Using the MCP server
January 9, 2026 · View on GitHub
Calling tools programmatically using C# SDK
Once the self-hosted Azure MCP server is running. You can test it by making requests to it following the MCP protocol. This template provides an example MCP client application that can list the tools in the MCP server and call the storage_account_get tool.
Follow instructions in McpClient/Readme to build and run the example MCP client application to test the MCP server.
Calling tools from Foundry Agent
A Foundry Agent can connect to such a self-hosted Azure MCP server and call its tools. Follow these steps to connect a Foundry Agent to the MCP server.
- In the tools section of an Agent, click
Add. - Select
Custom,Model Context Protocol (MCP)and then clickCreate. - Set the
Remote MCP Server endpointas the container app endpoint provisioned by this template. - Select
OAuth Identity Passthroughas the Authentication method. - Create a client secret in the client app registration provisioned by the template. This can be done in the
Manage/Certificates&Secretstab of the client app registration in Azure Portal. - Set the client app registration's client ID as the client ID.
- Set the client secret value as the
Client secret. - Set the Token URL and the Auth URL. Replace the tenant_id with the tenant id of your tenant.
- Set Scope to {server_app_registration_client_ID}/Mcp.Tools.ReadWrite
- Click
Connect
After configuring the above, Foundry will create a redirect URL to be added to the client app registration.
- Go to the
Toolstab and click the server you just added. - Copy the
Redirect URL. - Go to the client app registration in Azure Portal. Navigate to the
Manage/Authenticationtab and add this redirect URL as aWebtype redirect URL.
Once all these steps are done, you can prompt the Foundry Agent to load the MCP tools and call them.
Note: As of today, Foundry Agent only supports performing OAuth Identity Passthrough using client secret. However, it is recommended to use Federated Identity Credential instead of Client Secret as the client credential.
Calling tools from Copilot Studio Agent
A Copilot Studio Agent can connect to MCP servers via a custom connector. Follow these steps to configure the custom connector and the Copilot Studio Agent to connect to the MCP server.
Configure a custom connector
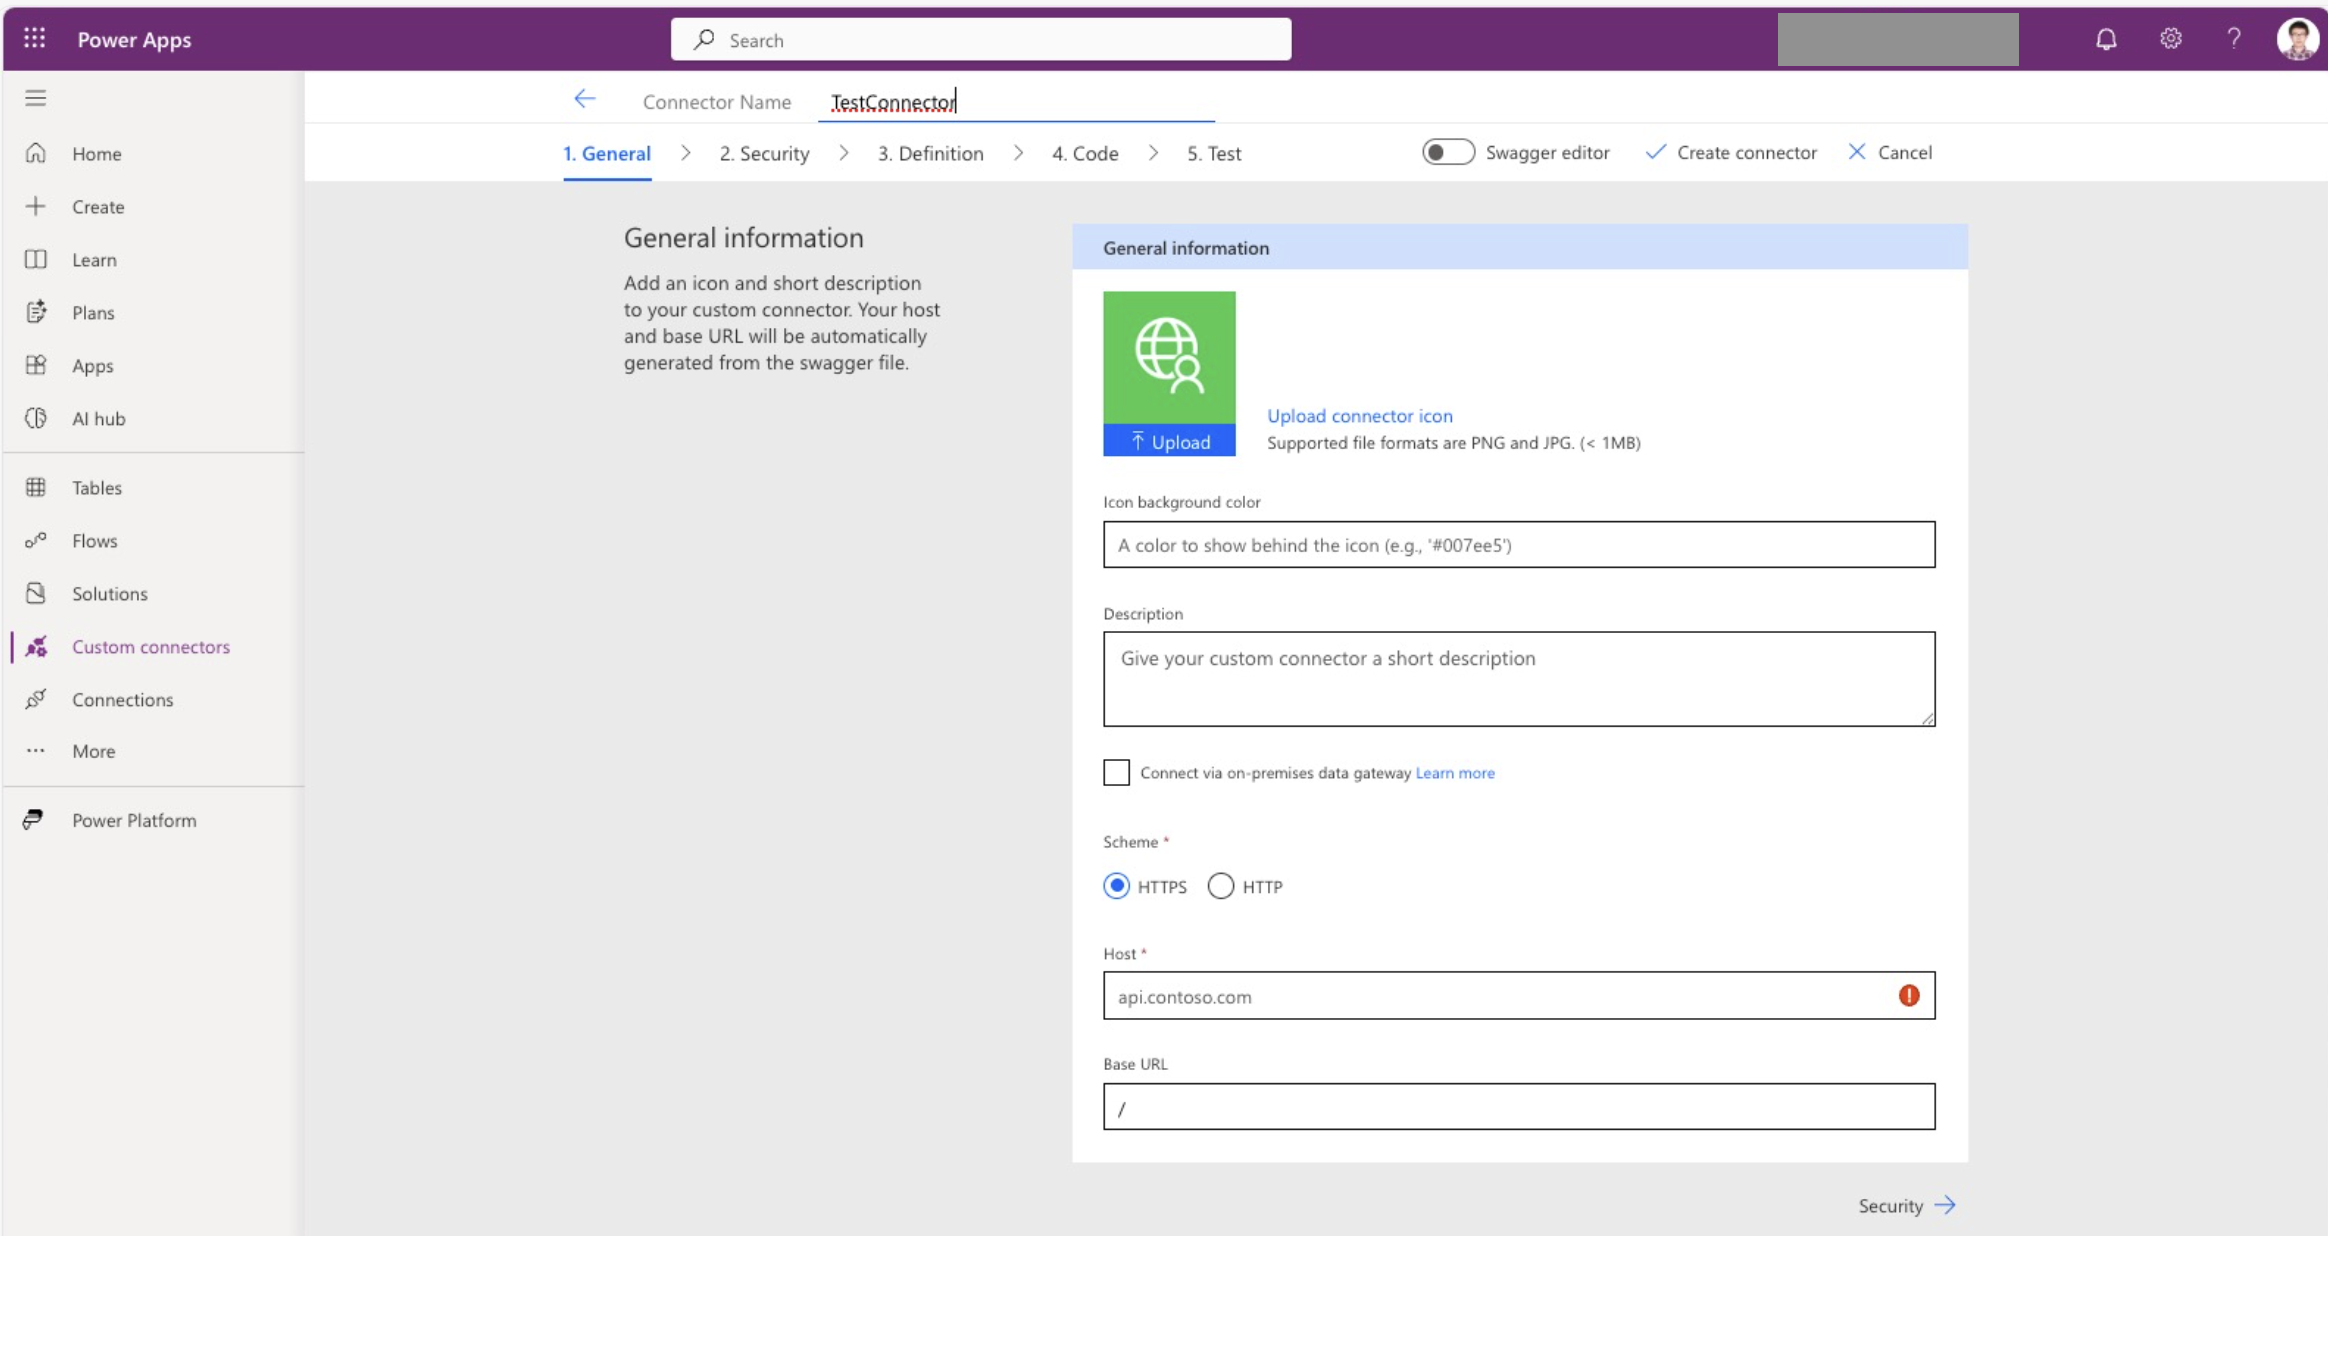
Login to Power Apps and select the environment to host the custom connector. Create a custom connector following the steps in the UI. Here we need to select the Create from blank option. To learn more about custom connector configuration, refer to create custom connector from scratch.
General
- Give a descriptive name and description for the custom connector.
- Set
Schemeto beHTTPS. - Set the
Hostto be the Container App URL from the CONTAINER_APP_URL output value.
Swagger editor
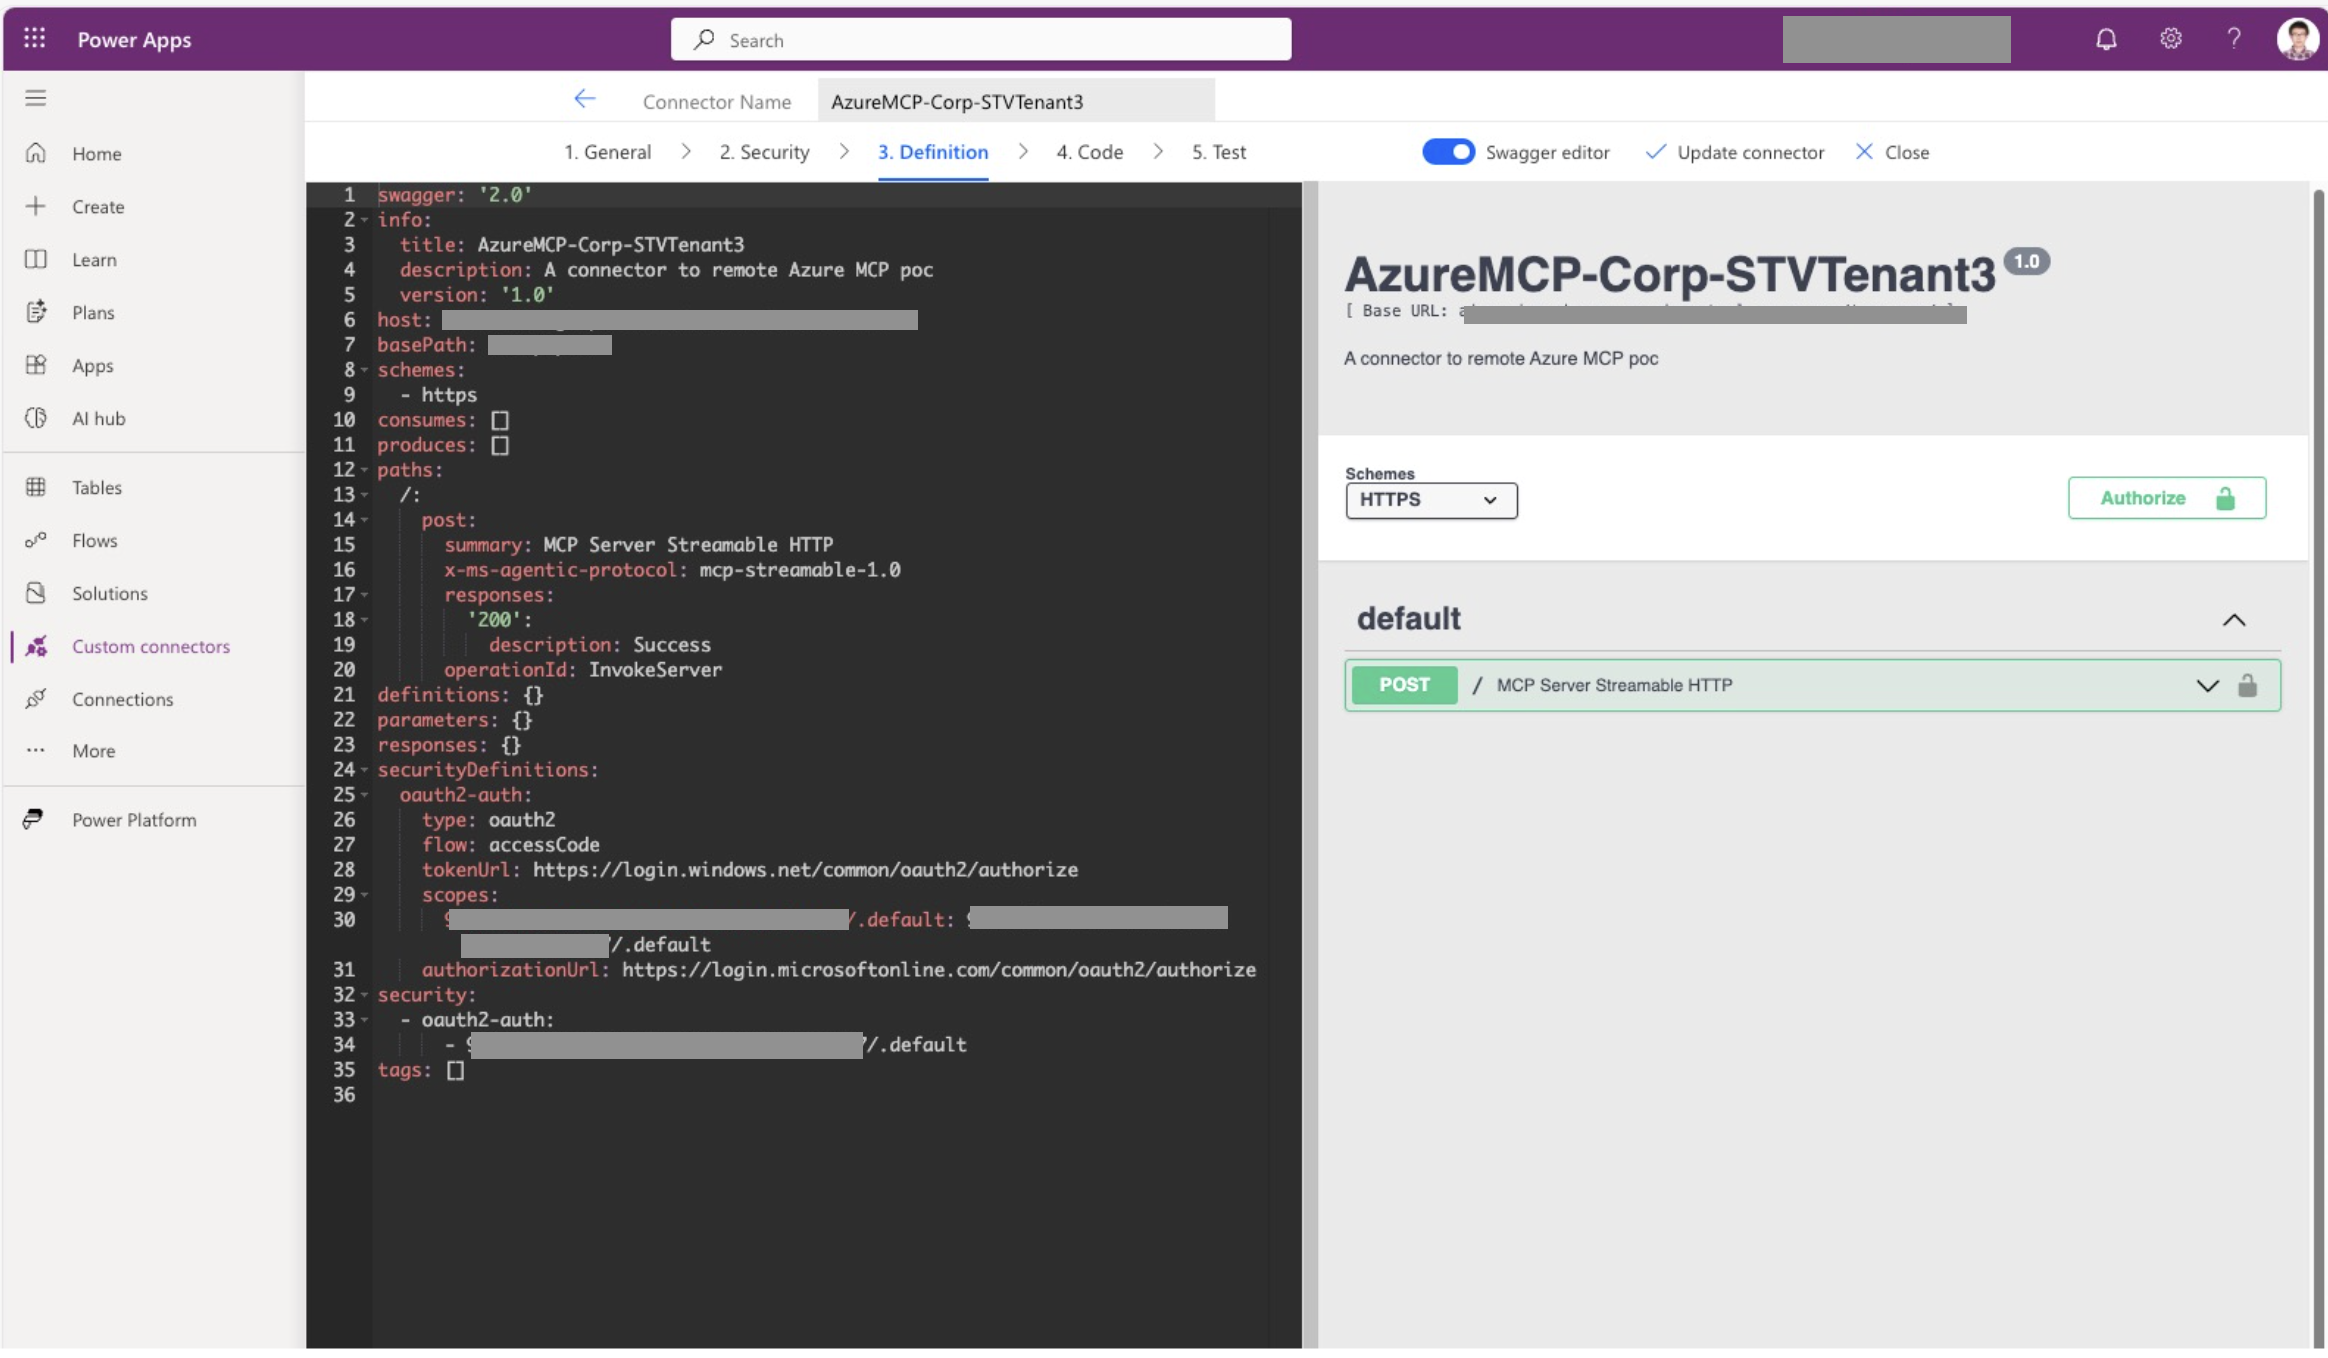
Skip the Security step for now and click the Swagger editor to enter the swagger editor view. In the swagger editor view
- Set the path such that a POST method is exposed at the root with a custom
x-ms-agentic-protocol: mcp-streamable-1.0property. This custom property is necessary for the custom connector to interact with this API using the MCP protocol. Refer to custom connector swagger example as an example.
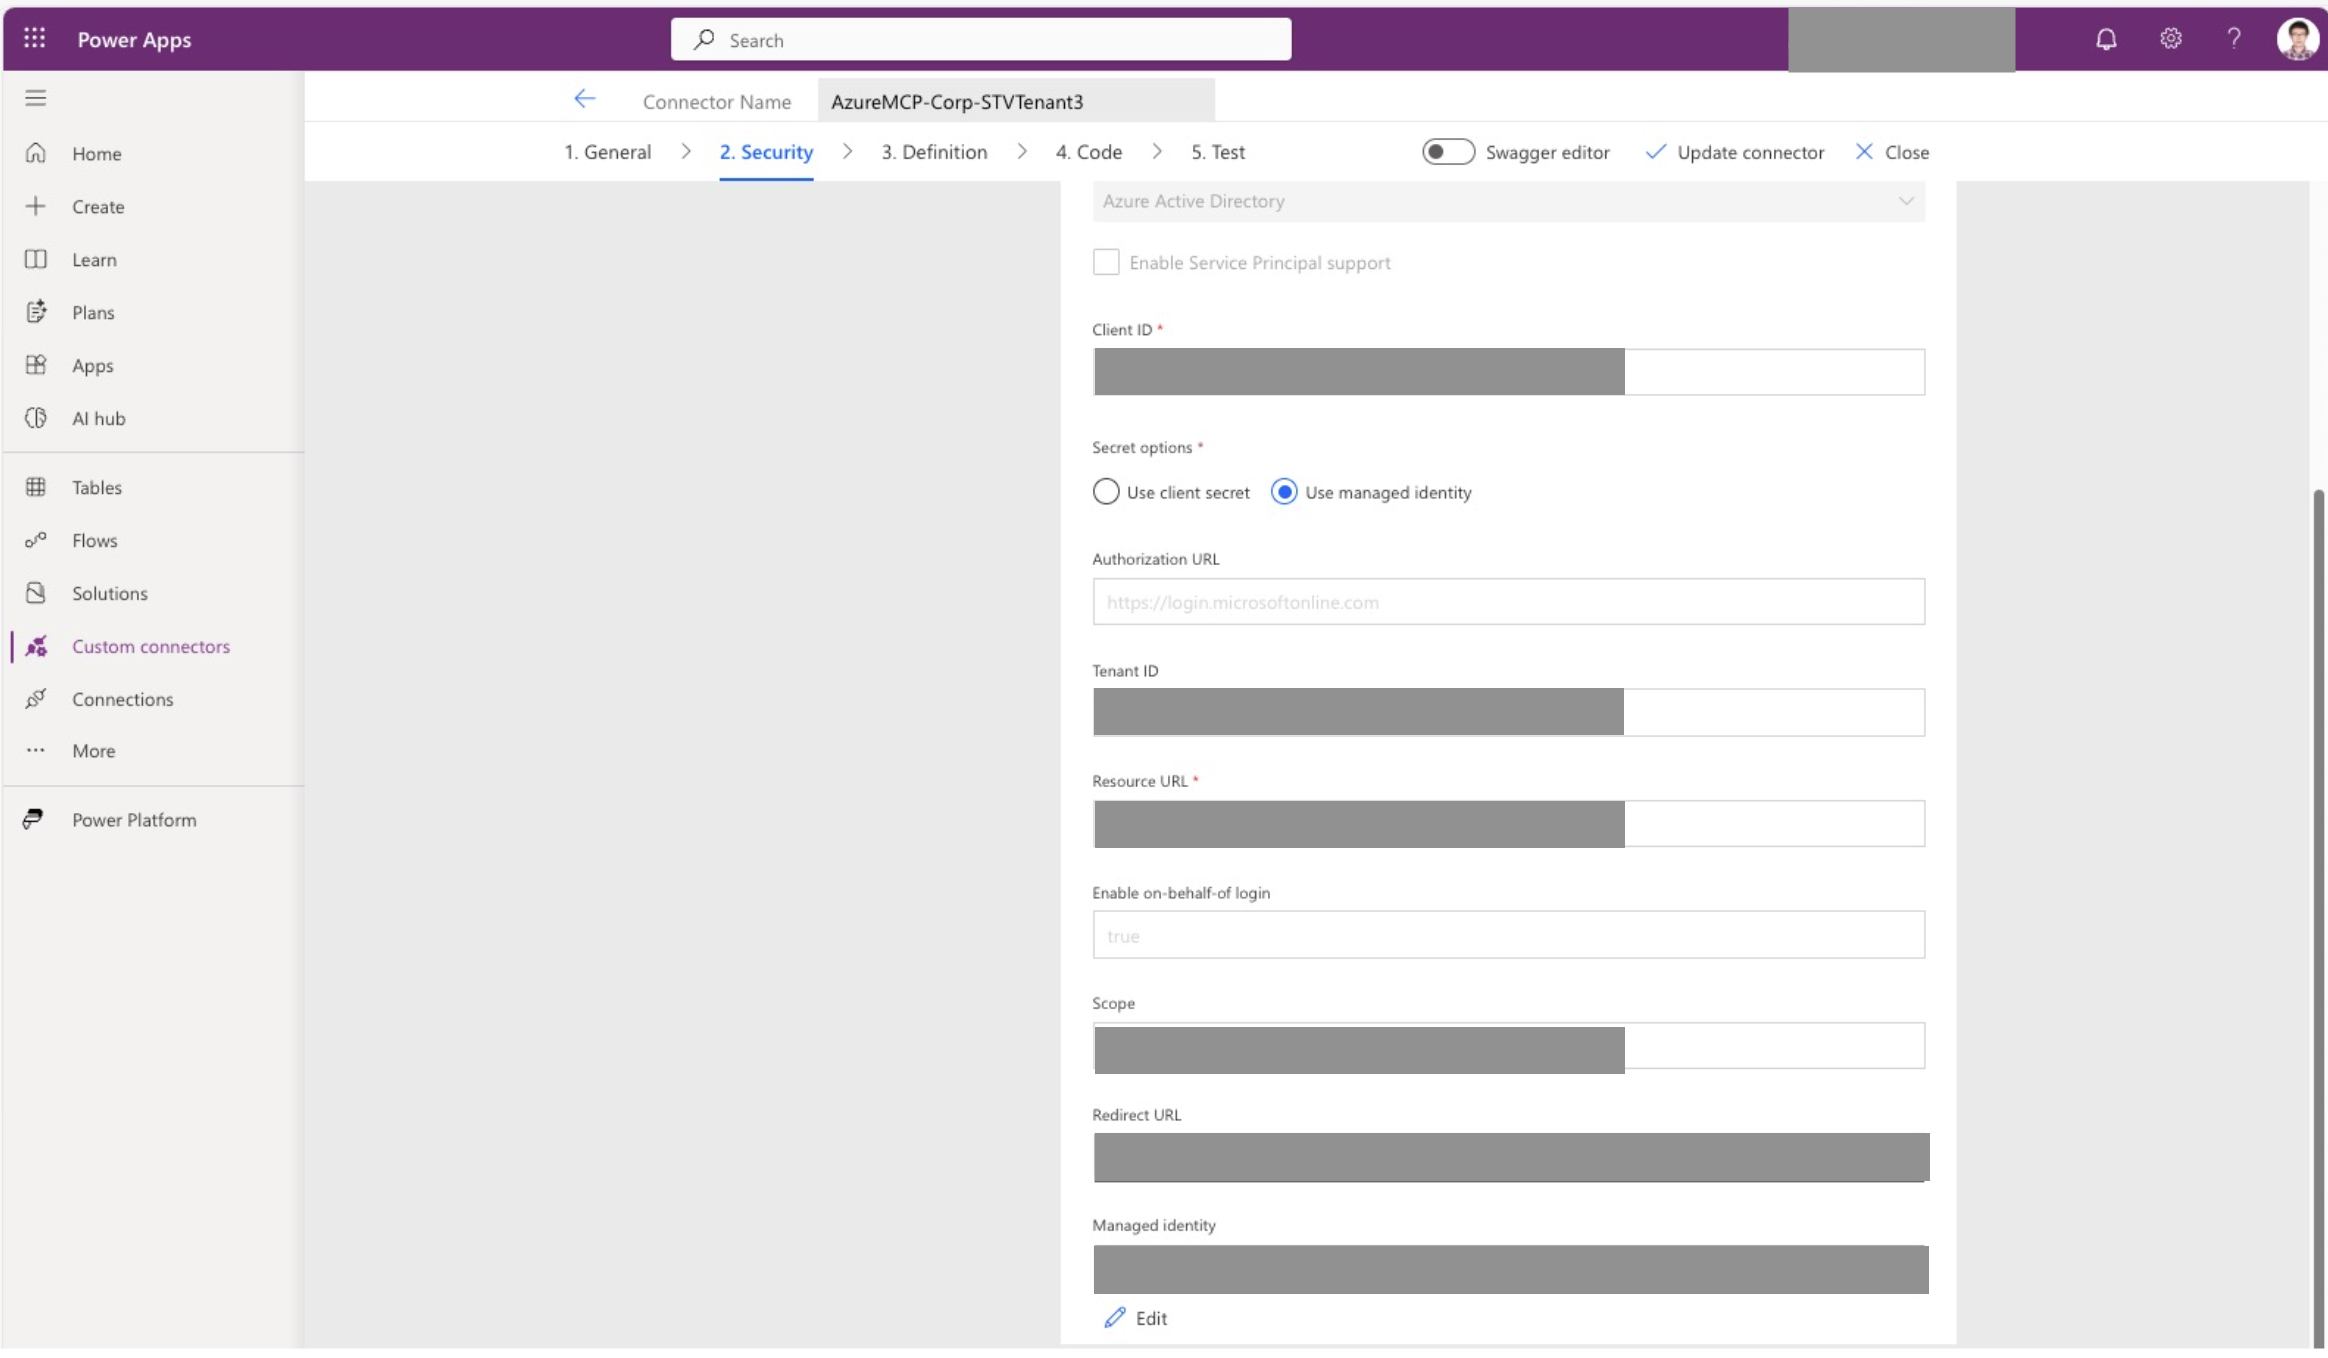
Security
Go to the Security step.
- Select
OAuth 2.0as the Authentication type. - Select
Azure Active Directoryas the Identity Provider. - Set
Client IDas the client ID of the client app registration provisioned before. You can get this from the ENTRA_APP_CLIENT_CLIENT_ID output value. - Choose
Use client secretorUse managed identityas theSecret options.- If you choose to use client secret, go to Azure Portal and create a client secret under the client app registration. Then copy the client secret value and paste it into the client secret field in the Security step.
- If you choose to use managed identity. Proceed with the rest of the steps until the custom connector is created.
- Keep Authorization URL as
https://login.microsoftonline.com. - Set
Tenant IDto the tenant ID of the client app registration. You can get this from the AZURE_TENANT_ID output value. - Set
Resource URLto the client ID of the server app registration. You can get this from the ENTRA_APP_SERVER_CLIENT_ID output value. - Set
Enable on-behalf-of loginto true. - Set
Scopeto<server app registration client ID>/.default.
Create the connector
- Click
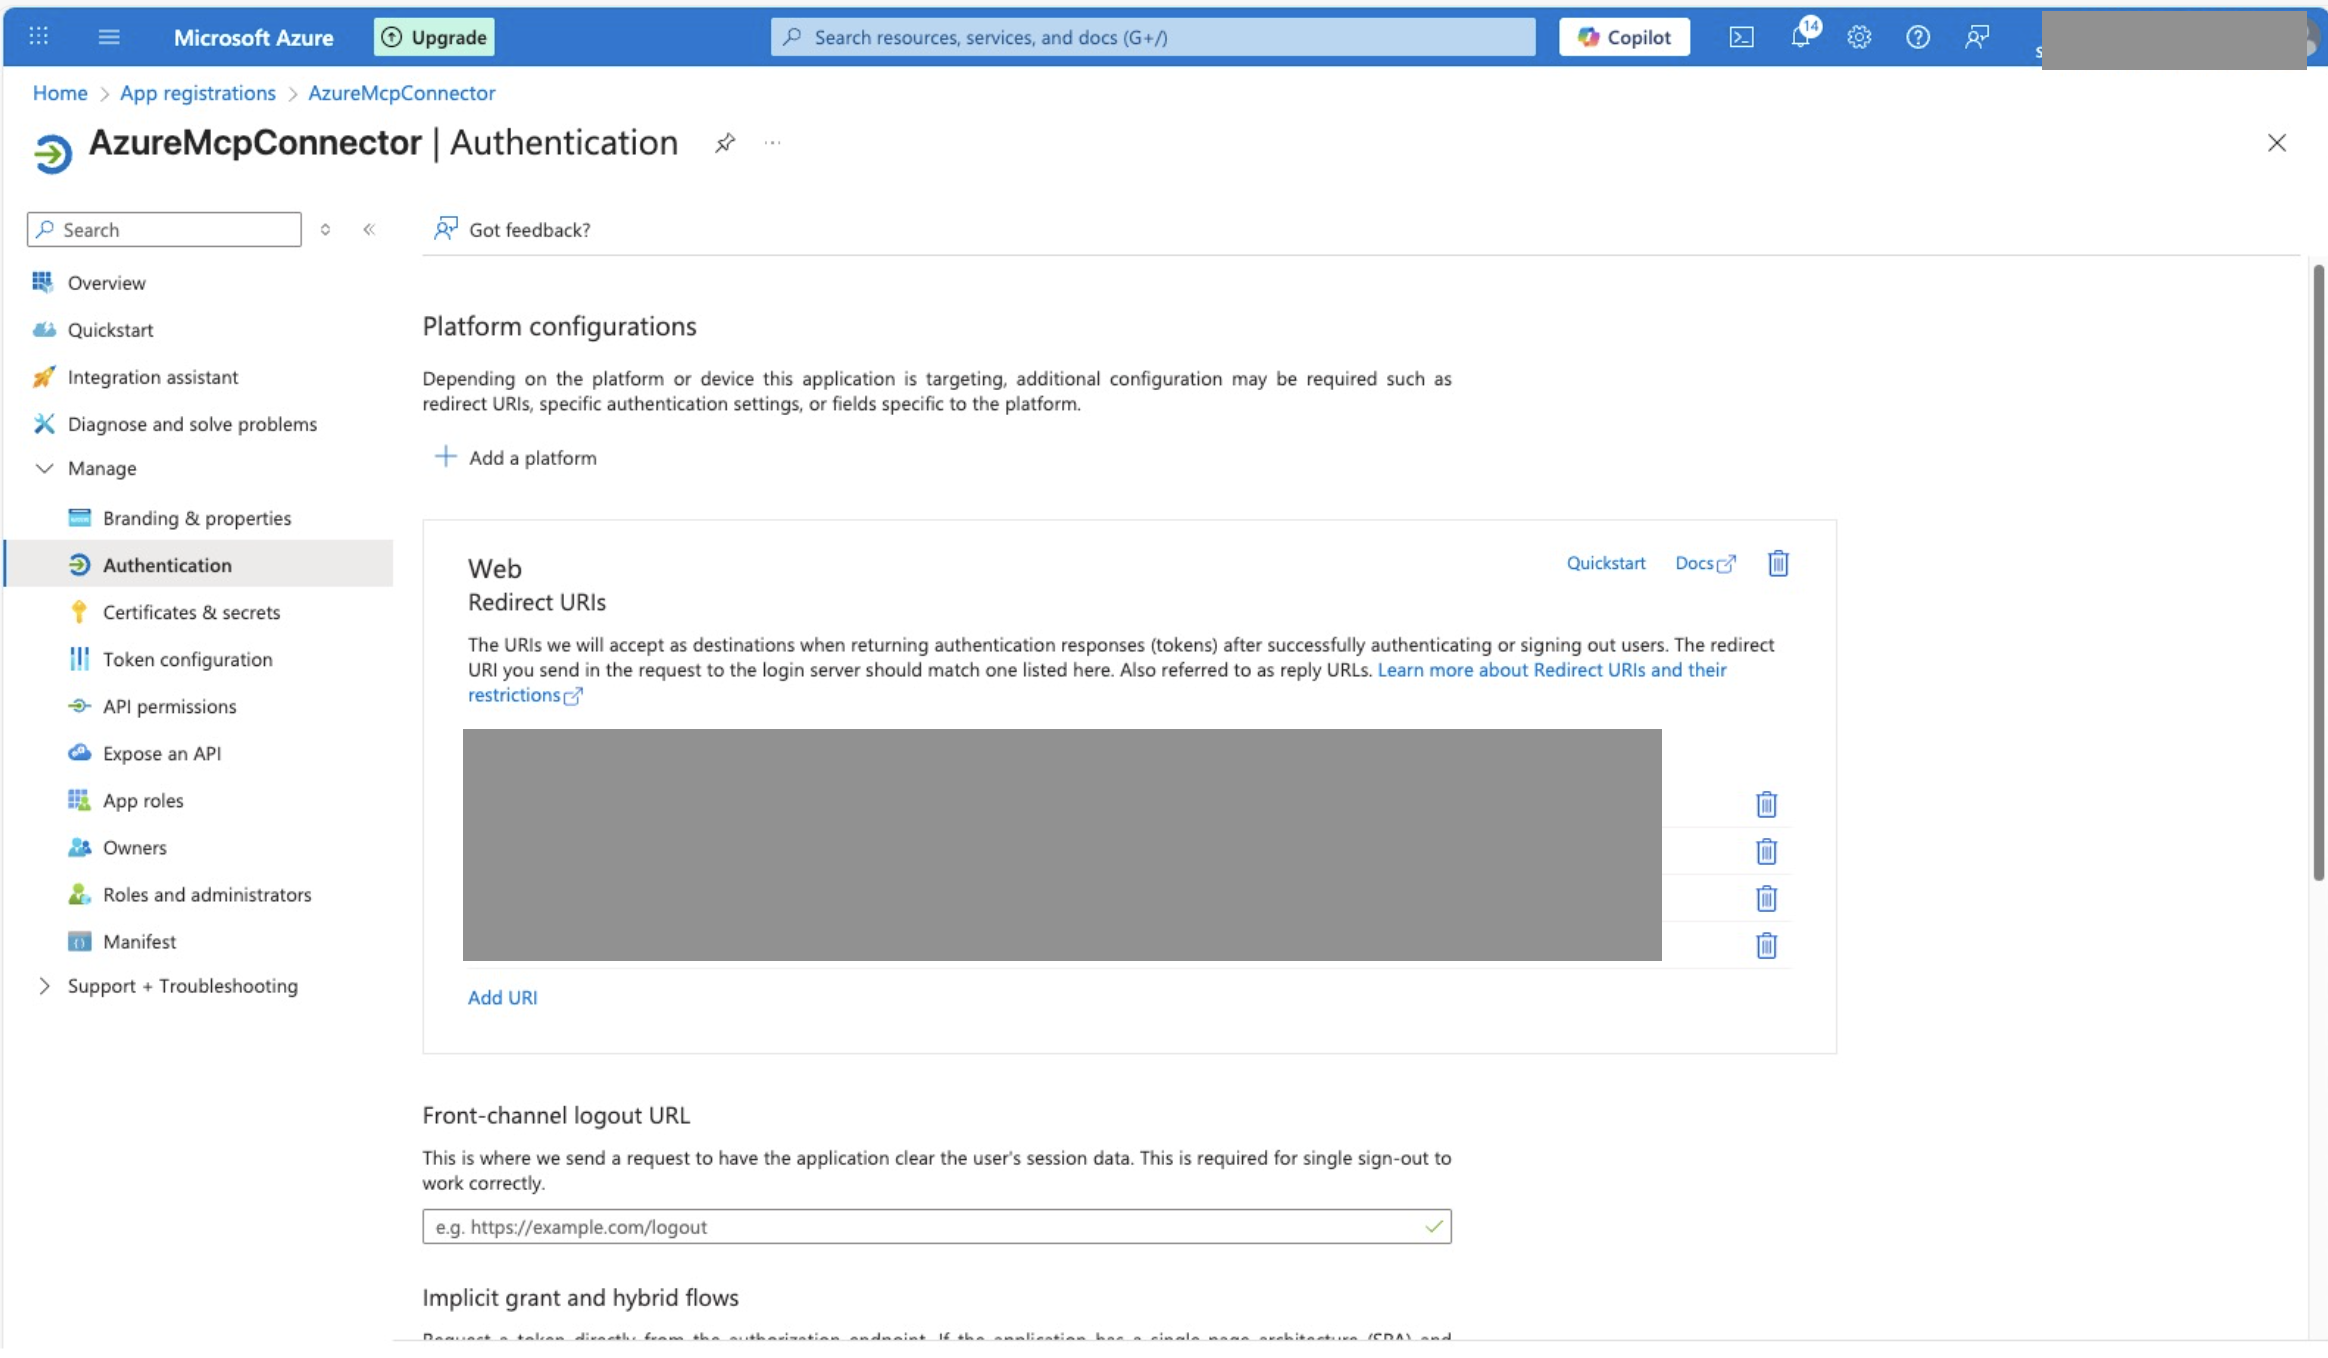
Create connectorand wait for it to complete. After the custom connector is created, it will give you a Redirect URL, and optionally a Managed Identity if you chose to use managed identity as the secret options. - Go to Azure Portal and add a redirect URI under the Web platform in the client app registration.
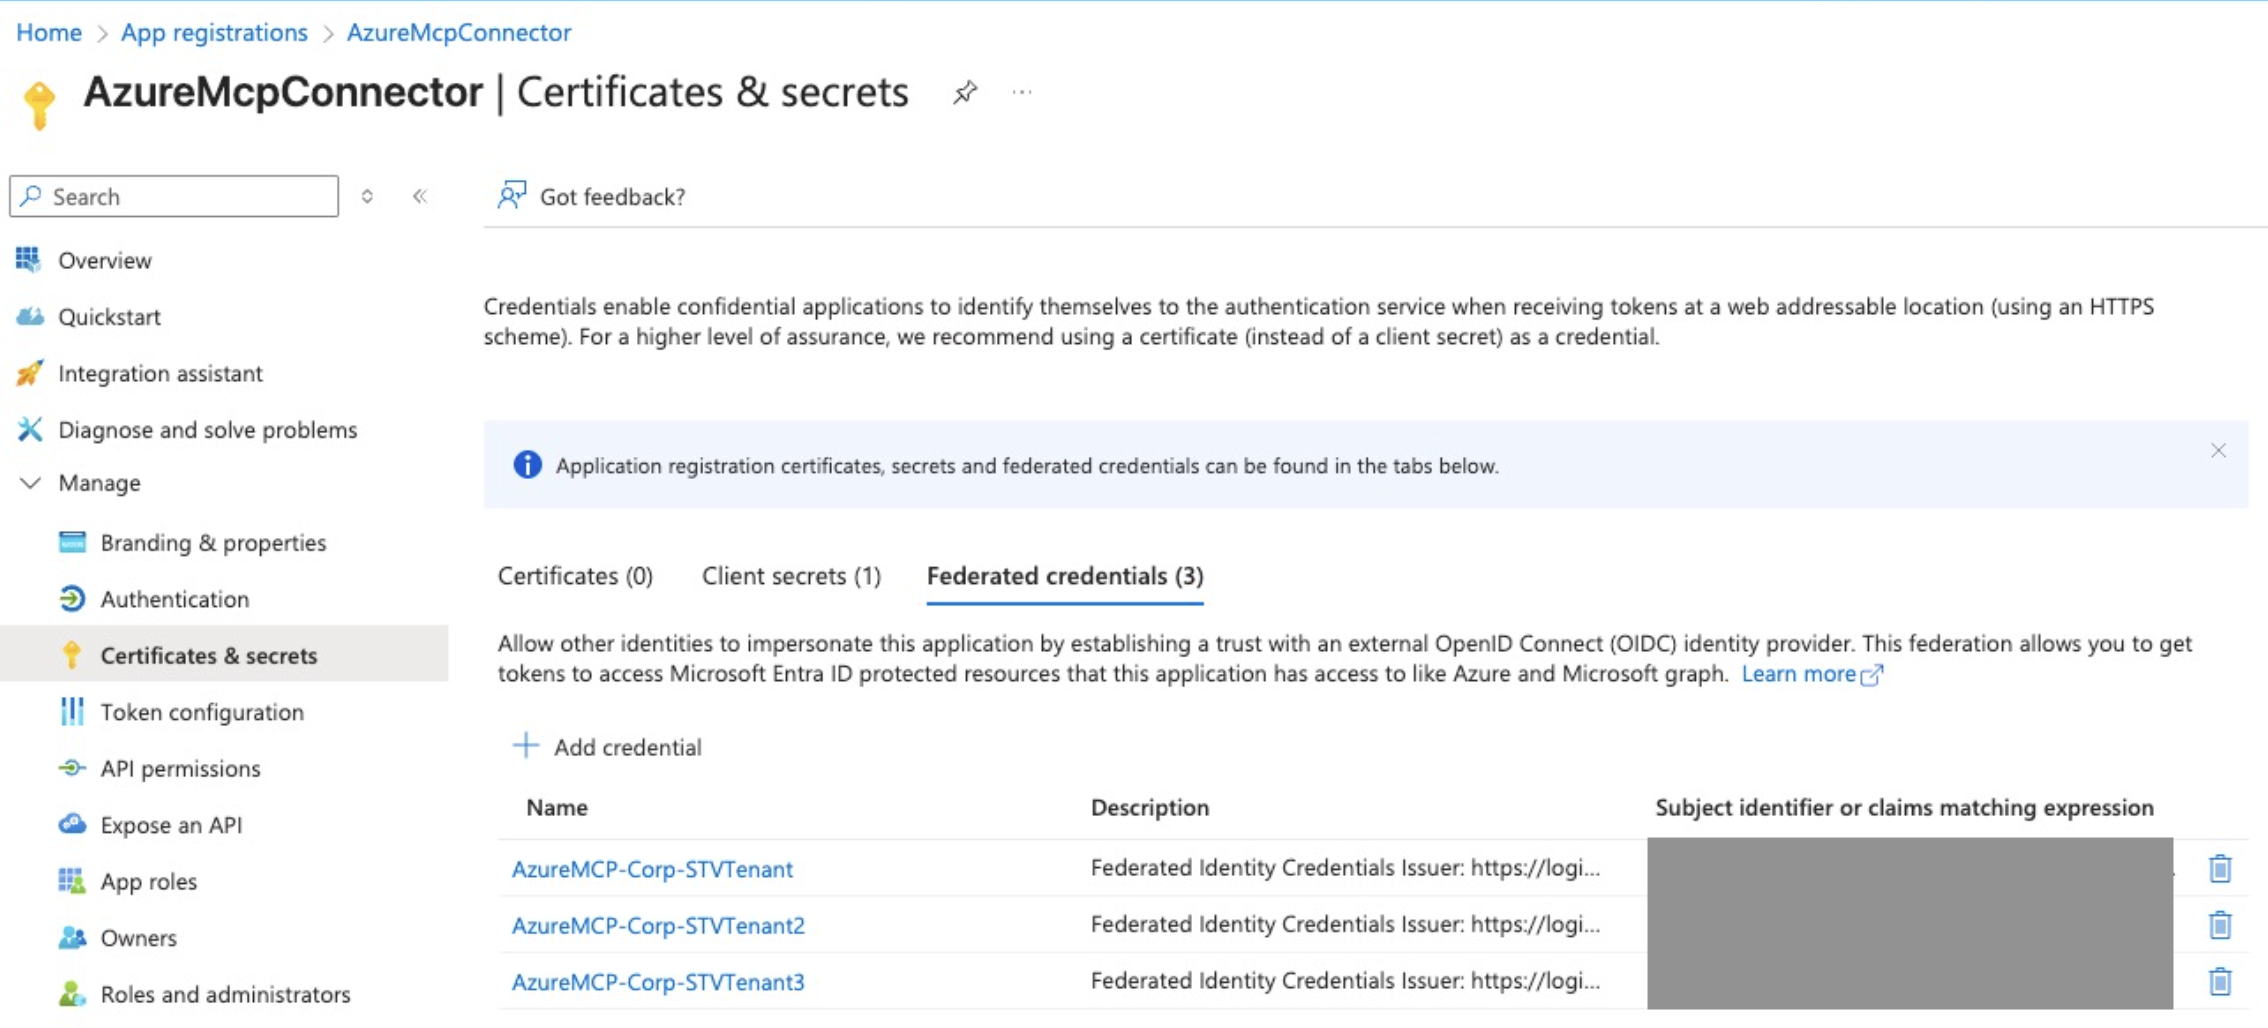
- If you chose to use managed identity as the secret options, create a Federated Credentials in the client app registration. In the creation UI, select
Other issueras theFederated credential scenario. Then copy paste theissuerand thesubjectof the Federated Credentials value from the custom connectors to corresponding fields in the credential creation UI. Give it a descriptive name and description, and then clickAdd.
Test connection
- Open the created custom connector, click
Editand go to theTeststep. - Select any operation and click the
New connectionbutton in the UI. - A new window should pop up to have you sign in to your user account. Sign in to the user account you plan to use to access the MCP tools. You might see the dialog asking you give consent to grant the client app registration access or telling you that you need an admin to give consent. If you don't know what you should do, please refer to the known issues for more details.
If everything works fine, after signing into the user account, the UI should indicate a connection is created successfully. If you encounter any error message during the sign-in, please refer to the known issues section, troubleshoot with your tenant admin or let us know.

Call Azure MCP tool in Copilot Studio test playground
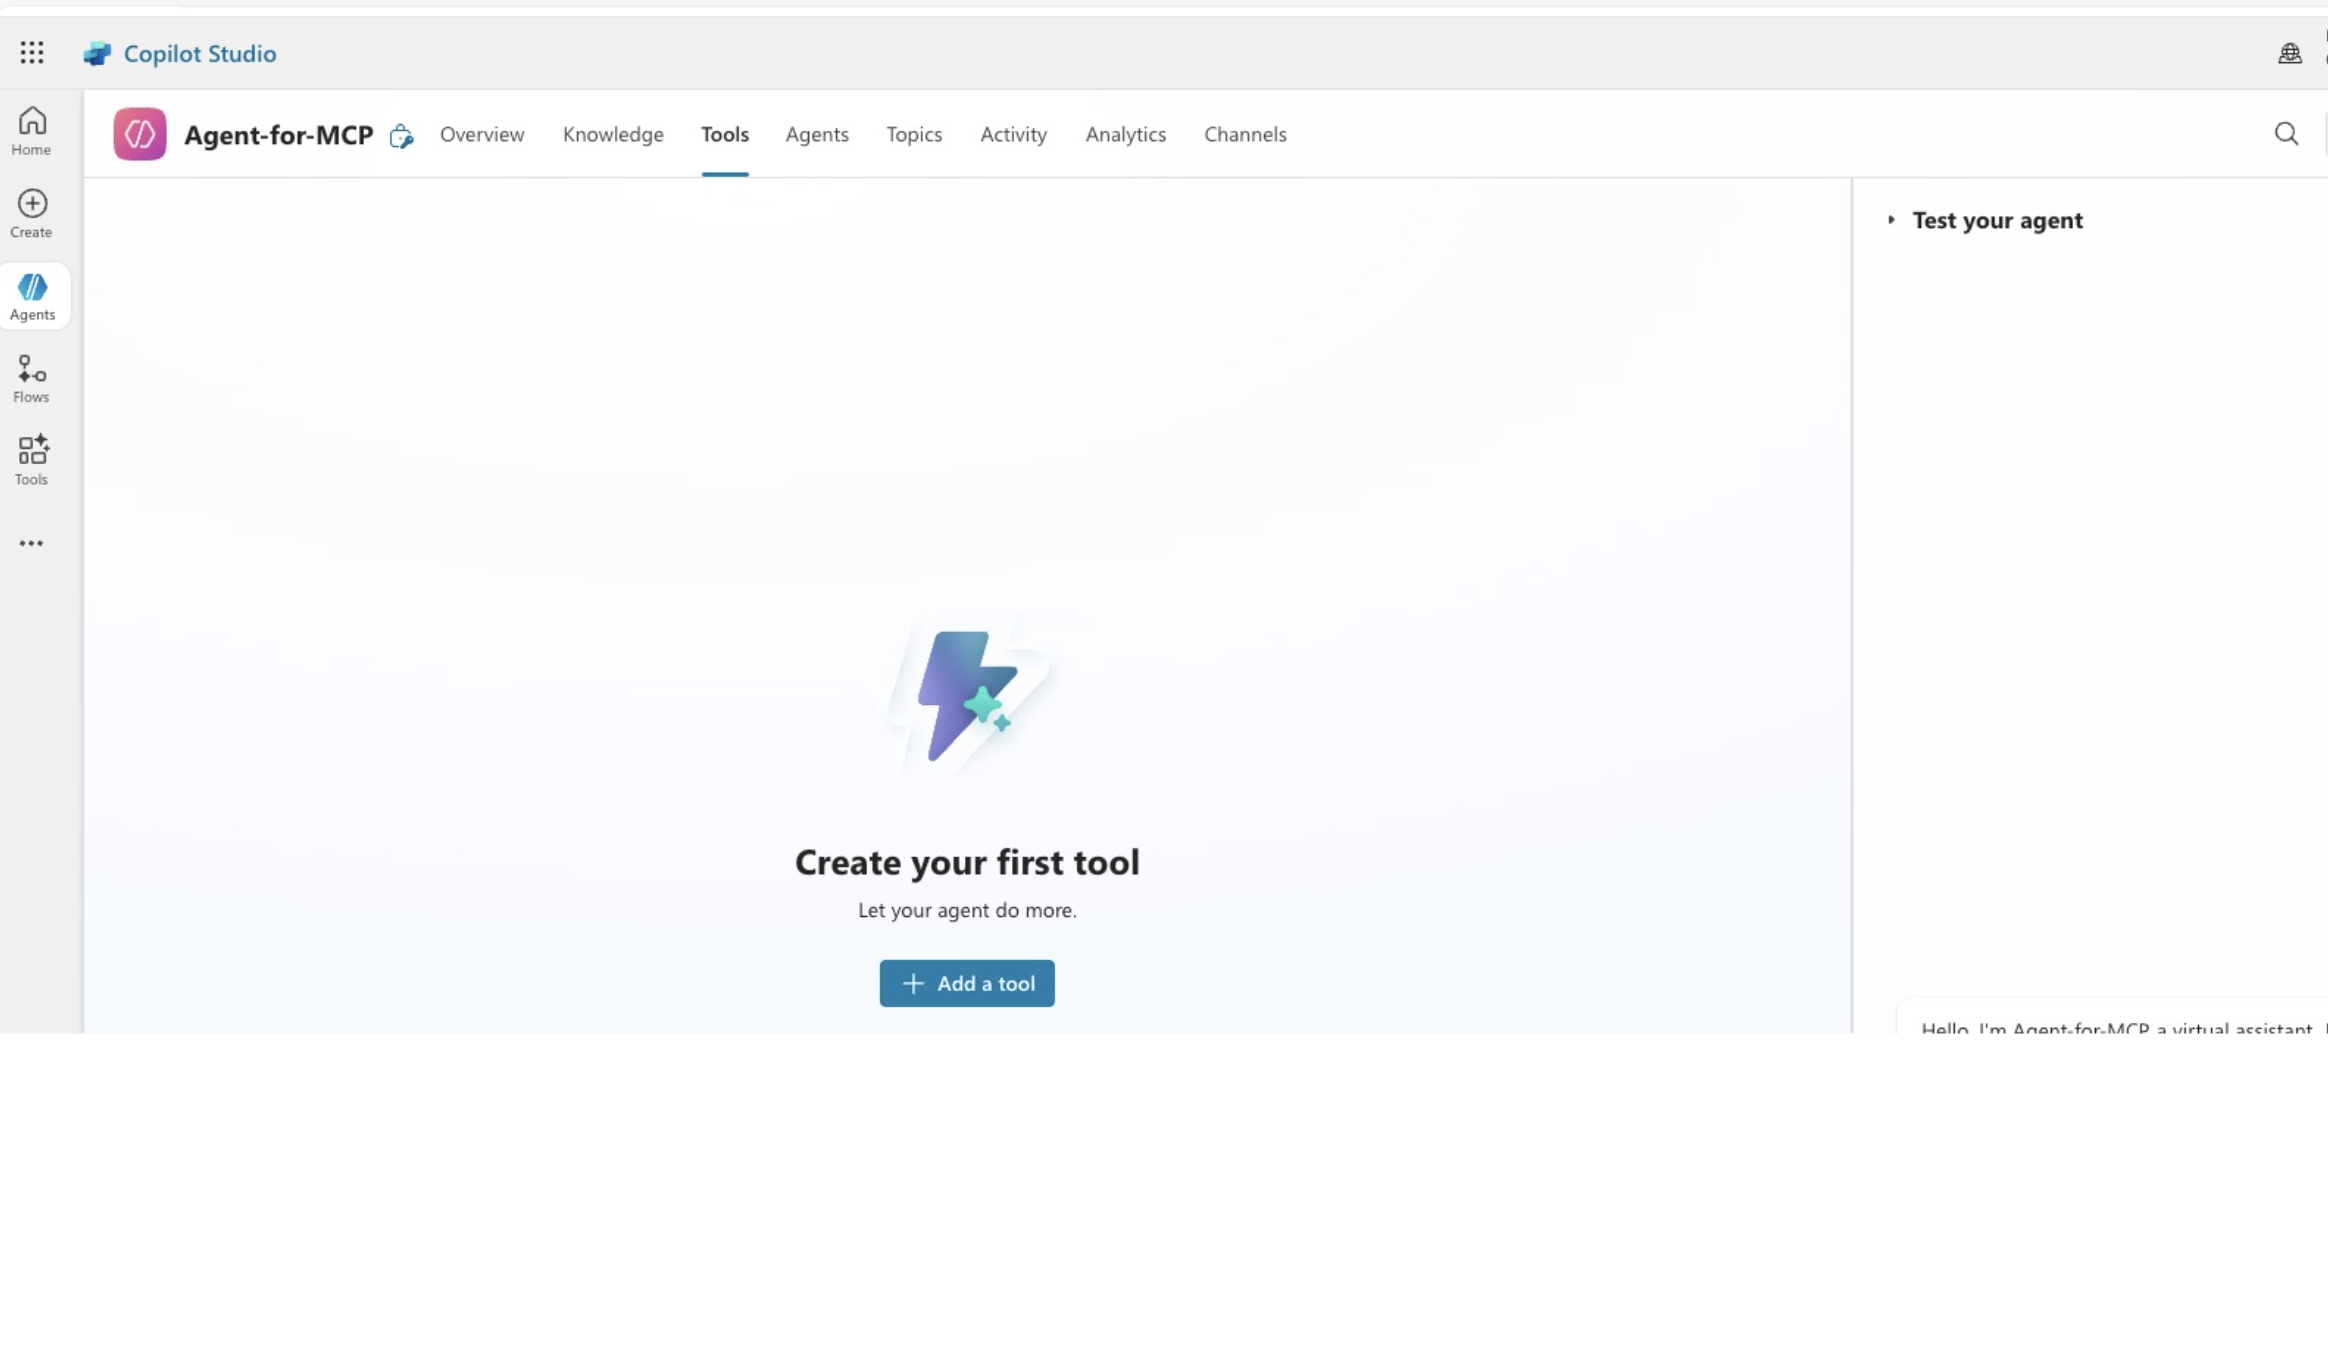
- Login to Copilot Studio and select the environment to host the Copilot Studio Agent. You may create a new Agent or use an existing one.
- Click to view the details of the Agent and navigate to its
Toolstab. - Click
Add a tool. - Search for your custom connector name and select to add it.
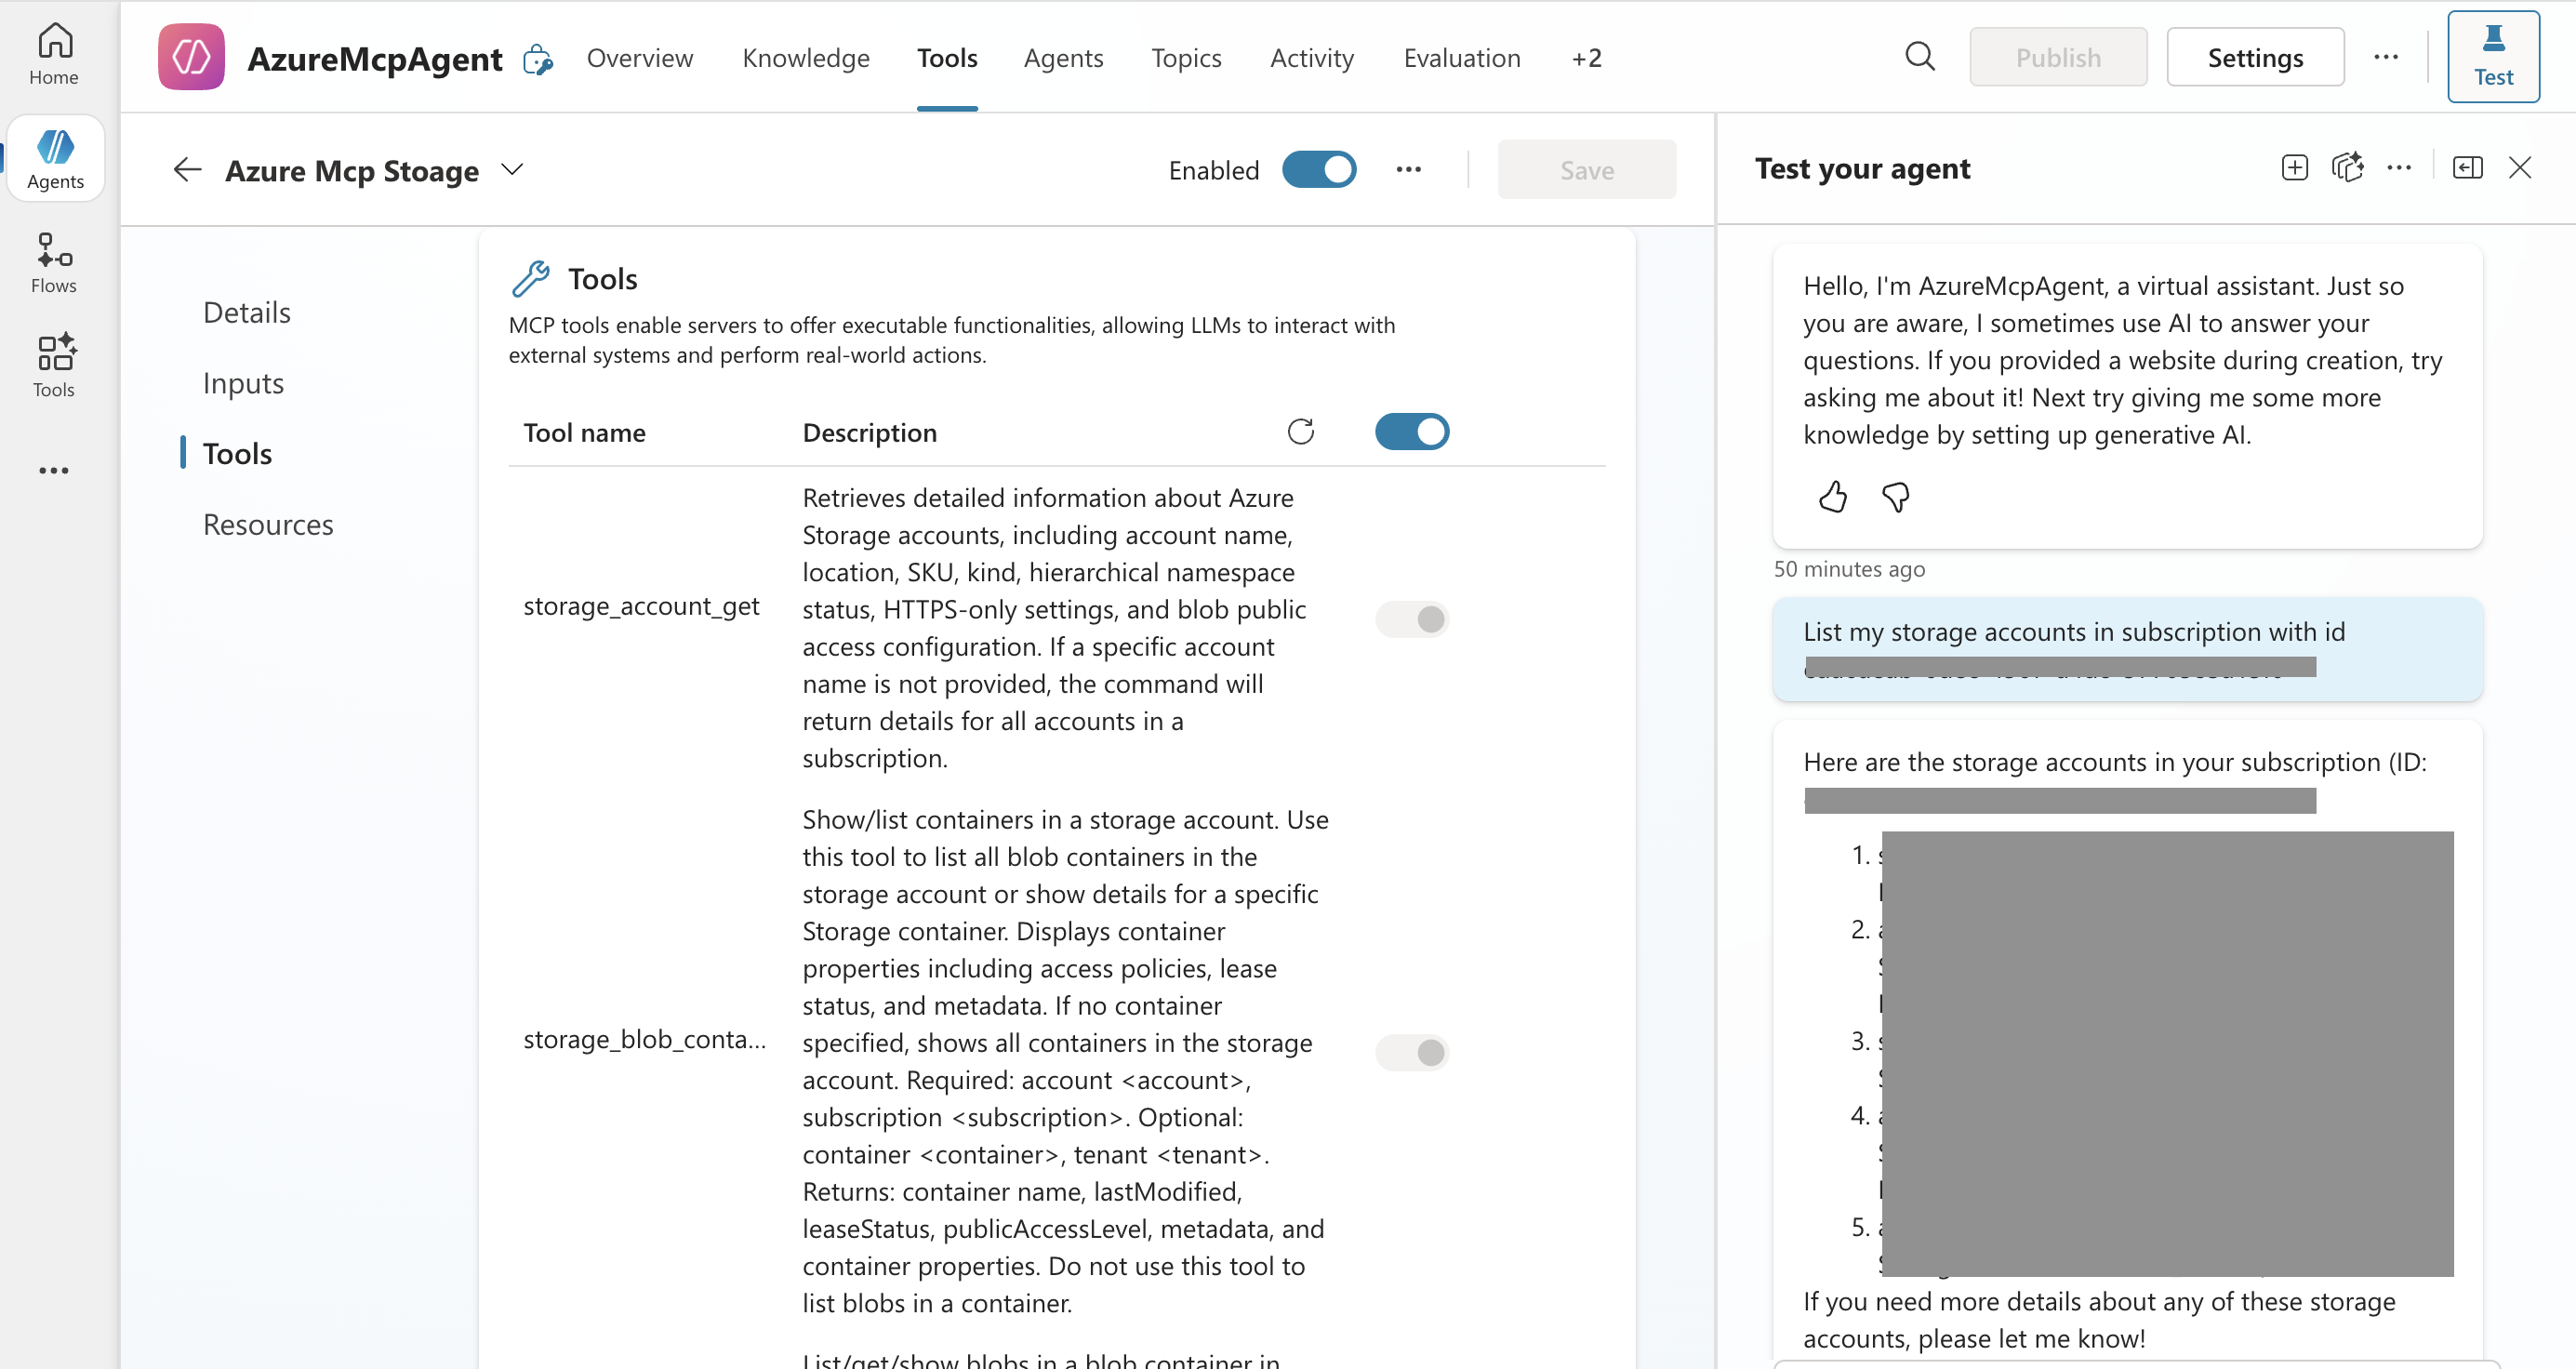
- After adding the custom connector, the Copilot Studio Agent will attempt to list the tools from the MCP server. If everything works fine, you should see the correct list of tools show up in the details under the added custom connector.
- Click the
Testbutton to start a test playground session. - You can prompt the agent to call the MCP tools, such as asking it to list storage accounts in the subscription. Please note that you can only perform actions granted by the permission of your user account that created the connection.