Requirements to build the website
January 17, 2023 · View on GitHub
Hugo
Prerequisites
Before you begin this tutorial you must:
Create a site
- Create the directory structure for your project in the "name-directory" directory.
hugo new site name-directory - Change the current directory to the root of your project.
cd name-directory - Initialize an empty Git repository in the current directory.
git init - Clone the Ananke theme into the themes directory, adding it to your project as a Git submodule.
git submodule add https://github.com/theNewDynamic/gohugo-theme-ananke themes/ananke - Append a line to the site configuration file, indicating the current theme.
echo "theme = 'ananke'" >> config.toml - Start Hugo’s development server to view the site.
hugo server
Add content
-
Add a new page to your site.
hugo new posts/file-markdown.md -
Hugo created the file in the content/posts directory. Open the file with your editor.
--- title: "My First Post" date: 2022-11-20T09:03:20-08:00 draft: true --- -
Notice the draft value in the front matter is true. By default, Hugo does not publish draft content when you build the site. Learn more about draft, future, and expired content.
Add some markdown to the body of the post, but do not change the draft value.
--- title: "My First Post" date: 2022-11-20T09:03:20-08:00 draft: true --- ## Introduction This is **bold** text, and this is *emphasized* text. Visit the [Hugo](https://gohugo.io) website! -
Save the file, then start Hugo’s development server to view the site. You can run either of the following commands to include draft content.
hugo server --buildDrafts
hugo server -D
Configure the site
-
With your editor, open the site configuration file (config.toml) in the root of your project.
baseURL = 'http://example.org/' languageCode = 'en-us' title = 'My New Hugo Site' theme = 'ananke' -
Make the following changes:
- Set the baseURL for your production site. This value must begin with the protocol and end with a slash, as shown above.
- Set the languageCode to your language and region.
- Set the title for your production site.
Start Hugo’s development server to see your changes, remembering to include draft content.
hugo server -D
Publish the site
In this step you will publish your site, but you will not deploy it.
When you publish your site, Hugo creates the entire static site in the public directory in the root of your project. This includes the HTML files, and assets such as images, CSS files, and JavaScript files.
When you publish your site, you typically do not want to include draft, future, or expired content. The command is simple.
```
hugo
```
Lifecycle
Build: Generate the website from the markdown and configuration files in the directory dist/. Clean: Cleanup the content of the directory dist/ Post: Create a new blog post whose filename and title come from the environment variables POST_TITLE and POST_NAME. help: Print instructions for create a web site.
Makefile
build:
Generate the website from the markdown and configuration files in the directory dist/.
hugo --destination dist
clean:
Cleanup the content of the directory dist/
rm -rf ./dist
post:
Create a new blog post whose filename and title come from the environment variables POST_TITLE
rm -rf content/posts/$(POST_NAME).md hugo new posts/$(POST_NAME).md sed -i 's/title*/title: "$(POST_TITLE)"/g' content/posts/$(POST_NAME).md
help:
Print Readme file of current directory.
cat README.md
Create a Workflow
Steps:
-
Under your repository name, click
 Actions.

-
Click in set up a workflow yourself
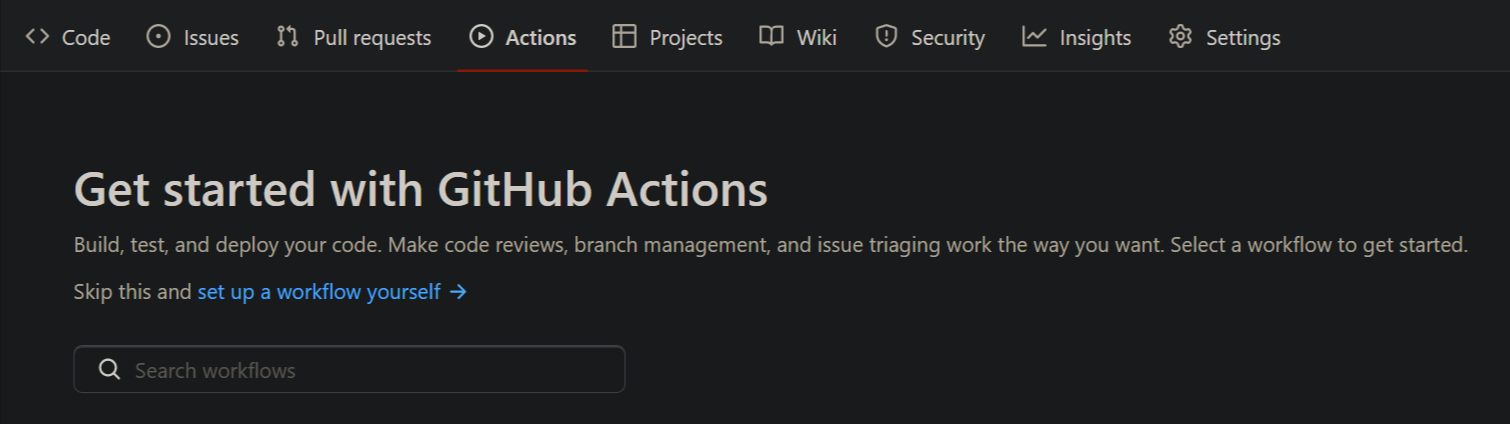
-
Choose the name you want for the '.yml' file
References
https://gohugo.io/getting-started/quick-start/#step-3-add-a-theme