Self-hosted AI starter kit
April 17, 2026 · View on GitHub
Self-hosted AI Starter Kit is an open-source Docker Compose template designed to swiftly initialize a comprehensive local AI and low-code development environment.
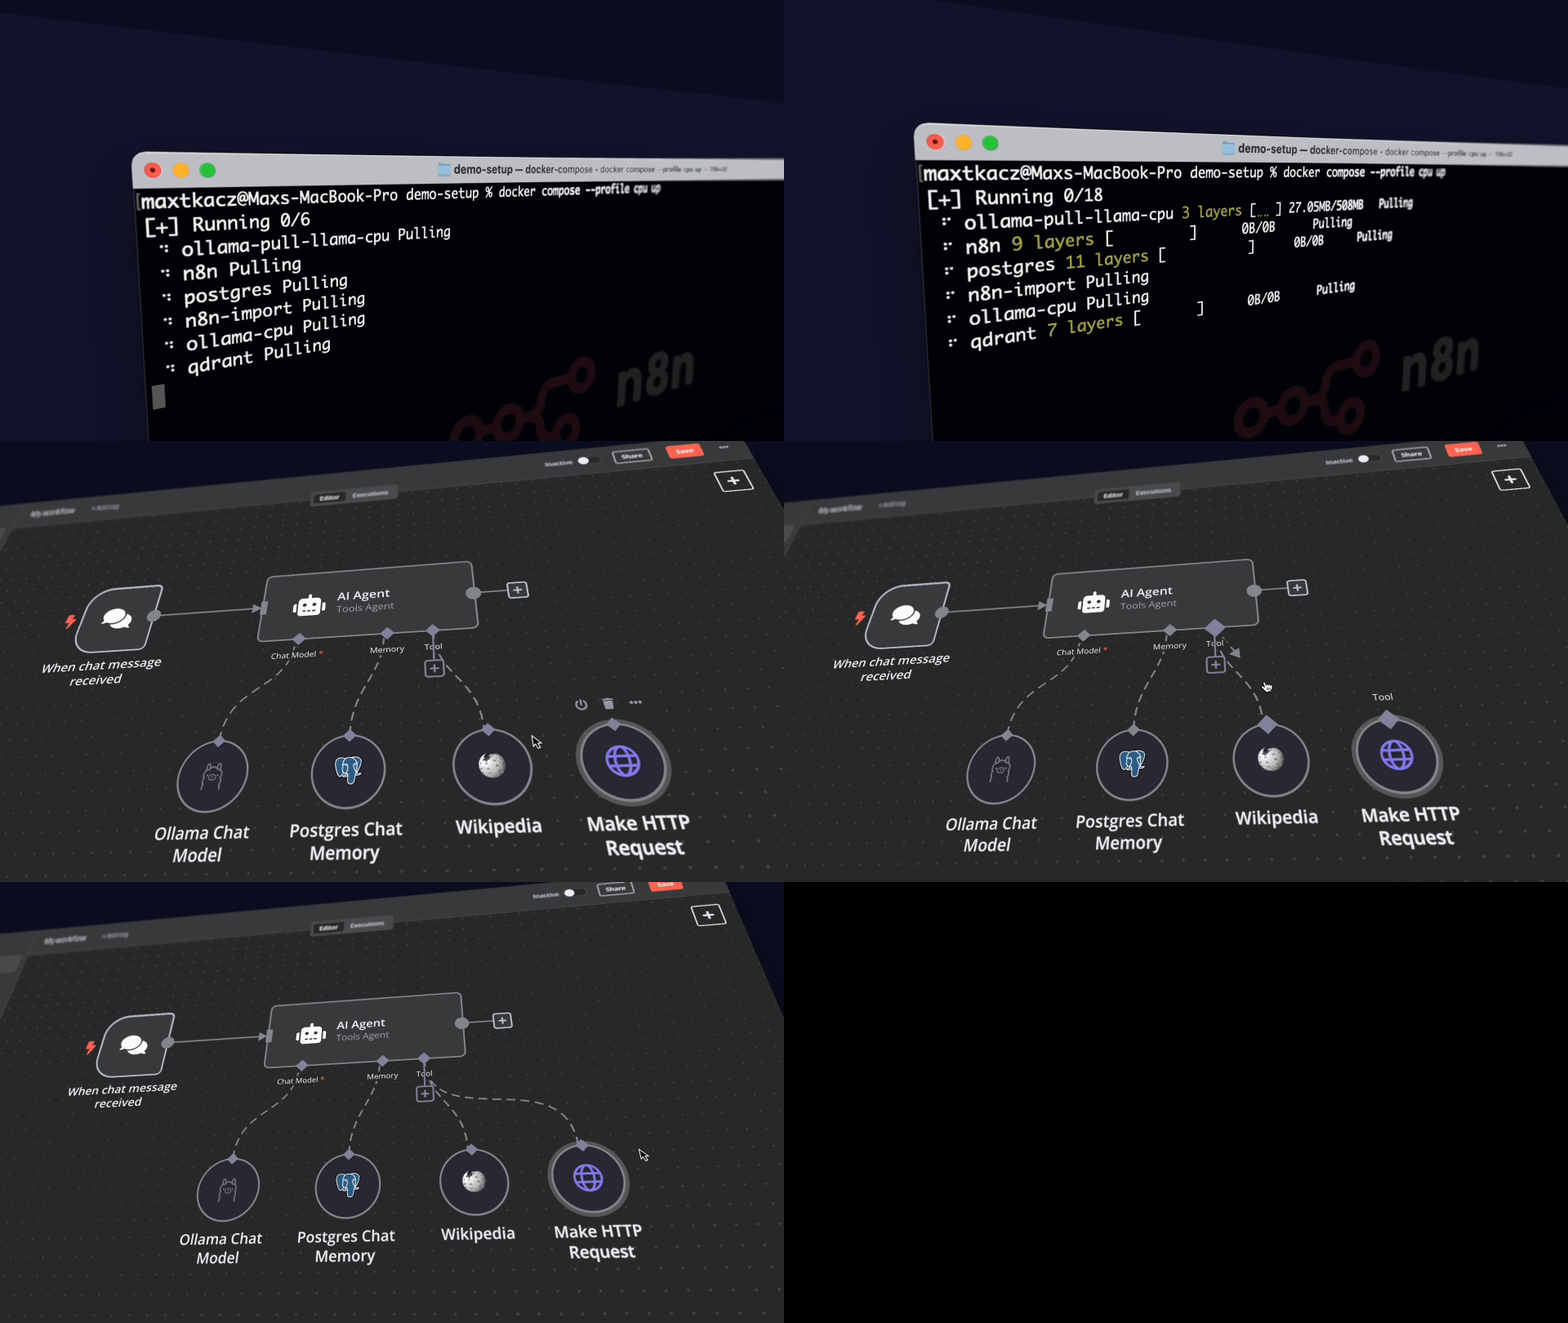
Curated by https://github.com/n8n-io, it combines the self-hosted n8n platform with a curated list of compatible AI products and components to quickly get started with building self-hosted AI workflows.
🤖 For AI Agents: START HERE
Mandatory: Every agent working on this project must read these documents in order before starting any tasks.
- AGENT_QUICKSTART.md — 5-minute onboarding (sets expectations, tools, ContextStream session setup)
- SETUP_STATUS.md — Current phase & immediate next steps (know what's done, what's pending, what's blocked)
- multi-agent-workflow.instructions.md — 5-phase pipeline reference (understand orchestration, git worktrees, automatic commits, PR workflow, ContextStream persistence)
- initial-setup.instructions.md — Bootstrap guide (Phase 1 setup, git configuration, Docker stack verification)
Multi-Agent Development Framework
This project uses isolated git worktrees and coordinated agent orchestration for parallel AI-driven development:
- Isolation: Each agent works in its own branch (e.g.,
feature/agent-foo) with independent git worktree - Parallel Work: Multiple agents can work simultaneously without conflicts
- Automatic Coordination: multi-agent-orchestrator.agent.md auto-detects completed work, creates PRs, merges on approval
- Code Gating: migration-analyst.agent.md gates all external code integration with security/quality analysis
- Persistent Memory: All agent decisions and state persisted across sessions via ContextStream
How It Works
Agent creates worktree → Makes changes → Tests pass → Commits & pushes
    ↓
Orchestrator detects new commits → Creates draft PR → Requests reviews
    ↓
Reviews approved → Orchestrator auto-merges → All agents sync to latest main
    ↓
Migration-analyst verifies any migration/ code before final approval
    ↓
Next agent task ready | ContextStream persists entire workflow history
Proactive Documentation Directives
Agents must follow these rules or face auto-rejection:
- ⚠️ Before any task: Read AGENT_QUICKSTART.md — mandatory first step
- ⚠️ Before git worktree: Check SETUP_STATUS.md — know current phase
- ⚠️ Before PRs/commits: Review multi-agent-workflow.instructions.md — understand flow
- ⚠️ Migration folder code: migration-analyst.agent.md will gate it — expect automated analysis
- ⚠️ Session persistence: Use ContextStream (see contextstream-knowledge-management.instructions.md) — state carries across sessions
- ⚠️ Codebase context: See .github/copilot-instructions.md — project conventions and tool access rules
What’s included
✅ Self-hosted n8n - Low-code platform with over 400 integrations and advanced AI components
✅ Ollama - Cross-platform LLM platform to install and run the latest local LLMs
✅ Qdrant - Open-source, high performance vector store with an comprehensive API
✅ PostgreSQL - Workhorse of the Data Engineering world, handles large amounts of data safely.
What you can build
⭐️ AI Agents for scheduling appointments
⭐️ Summarize Company PDFs securely without data leaks
⭐️ Smarter Slack Bots for enhanced company communications and IT operations
⭐️ Private Financial Document Analysis at minimal cost
Installation
Cloning the Repository
git clone https://github.com/n8n-io/self-hosted-ai-starter-kit.git
cd self-hosted-ai-starter-kit
cp .env.example .env # you should update secrets and passwords inside
Running n8n using Docker Compose
For Nvidia GPU users
git clone https://github.com/n8n-io/self-hosted-ai-starter-kit.git
cd self-hosted-ai-starter-kit
cp .env.example .env # you should update secrets and passwords inside
docker compose --profile gpu-nvidia up
Note
If you have not used your Nvidia GPU with Docker before, please follow the Ollama Docker instructions.
For AMD GPU users on Linux
git clone https://github.com/n8n-io/self-hosted-ai-starter-kit.git
cd self-hosted-ai-starter-kit
cp .env.example .env # you should update secrets and passwords inside
docker compose --profile gpu-amd up
For Mac / Apple Silicon users
If you’re using a Mac with an M1 or newer processor, you can't expose your GPU to the Docker instance, unfortunately. There are two options in this case:
- Run the starter kit fully on CPU, like in the section "For everyone else" below
- Run Ollama on your Mac for faster inference, and connect to that from the n8n instance
If you want to run Ollama on your mac, check the Ollama homepage for installation instructions, and run the starter kit as follows:
git clone https://github.com/n8n-io/self-hosted-ai-starter-kit.git
cd self-hosted-ai-starter-kit
cp .env.example .env # you should update secrets and passwords inside
docker compose up
For Mac users running OLLAMA locally
If you're running OLLAMA locally on your Mac (not in Docker), you need to modify the OLLAMA_HOST environment variable
-
Set OLLAMA_HOST to
host.docker.internal:11434in your .env file. -
Additionally, after you see "Editor is now accessible via: http://localhost:5678/":
- Head to http://localhost:5678/home/credentials
- Click on "Local Ollama service"
- Change the base URL to "http://host.docker.internal:11434/"
For everyone else
git clone https://github.com/n8n-io/self-hosted-ai-starter-kit.git
cd self-hosted-ai-starter-kit
cp .env.example .env # you should update secrets and passwords inside
docker compose --profile cpu up
⚡️ Quick start and usage
The core of the Self-hosted AI Starter Kit is a Docker Compose file, pre-configured with network and storage settings, minimizing the need for additional installations. After completing the installation steps above, simply follow the steps below to get started.
- Open http://localhost:5678/ in your browser to set up n8n. You’ll only have to do this once.
- Open the included workflow: http://localhost:5678/workflow/srOnR8PAY3u4RSwb
- Click the Chat button at the bottom of the canvas, to start running the workflow.
- If this is the first time you’re running the workflow, you may need to wait until Ollama finishes downloading Llama3.2. You can inspect the docker console logs to check on the progress.
To open n8n at any time, visit http://localhost:5678/ in your browser.
With your n8n instance, you’ll have access to over 400 integrations and a suite of basic and advanced AI nodes such as AI Agent, Text classifier, and Information Extractor nodes. To keep everything local, just remember to use the Ollama node for your language model and Qdrant as your vector store.
Note
This starter kit is designed to help you get started with self-hosted AI workflows. While it’s not fully optimized for production environments, it combines robust components that work well together for proof-of-concept projects. You can customize it to meet your specific needs
Upgrading
docker compose --profile gpu-nvidia pull
docker compose create && docker compose --profile gpu-nvidia up
docker compose pull
docker compose create && docker compose up
docker compose --profile cpu pull
docker compose create && docker compose --profile cpu up
👓 Recommended reading
n8n is full of useful content for getting started quickly with its AI concepts and nodes. If you run into an issue, go to support.
- AI agents for developers: from theory to practice with n8n
- Tutorial: Build an AI workflow in n8n
- Langchain Concepts in n8n
- Demonstration of key differences between agents and chains
- What are vector databases?
🎥 Video walkthrough
🛍️ More AI templates
For more AI workflow ideas, visit the official n8n AI template gallery. From each workflow, select the Use workflow button to automatically import the workflow into your local n8n instance.
Learn AI key concepts
- AI Agent Chat
- AI chat with any data source (using the n8n workflow too)
- Chat with OpenAI Assistant (by adding a memory)
- Use an open-source LLM (via Hugging Face)
- Chat with PDF docs using AI (quoting sources)
- AI agent that can scrape webpages
Local AI templates
- Tax Code Assistant
- Breakdown Documents into Study Notes with MistralAI and Qdrant
- Financial Documents Assistant using Qdrant and Mistral.ai
- Recipe Recommendations with Qdrant and Mistral
Tips & tricks
Accessing local files
The self-hosted AI starter kit will create a shared folder (by default,
located in the same directory) which is mounted to the n8n container and
allows n8n to access files on disk. This folder within the n8n container is
located at /data/shared -- this is the path you’ll need to use in nodes that
interact with the local filesystem.
Nodes that interact with the local filesystem
📜 License
This project is licensed under the Apache License 2.0 - see the LICENSE file for details.
💬 Support
Join the conversation in the n8n Forum, where you can:
- Share Your Work: Show off what you’ve built with n8n and inspire others in the community.
- Ask Questions: Whether you’re just getting started or you’re a seasoned pro, the community and our team are ready to support with any challenges.
- Propose Ideas: Have an idea for a feature or improvement? Let us know! We’re always eager to hear what you’d like to see next.
🚀 Codespace Automation — What's been added
This fork extends the original starter kit with automated DevOps scaffolding designed for vibe-coding — you don't need to remember commands; scripts handle the routine work for you.
Auto-installed when you open this Codespace
| What | How to use |
|---|---|
| Memory guard daemon | Starts automatically — watches RAM, prunes Docker when memory is low |
| Python 3.12 + uv | Ready to use: uv run python ... |
| Node 20 + npm | Ready to use: npm install / npm test |
| 23 VSCode extensions | Copilot, GitLens, ShellCheck, REST Client, Ruff, Prettier — installed on first open |
| Git hooks | Auto-runs format checks on commit |
Scripts you can run anytime
# Check everything is healthy (Docker, ports, RAM, toolchain)
bash .devcontainer/scripts/health-check.sh

# Auto-fix missing dependencies, secrets, venvs, Docker images
bash .devcontainer/scripts/self-heal-deps.sh

# Interactively configure LLM providers (OpenAI, Anthropic, Gemini, OpenRouter)
bash .devcontainer/scripts/setup-llm.sh

# Run all tests across npm and Python sub-projects
bash scripts/test-runner.sh

# Run only Python tests (fast, no LLM API keys needed)
bash scripts/test-runner.sh --suite python --fast

# Install Blackbox CLI (AI coding assistant)
npm run install:blackbox
LLM providers — Ollama works out of the box
The llm.config.json file lists all supported providers. Ollama runs
locally inside Docker (no API key needed). To enable cloud providers:
- Run
bash .devcontainer/scripts/setup-llm.sh— it will prompt you for keys - Or add keys to
.envmanually:OPENAI_API_KEY=sk-... - Restart the stack:
docker compose --profile cpu down && docker compose --profile cpu up -d
🖥️ Shadcn Codespace Dashboard (Foundation)
A Shadcn/UI-based dashboard skeleton has been added at ui/shadcn-dashboard/
to serve as the foundation for a future Codespace VM status & capacity panel.
What's included now:
- Vite + React + Tailwind CSS + shadcn/ui project skeleton
- Placeholder "Codespace Status" page with mocked RAM, disk, Docker, and service-health metrics (all clearly marked as mock data)
- Sidebar navigation shell
- Full inline
TODOmarkers showing exactly where real metrics will be wired
What's NOT built yet (intentional):
- Live metric fetching (no backend API yet)
- Working action buttons (disabled, pending API)
- Auth / access control
To run the dashboard inside your Codespace:
cd ui/shadcn-dashboard
npm install
npm run dev
# → Open port 5173 in your Codespace Ports tab
Shadcn upstream resources referenced and documented in the dashboard:
- shadcn-admin — full admin layout + Recharts charts
- shadcn-vue-modme — Vue 3 reference
- awesome-shadcn-ui-modme — component showcase
- shadcn-ui-sidebar-modme — sidebar patterns
📖 Full agent/developer guide: docs/shadcn-dashboard-foundation.md
🧭 Next Steps — What to do after opening your Codespace
Step 1 — Start the AI stack
docker compose --profile cpu up -d
# Wait ~60 seconds, then:
bash .devcontainer/scripts/health-check.sh
Open n8n at http://localhost:5678 and complete the one-time setup wizard.
Step 2 — Set up Codespaces Secrets (replaces .env for shared use)
For any API keys you use regularly, store them as Codespaces secrets so they are automatically available every time you open a codespace — no need to re-enter them:
- Go to github.com → Settings → Codespaces → Secrets
- Add:
OPENAI_API_KEY,ANTHROPIC_API_KEY,GEMINI_API_KEY(whichever you use) - To make them available in the container, add each secret name to the
remoteEnvblock in.devcontainer/devcontainer.json, e.g."OPENAI_API_KEY": "${localEnv:OPENAI_API_KEY}"
Step 3 — Connect GitLab CI/CD
This repo includes a .gitlab-ci.yml pipeline. If you want automated
pipelines on GitLab (useful for teams or if you want a second CI provider):
➡️ See GITLAB_SETUP.md for a beginner-friendly walkthrough.
Key steps (takes ~15 minutes):
- Create a GitLab account at gitlab.com
- Import this GitHub repo into GitLab (New project → Import → GitHub)
- Enable auto-mirroring (GitLab pulls from GitHub every 5 minutes)
- Add your secrets as CI/CD Variables in GitLab Settings
- Set up a weekly schedule for dependency audits
Step 4 — Try GenerateAgents.md (auto-generates AGENTS.md for any repo)
cd GenerateAgents.md
uv sync --extra dev
# Analyze this repo (uses Ollama by default — no API key needed)
uv run autogenerateagentsmd .. --style comprehensive
This creates an AGENTS.md that teaches Copilot about the codebase structure,
making vibe-coding suggestions much more accurate.
Step 5 — Pull a better LLM model into Ollama
The default model (phi) is small and fast. For better reasoning, pull a
larger model when you have RAM headroom:
# Inside your Codespace terminal:
docker exec ollama ollama pull llama3.2        # ~4GB, good general model
docker exec ollama ollama pull mistral         # ~4GB, good for coding
docker exec ollama ollama pull deepseek-r1:7b  # ~5GB, strong reasoning

# List what's available
docker exec ollama ollama list
Update llm.config.json → providers.ollama.default_model to switch.
Step 6 — Set up n8n → Webhook notifications (optional)
Connect GitLab or GitHub pipeline events to n8n for custom notifications:
- In n8n: New workflow → Webhook trigger → copy the URL
- GitHub: Repo Settings → Webhooks → paste URL, select "Workflow runs"
- Or GitLab: Settings → Webhooks → paste URL, select "Pipeline events"
- Build a workflow that sends a Discord/Slack message or logs the result
🗺️ Reference repos worth exploring
These repos inspired the patterns in this starter kit and are worth exploring for ideas and code reuse:
| Repo | What it's useful for |
|---|---|
| ag2 | Multi-agent framework — good patterns for agent orchestration and pre-commit hooks |
| modme-ui-01 | Codespaces secrets management, MCP server integration patterns |
| Github-runner-package | Advanced GitHub Actions: build matrix, npm/docker upgrade automation, stale bot |
| awesome-agent-skills | AgentSkills format, skill validation patterns |
| self-hosted-ai-starter-kit | The upstream project this is based on |
| foam-knowledgebase | Foam-based knowledge graph — good for documenting what you build |
| llama-fs | LLM-powered file system organiser |
| open-multi-agent | Multi-agent coordination patterns |
| agno | Lightweight agent framework |
⚠️ What still needs manual setup (things agents can't do for you yet)
| Task | Why it needs you | How to do it |
|---|---|---|
| Generate real API keys | Keys are account-specific secrets | Visit provider dashboards (OpenAI, Anthropic, etc.) and paste into .env or Codespaces Secrets |
| First-time n8n login | n8n requires interactive account creation | Open http://localhost:5678 and complete the form |
| GitLab account + import | Requires account creation and OAuth | Follow GITLAB_SETUP.md steps 1-3 |
| Choosing an Ollama model | Depends on your RAM and use case | Run docker exec ollama ollama pull <model> |
| Foam knowledge base | Personal knowledge — agents can't write your notes | Clone foam-knowledgebase and start adding .md files |
| GitHub Codespaces billing | Free tier has 60hr/month limit | Monitor usage at github.com/settings/billing |