Recipes
July 31, 2026 · View on GitHub
Practical walkthroughs for the most common live-share.nvim workflows. Each recipe is self-contained — start at the top and you're done at the bottom.
For installation, see README.md. For troubleshooting, see TROUBLESHOOTING.md.
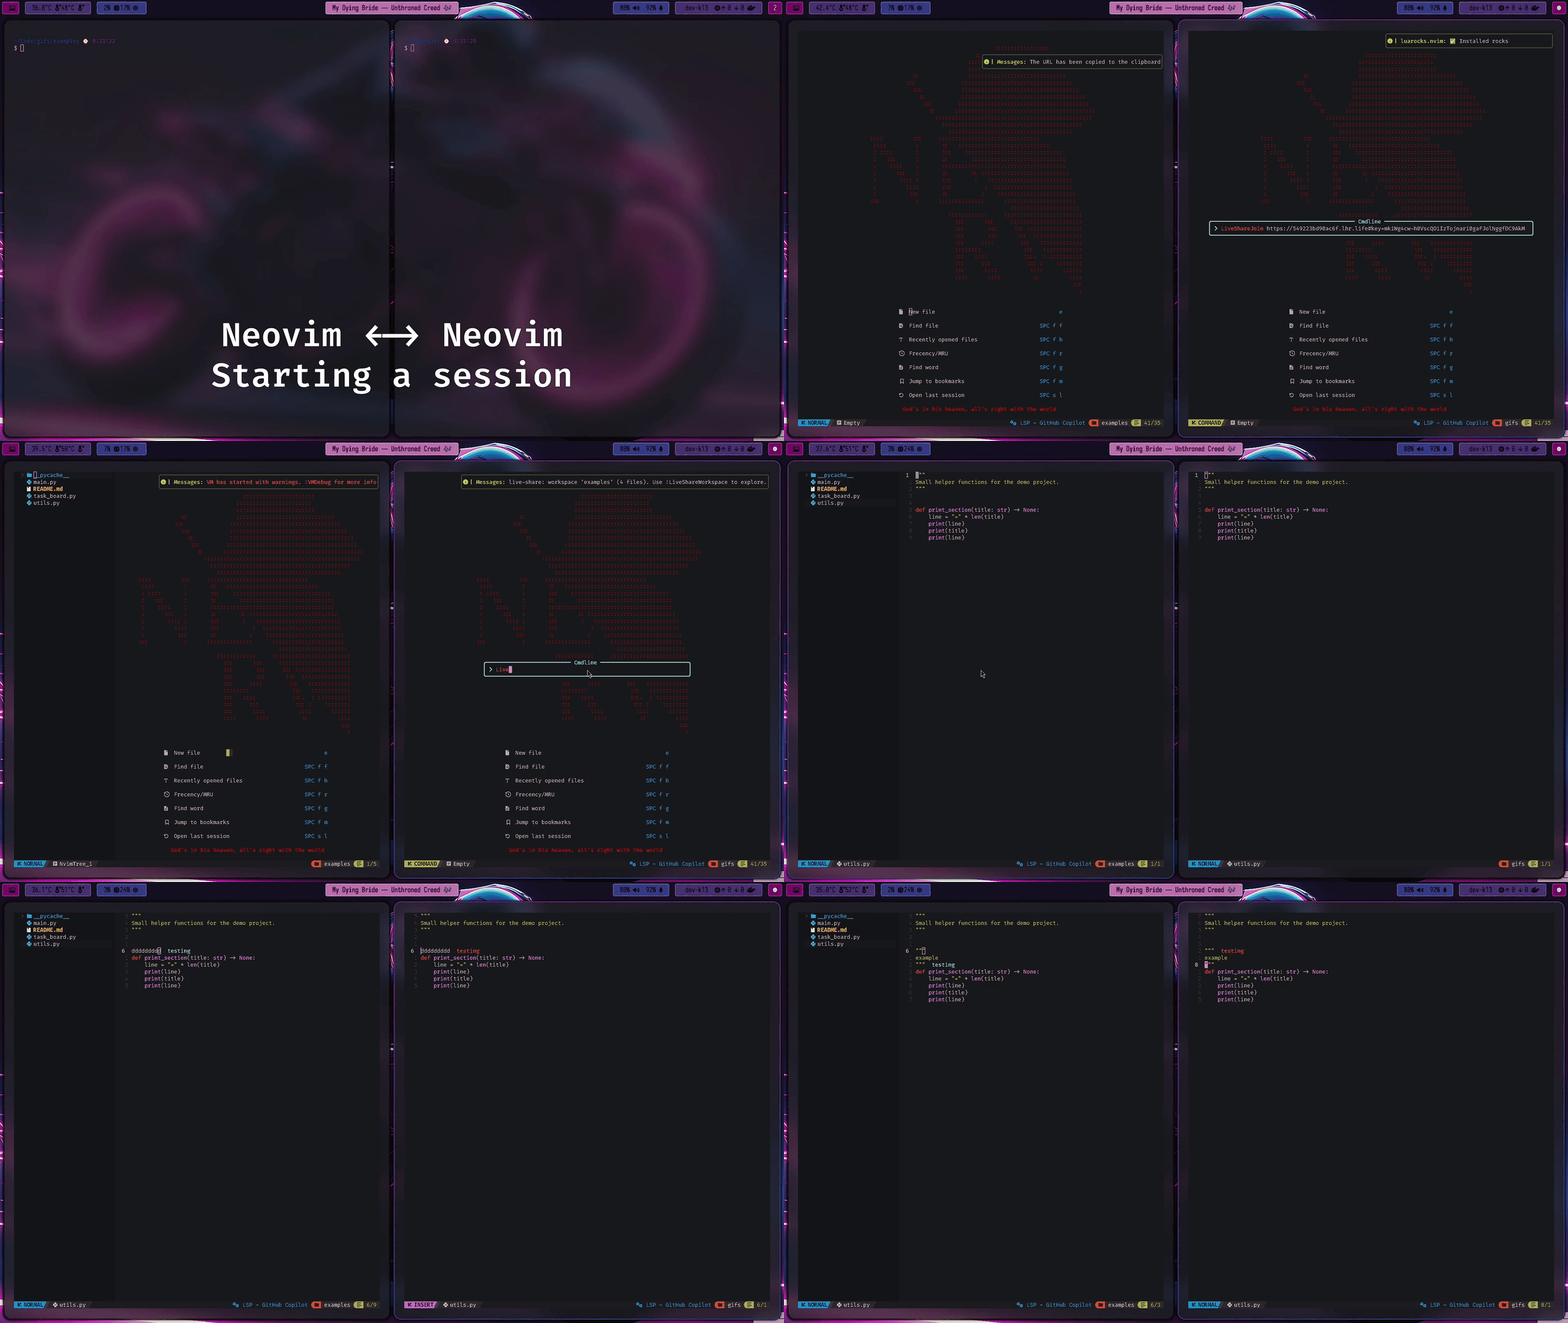
1. Neovim ↔ Neovim (default)
The simplest case: two Neovim users on different machines, internet between them.
Host:
:LiveShareHostStart
live-share.nvim starts the local TCP server, opens a tunnel through nokey@localhost.run (the default), and copies the share URL to your clipboard. The URL looks like:
https://abc123.lhr.life#key=<base64url>
The #key=... fragment is the AES-256-GCM session key. Tunnel servers never see it.
Guest:
:LiveShareJoin https://abc123.lhr.life#key=<base64url>
The host receives an approval prompt (vim.ui.select). Choose Approve and pick a role (Read/Write or Read only). The guest's workspace populates from :LiveShareWorkspace.
2. Neovim ↔ VS Code via open-pair
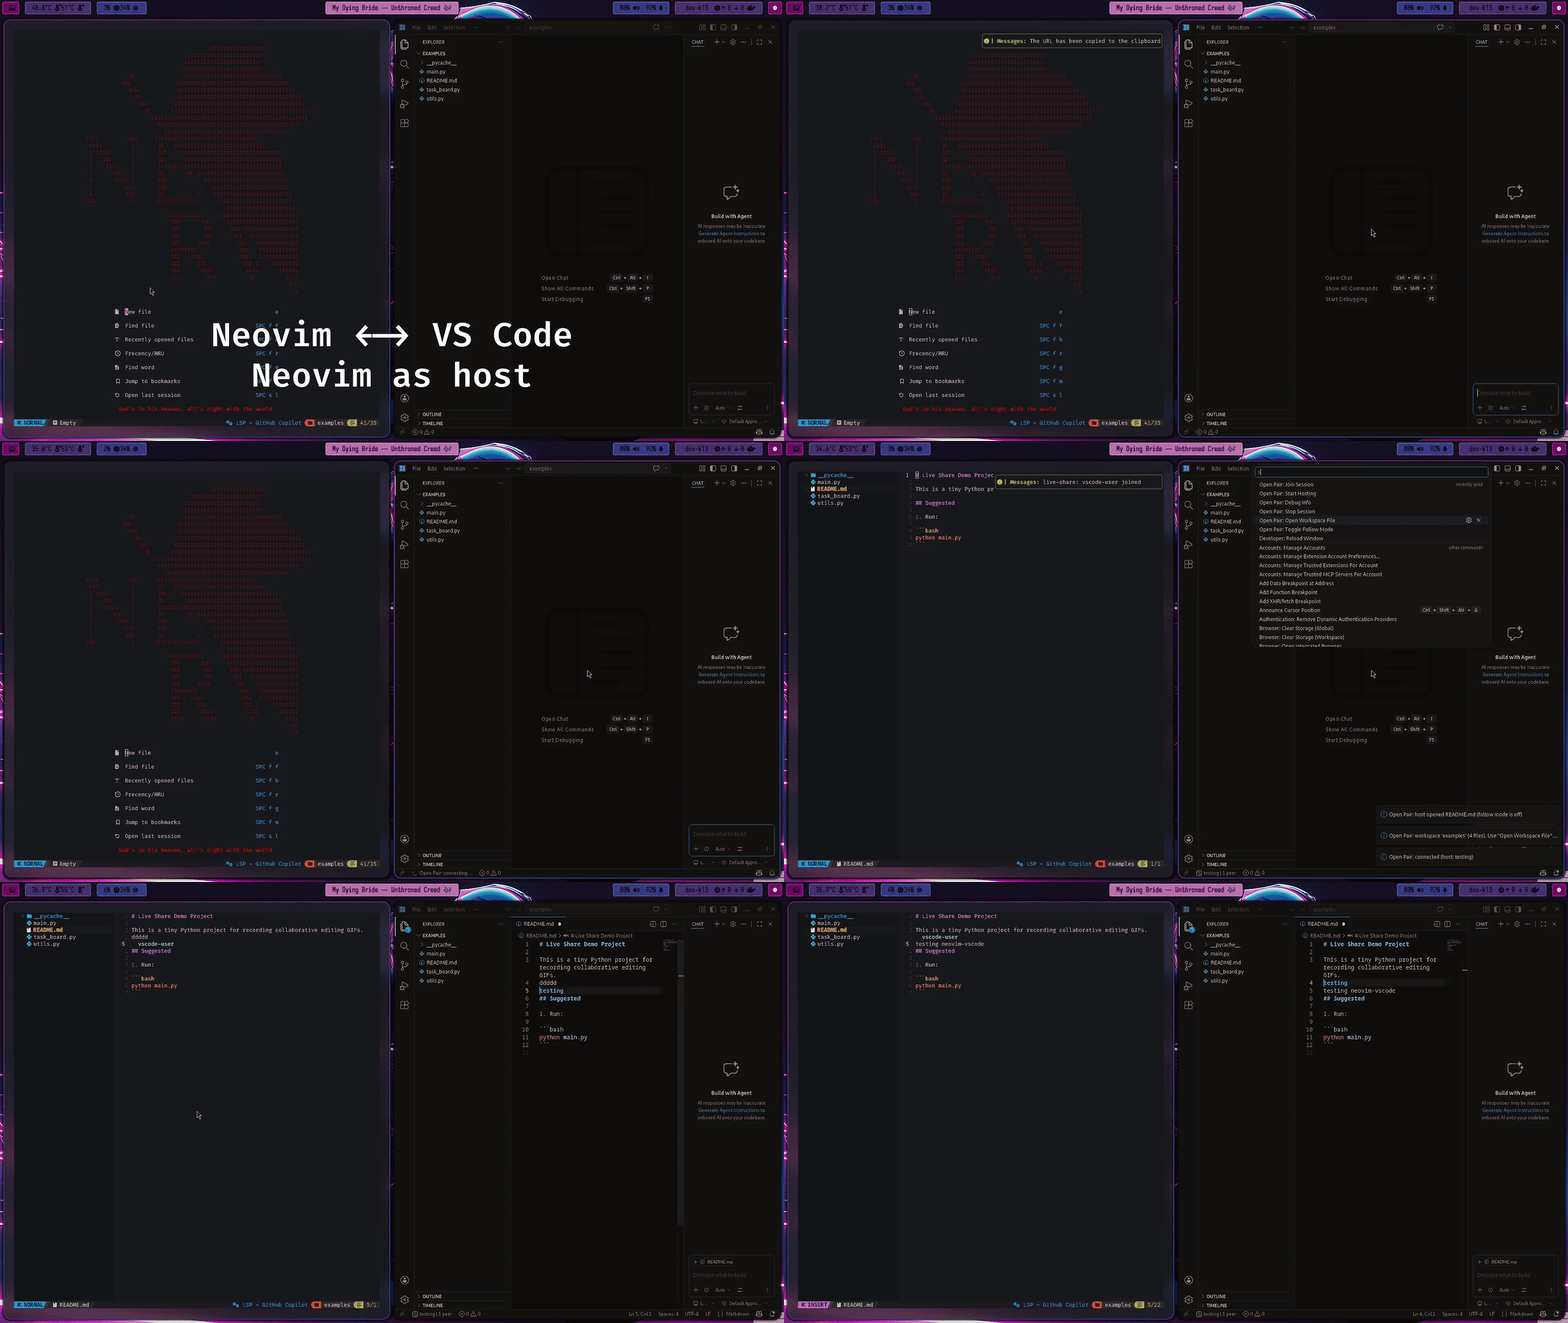
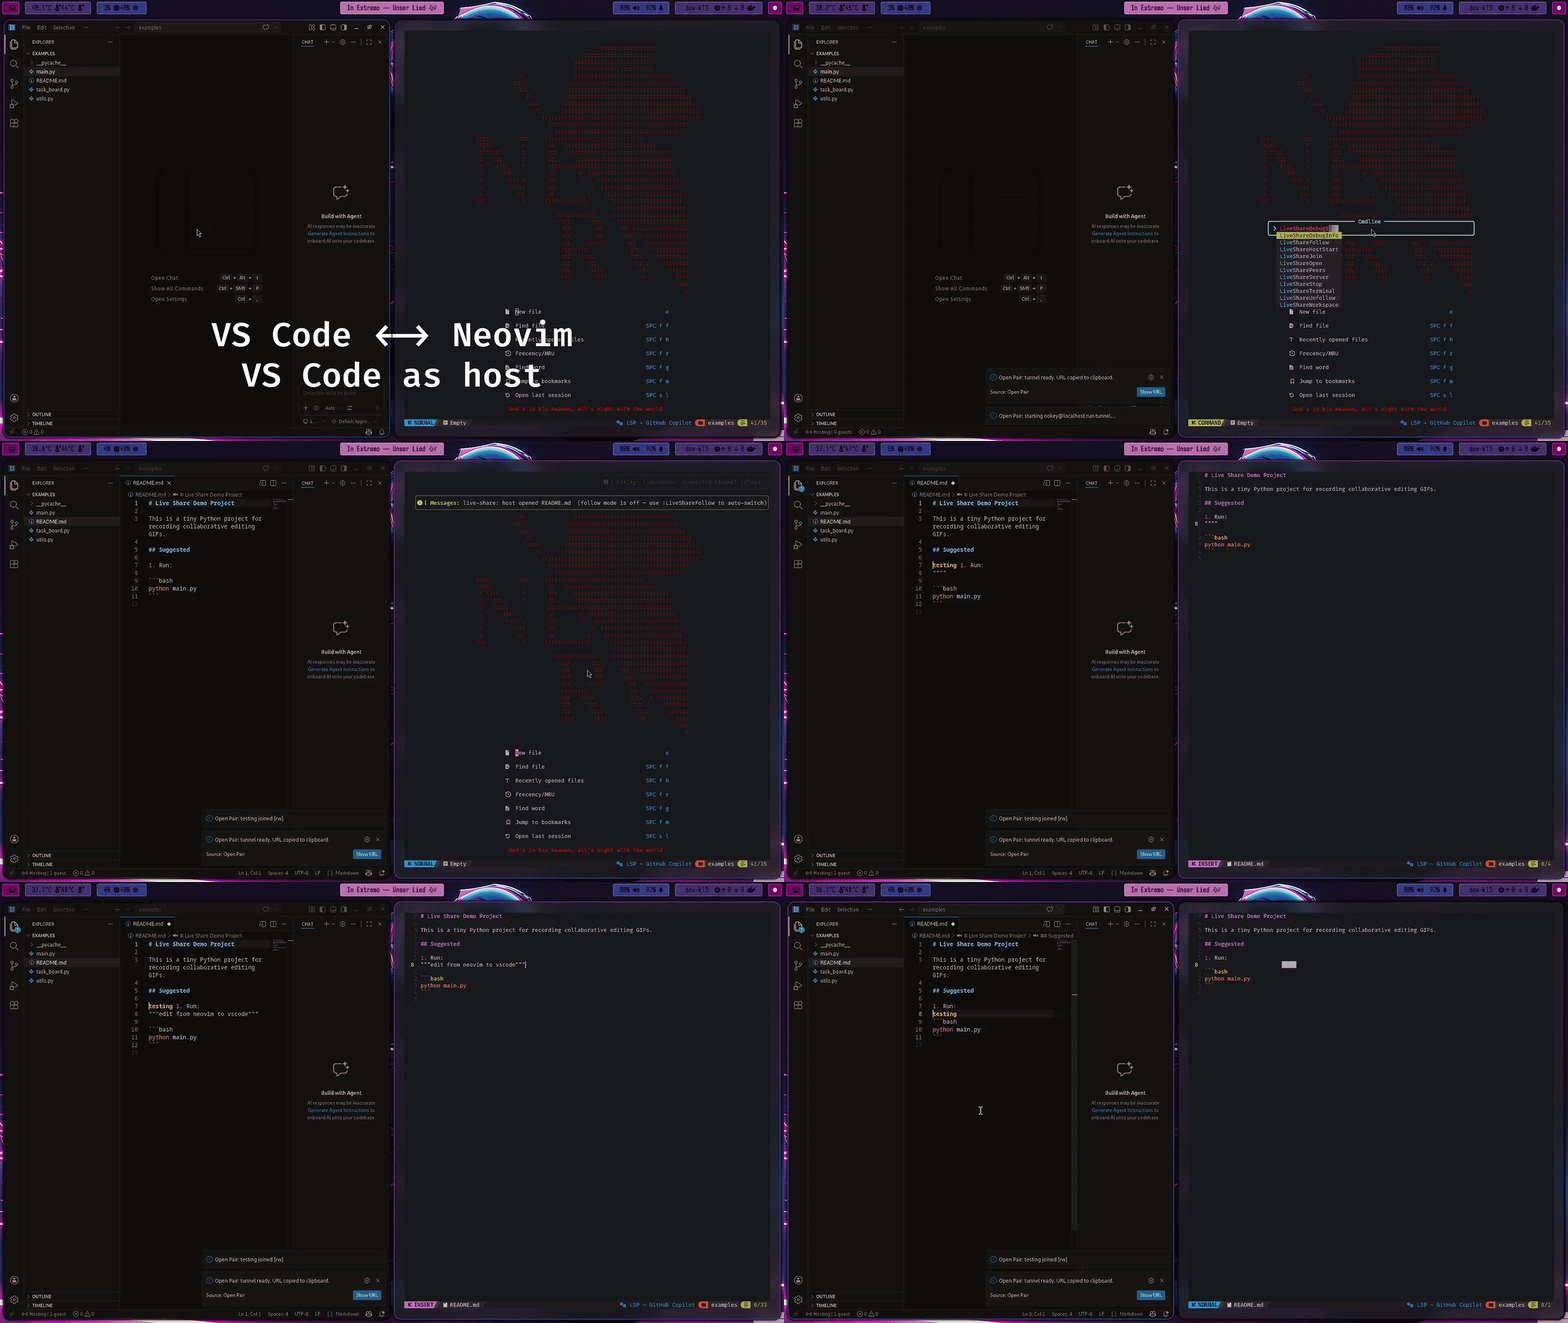
Cross-editor collaboration is supported via open-pair, a VS Code extension that speaks the live-share.nvim protocol. Tested in both directions.
Neovim host, VS Code guest:
- In Neovim:
:LiveShareHostStart— copy the URL. - In VS Code: install
open-pairfrom the marketplace, run Open Pair: Join Session from the command palette, paste the URL. - Approve the connection in Neovim.
VS Code host, Neovim guest:
- In VS Code: Open Pair: Start Session — copy the URL.
- In Neovim:
:LiveShareJoin <url>. - Approve in VS Code.
Cross-platform (Windows ↔ Linux) sessions work identically. See COMPATIBILITY.md for the protocol versions involved.
3. LAN-only session (no third-party tunnel)
If both peers are on the same network, you can skip the public tunnel and connect directly to the host's LAN IP. There is no built-in flag for this — register a custom provider that writes the LAN address to the service URL file:
Host config:
require("live-share.provider").register("lan", {
  command = function(_, port, service_url)
    -- Replace 192.168.1.42 with your machine's LAN IP.
    return string.format(
      [[printf 'tcp://192.168.1.42:%d\n' > %s; sleep infinity]],
      port, service_url)
  end,
  pattern = "tcp://[%w._-]+:%d+",
})

require("live-share").setup({
  username = "your-name",
  ip_local = "0.0.0.0",
  service  = "lan",
})
Then :LiveShareHostStart produces a URL like tcp://192.168.1.42:9876#key=... that the guest can paste into :LiveShareJoin. Encryption is still active end-to-end.
Why this works. The provider system polls
service_urlfor a public URL pattern; any string that matches thepatternregex is treated as the address that gets the#key=fragment appended. Writing your LAN address directly is a legitimate use of the API.
Caveats.
- The custom command keeps a process alive (
sleep infinity) becausetunnel.luaexpects the process to remain running for the duration of the session.- Both peers must be reachable on the same L2/L3 segment (no NAT, no VPN split).
4. SSH-tunnel session (alternative providers)
The default provider is nokey@localhost.run — works without an account. For long sessions or stricter quotas, switch providers:
serveo.net (account-less, OpenSSH-based):
require("live-share").setup({ service = "serveo.net" })
localhost.run (with your own SSH key for higher limits):
require("live-share").setup({ service = "localhost.run" })
ngrok (requires ngrok CLI authenticated once via ngrok config add-authtoken <token>):
require("live-share").setup({ service = "ngrok" })
bore (requires the bore CLI; register manually):
require("live-share.provider").register("bore", {
  command = function(_, port, service_url)
    return string.format("bore local %d --to bore.pub > %s 2>&1", port, service_url)
  end,
  -- Anchored to bore's success line ("listening at bore.pub:41287") and
  -- capturing only the address.  An unanchored "bore%.pub:%d+" would also match
  -- the failure line ("could not connect to bore.pub:7835") and turn bore's
  -- control port into a share URL that no tunnel ever answered.
  pattern = "listening at (bore%.pub:%d+)",
})
require("live-share").setup({ service = "bore" })
For all providers, :LiveShareHostStart works the same way — the tunnel is invisible to the user. To see which provider is active and what URL was generated, run :LiveShareDebugInfo.
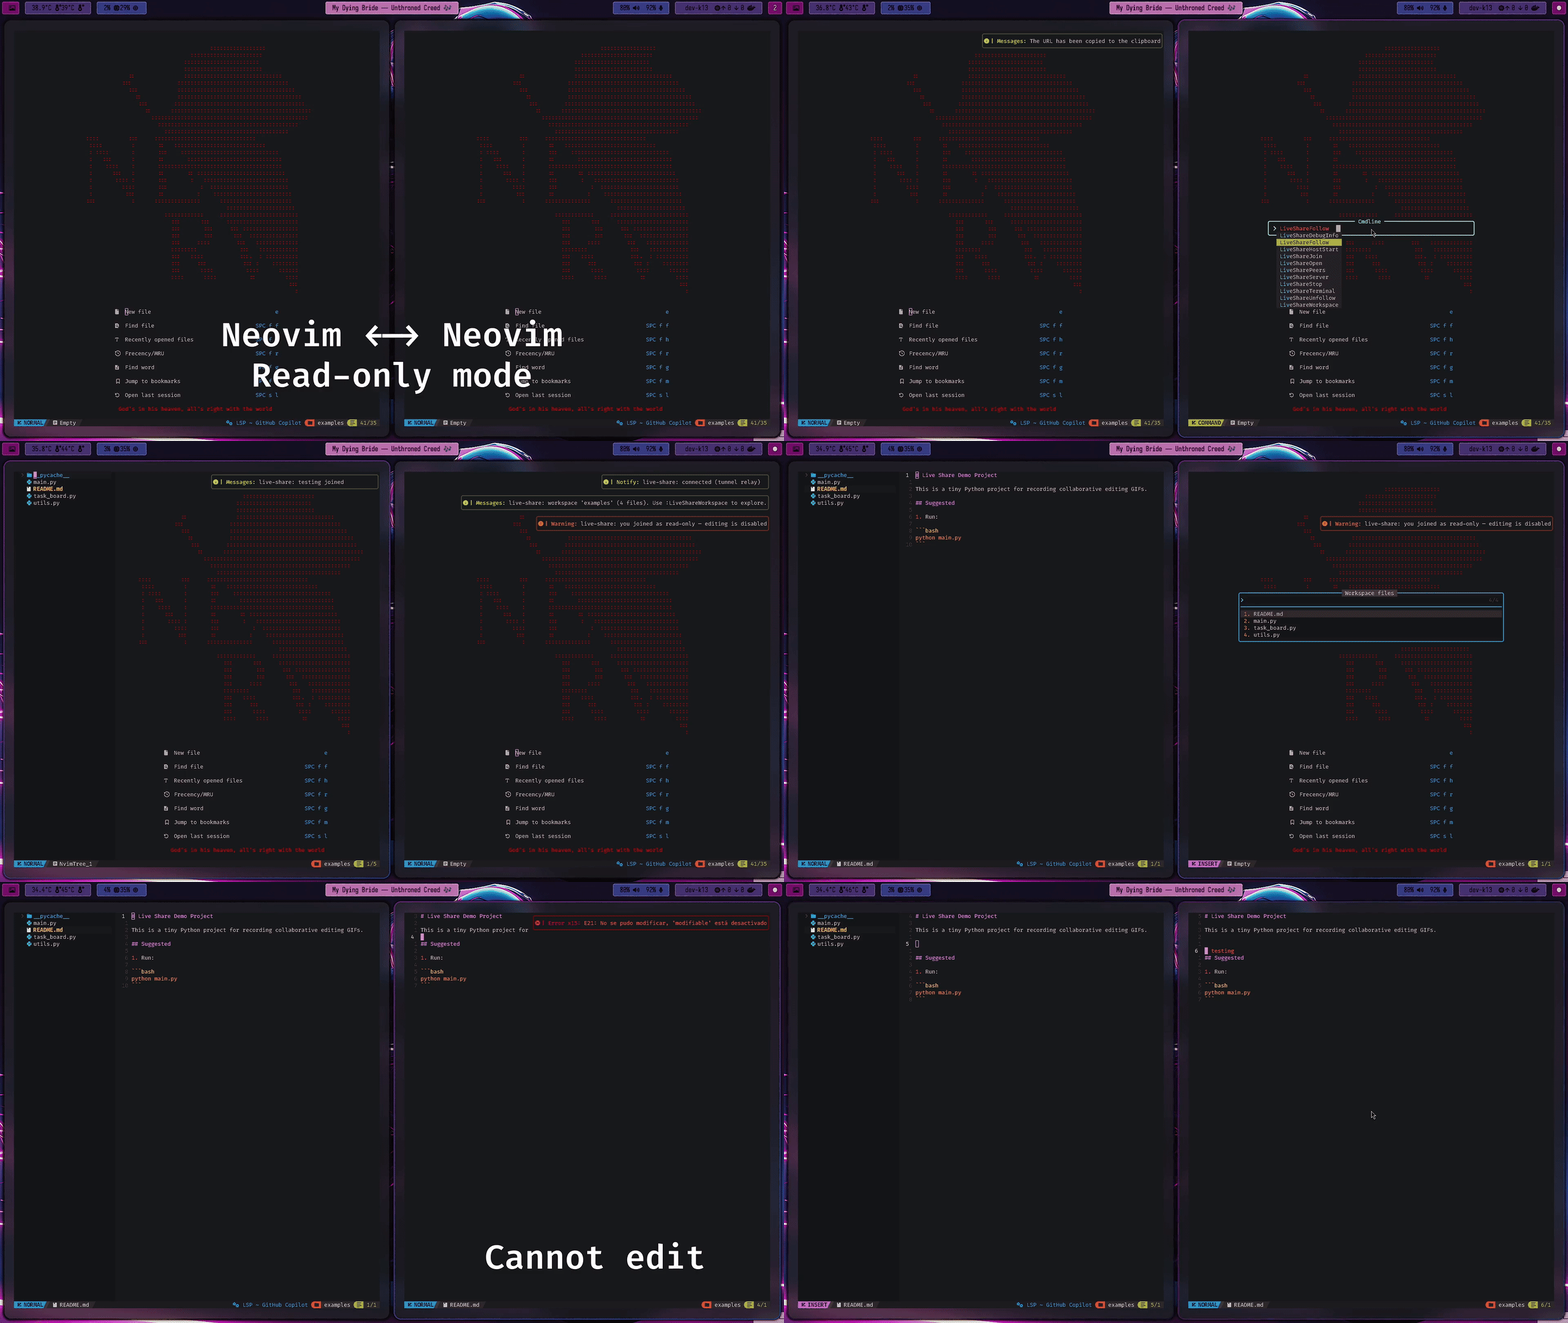
5. Read-only review session
Useful for code reviews, screen-share replacements, or pair-programming with a junior who shouldn't accidentally type into your buffer.
Host:
:LiveShareHostStart
Guest joins. When the approval prompt appears on the host:
- Choose Approve.
- In the role prompt, choose Read only.
The guest's patch messages are silently dropped server-side (server.lua enforces this — it's not a UI-only restriction). The guest can still:
- See all buffer changes in real time.
- See the host's cursor and selections.
- Browse the workspace via
:LiveShareWorkspace. - Open files via
:LiveShareOpen. - Follow the host's active buffer with
:LiveShareFollow.
To promote a guest from RO to RW mid-session, the host has to disconnect them and re-approve with the new role. There is no live role flip yet — it's a known limitation.
6. Self-hosted relay (privacy-first)
If you don't want any third-party (localhost.run, serveo, ngrok, bore.pub) to see your encrypted traffic, host the tunnel yourself. Both ws and punch benefit:
wstransport — guests connect through your tunnel instead of a shared service.punchtransport — the signaling server and the relay broker (used when NAT hole-punching fails) both ride on top of whichever tunnel you pick. Your tunnel = your relay, automatically.
Two practical paths.
Option A — your own SSH server
Anything that runs sshd works (Debian/Ubuntu/Arch/Alpine VPS, a home server with a static IP, etc.).
1. Configure sshd on the VPS. By default, SSH binds remote forwarded ports to 127.0.0.1 on the server side, which means a guest connecting to vps.example.com:80 would hit nothing. Edit /etc/ssh/sshd_config:
GatewayPorts clientspecified
Reload sshd:
sudo systemctl reload sshd
(GatewayPorts yes also works but always binds to 0.0.0.0. clientspecified lets the SSH client pick — safer.)
2. Register a custom provider in your Neovim config:
require("live-share.provider").register("my-vps", {
  command = function(cfg, port_internal, service_url)
    -- cfg.port is the public port the guest will connect to (default 80).
    -- 0.0.0.0:cfg.port:localhost:port_internal — bind the forward to all interfaces on the VPS.
    return string.format(
      "ssh -o StrictHostKeyChecking=no -R 0.0.0.0:%d:localhost:%d user@vps.example.com "
        .. "'echo tcp://vps.example.com:%d; sleep infinity' > %s 2>/dev/null",
      cfg.port, port_internal, cfg.port, service_url)
  end,
  pattern = "tcp://[%w._-]+:%d+",
})

require("live-share").setup({
  username = "your-name",
  service  = "my-vps",
  port     = 8443,   -- pick a non-privileged port unless your sshd allows :80
})
The echo tcp://... runs on the VPS once the SSH session is established, so the resulting URL is what tunnel.lua polls and copies to the clipboard.
3. Make sure the firewall lets the public port through (the one the guest connects to, e.g. 8443/tcp).
Option B — your own bore server
bore (ekzhang/bore) is a single Rust binary you can run on any VPS. Simpler than tweaking sshd.
1. On the VPS:
bore server --secret your-shared-secret
(Or as a systemd unit. Default control port is 7835/tcp; the dynamically allocated public ports also need to be reachable.)
2. In your Neovim config:
require("live-share.provider").register("my-bore", {
  command = function(_, port_internal, service_url)
    return string.format(
      "bore local %d --to vps.example.com --secret your-shared-secret > %s 2>&1",
      port_internal, service_url)
  end,
  -- Anchored to bore's success line, so its failure output cannot be scraped
  -- as a share URL (see §4).
  pattern = "listening at (vps%.example%.com:%d+)",
})

require("live-share").setup({
  username = "your-name",
  service  = "my-bore",
})
Same setup with punch
Either provider above works as the signaling tunnel for punch — just add transport = "punch":
require("live-share").setup({
  username  = "your-name",
  service   = "my-vps",   -- or "my-bore"
  transport = "punch",
})
When NAT hole-punching succeeds, the actual session traffic flows direct UDP between peers and never touches the VPS at all. When it falls back to relay, the relay broker is the one running on the host's signaling server — exposed through your VPS, not anyone else's.
Caveats
- You're on the hook for uptime. No third-party means no third-party SLA. Reboot your VPS, restart
bore server, the session is gone. - Encryption still applies. AES-256-GCM is end-to-end; neither your VPS nor any other relay can read the buffer contents. Self-hosting eliminates the traffic-pattern observability (who connected to whom, when, how long), not the content confidentiality.
- TLS termination is on you. SSH gives you encrypted transport to the VPS for free. Bore uses a plaintext control protocol with a shared secret — fine for the threat model (everything inside is already E2E-encrypted), but your VPS provider can still see the connection metadata.
GatewayPortsis the silent failure when self-hosting via SSH. If guests can't connect, checksshd_configfirst.
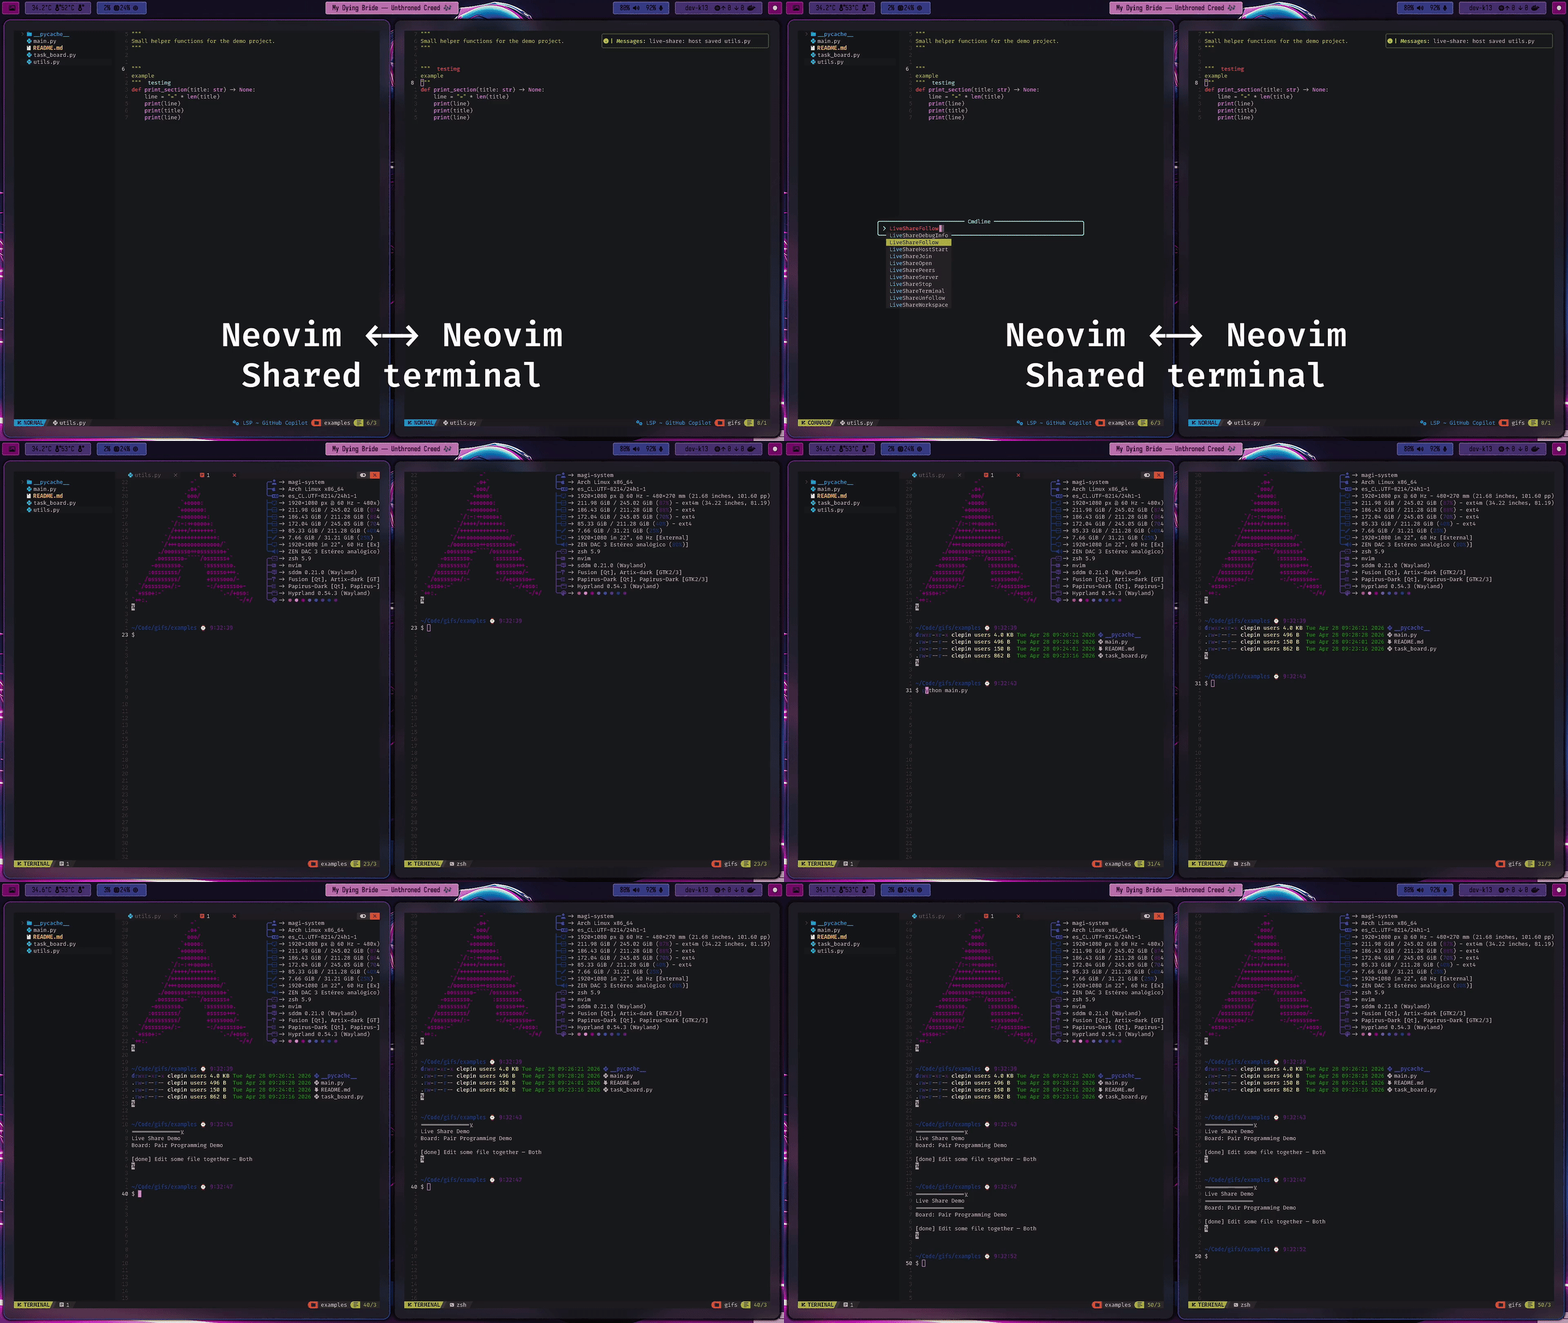
7. Shared terminal session
The host runs a real PTY and streams its output to all guests. Useful for demoing build output, REPLs, or live debugging.
Host:
:LiveShareHostStart
:LiveShareTerminal
A terminal buffer opens on the host. Anything typed there is sent to a real shell ($SHELL); guests receive terminal_data messages and see the same output in their own terminal buffer.
Caveats:
- Host-only input. Guests see the stream but cannot type back yet. Bidirectional input is on the roadmap.
- No replay on reconnect. If a guest disconnects and rejoins, their terminal buffer starts empty — scrollback before the reconnect is not replayed.
- One terminal per session. Running
:LiveShareTerminaltwice is not currently supported.
See also
- README.md — installation and configuration.
- PROTOCOL.md — full wire-protocol spec.
- COMPATIBILITY.md — version negotiation, capability flags.
- TROUBLESHOOTING.md — common issues and fixes.
- SECURITY.md — threat model and what tunnel providers can see.