Ballerina Amazon SNS Connector
March 31, 2026 · View on GitHub
![]()
![]()

![]()
![]()
Amazon SNS is a message notification service provided by Amazon.com Inc., enabling users to publish messages to topics, which are then delivered to subscribing endpoints or clients.
Overview
The ballerinax/aws.sns package offers APIs to connect and interact with AWS SNS API endpoints.
Setup guide
Step 1: Create an AWS account
- If you don't already have an AWS account, you need to create one. Go to the AWS Management Console, click on "Create a new AWS Account," and follow the instructions.
Step 2: Get the access key ID and the secret access key
Once you log in to your AWS account, you need to create a user group and a user with the necessary permissions to access SNS. To do this, follow the steps below:
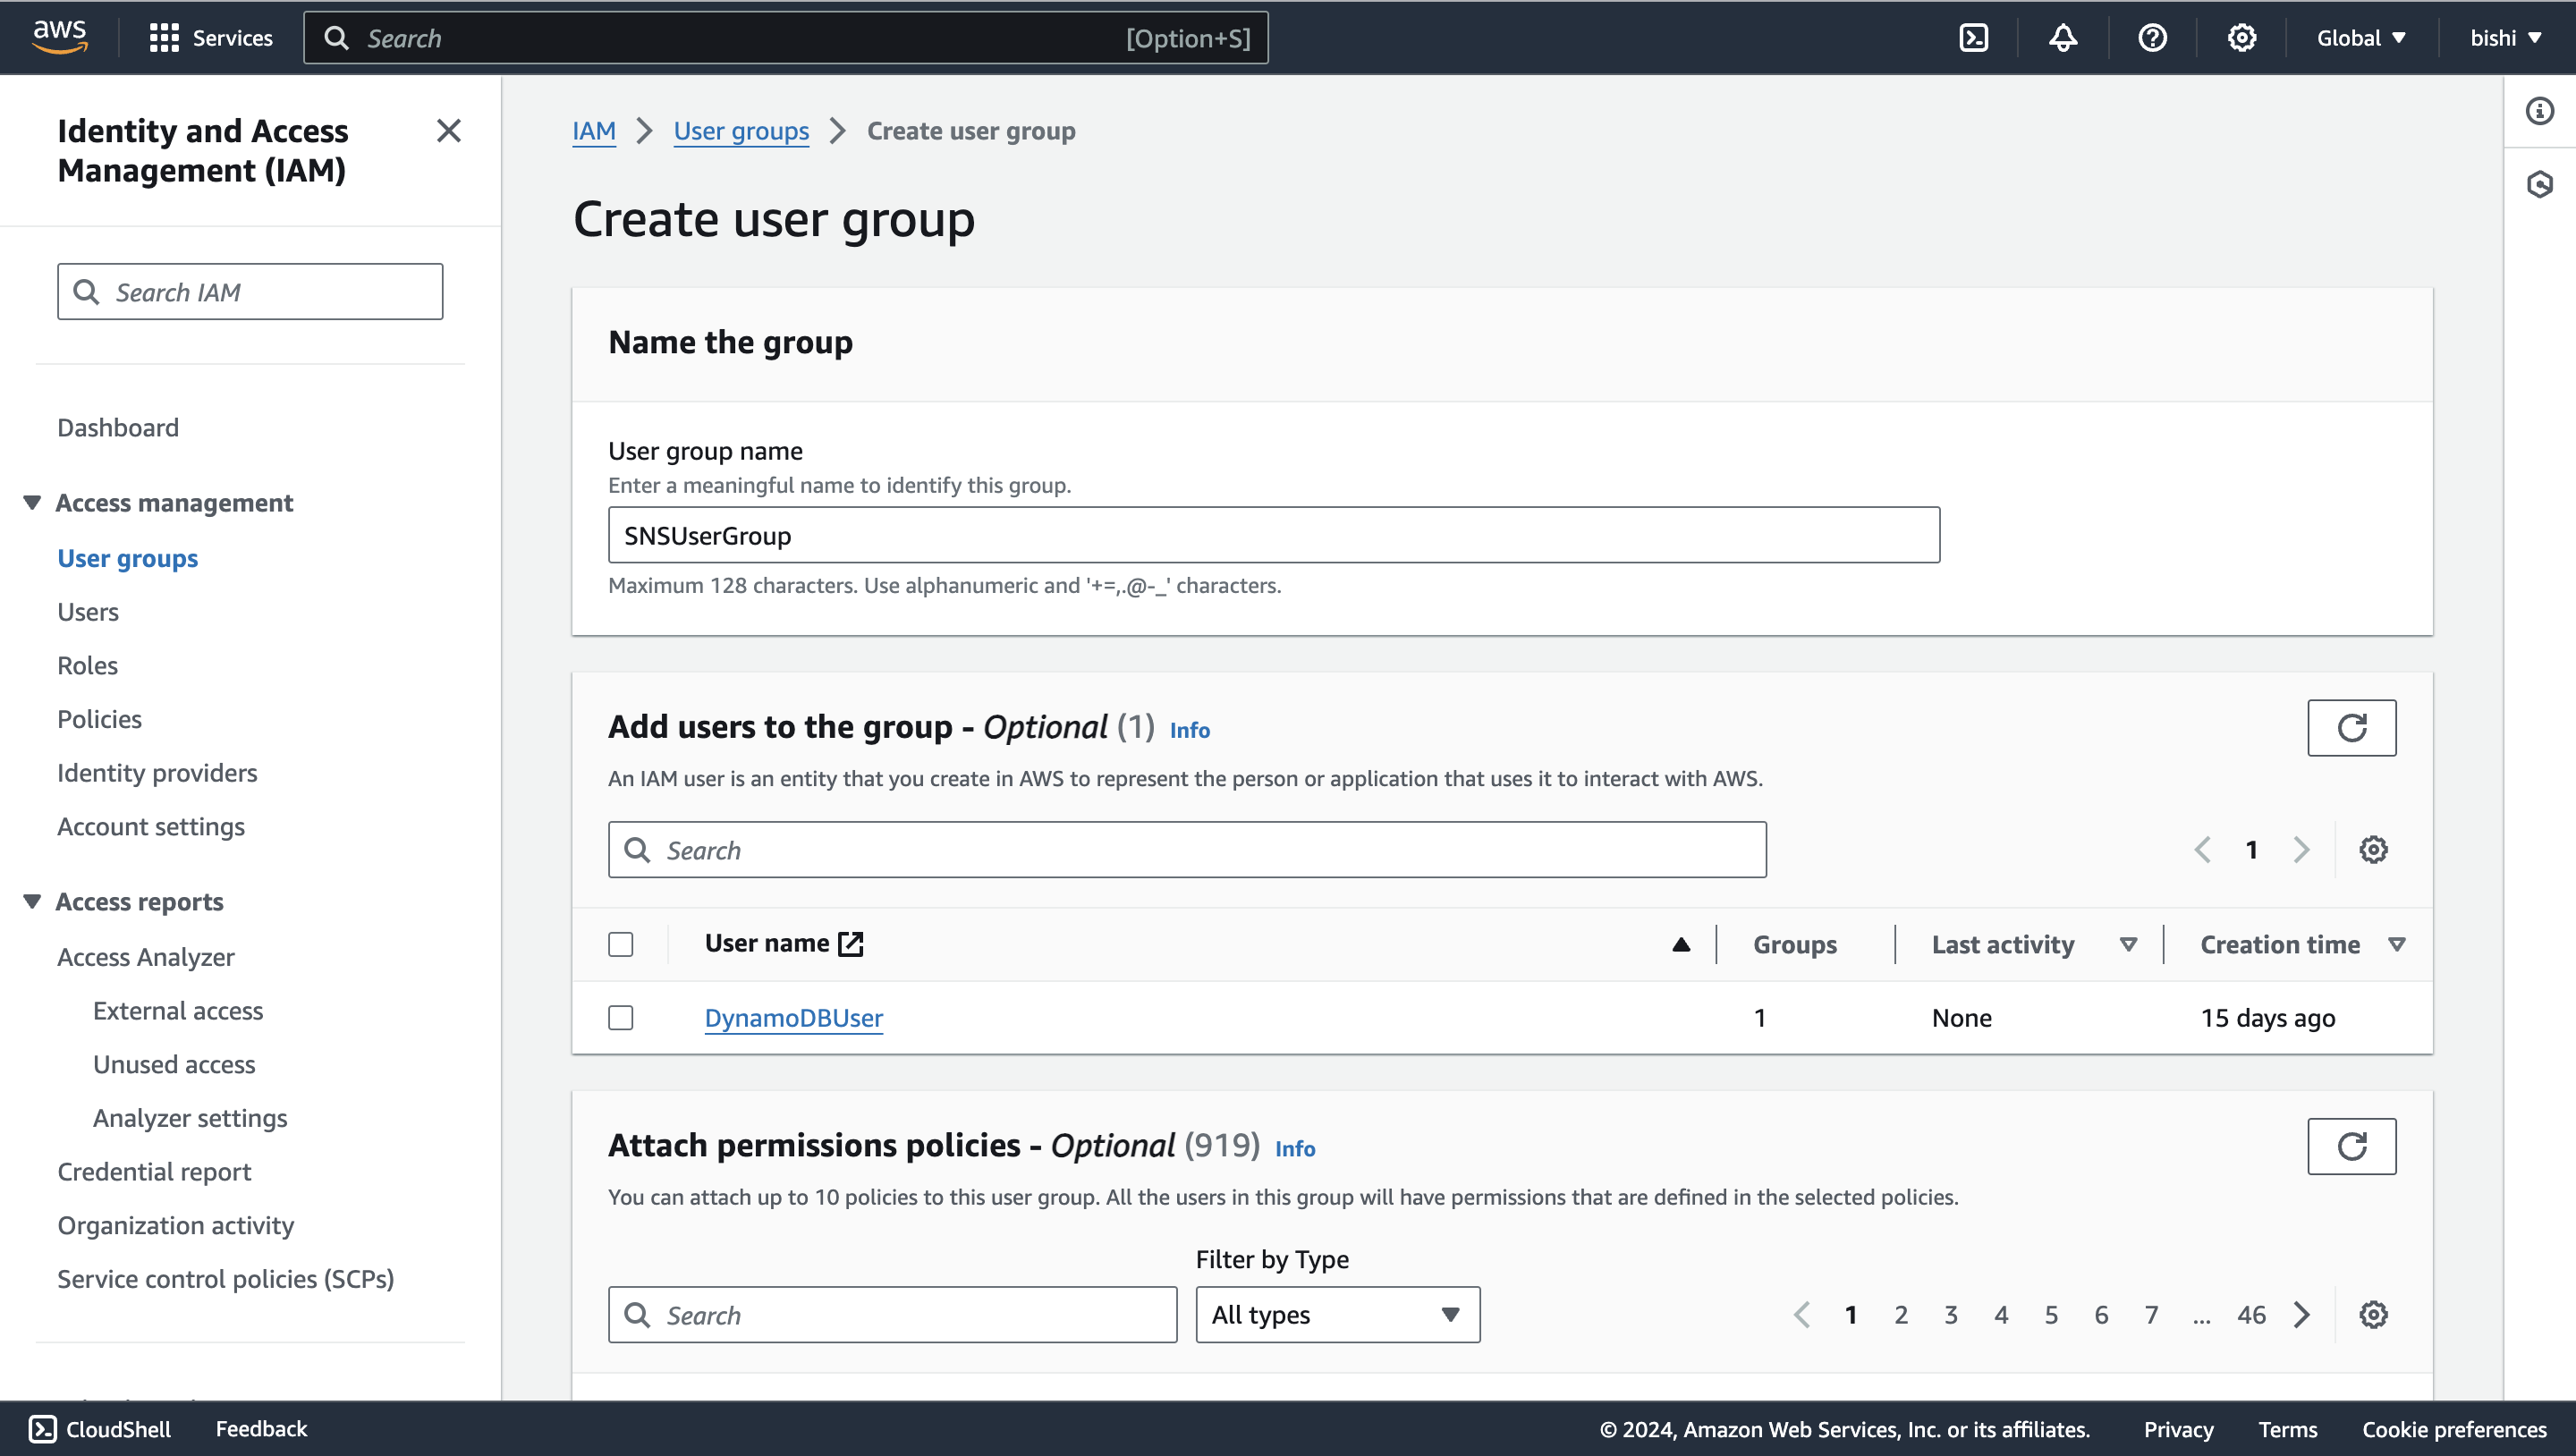
- Create an AWS user group
-
Navigate to the Identity and Access Management (IAM) service. Click on "Groups" and then "Create New Group."
<img src=https://raw.githubusercontent.com/ballerina-platform/module-ballerinax-aws.sns/main/docs/setup/resources/create-group.png alt="Create user group" width="50%">
-
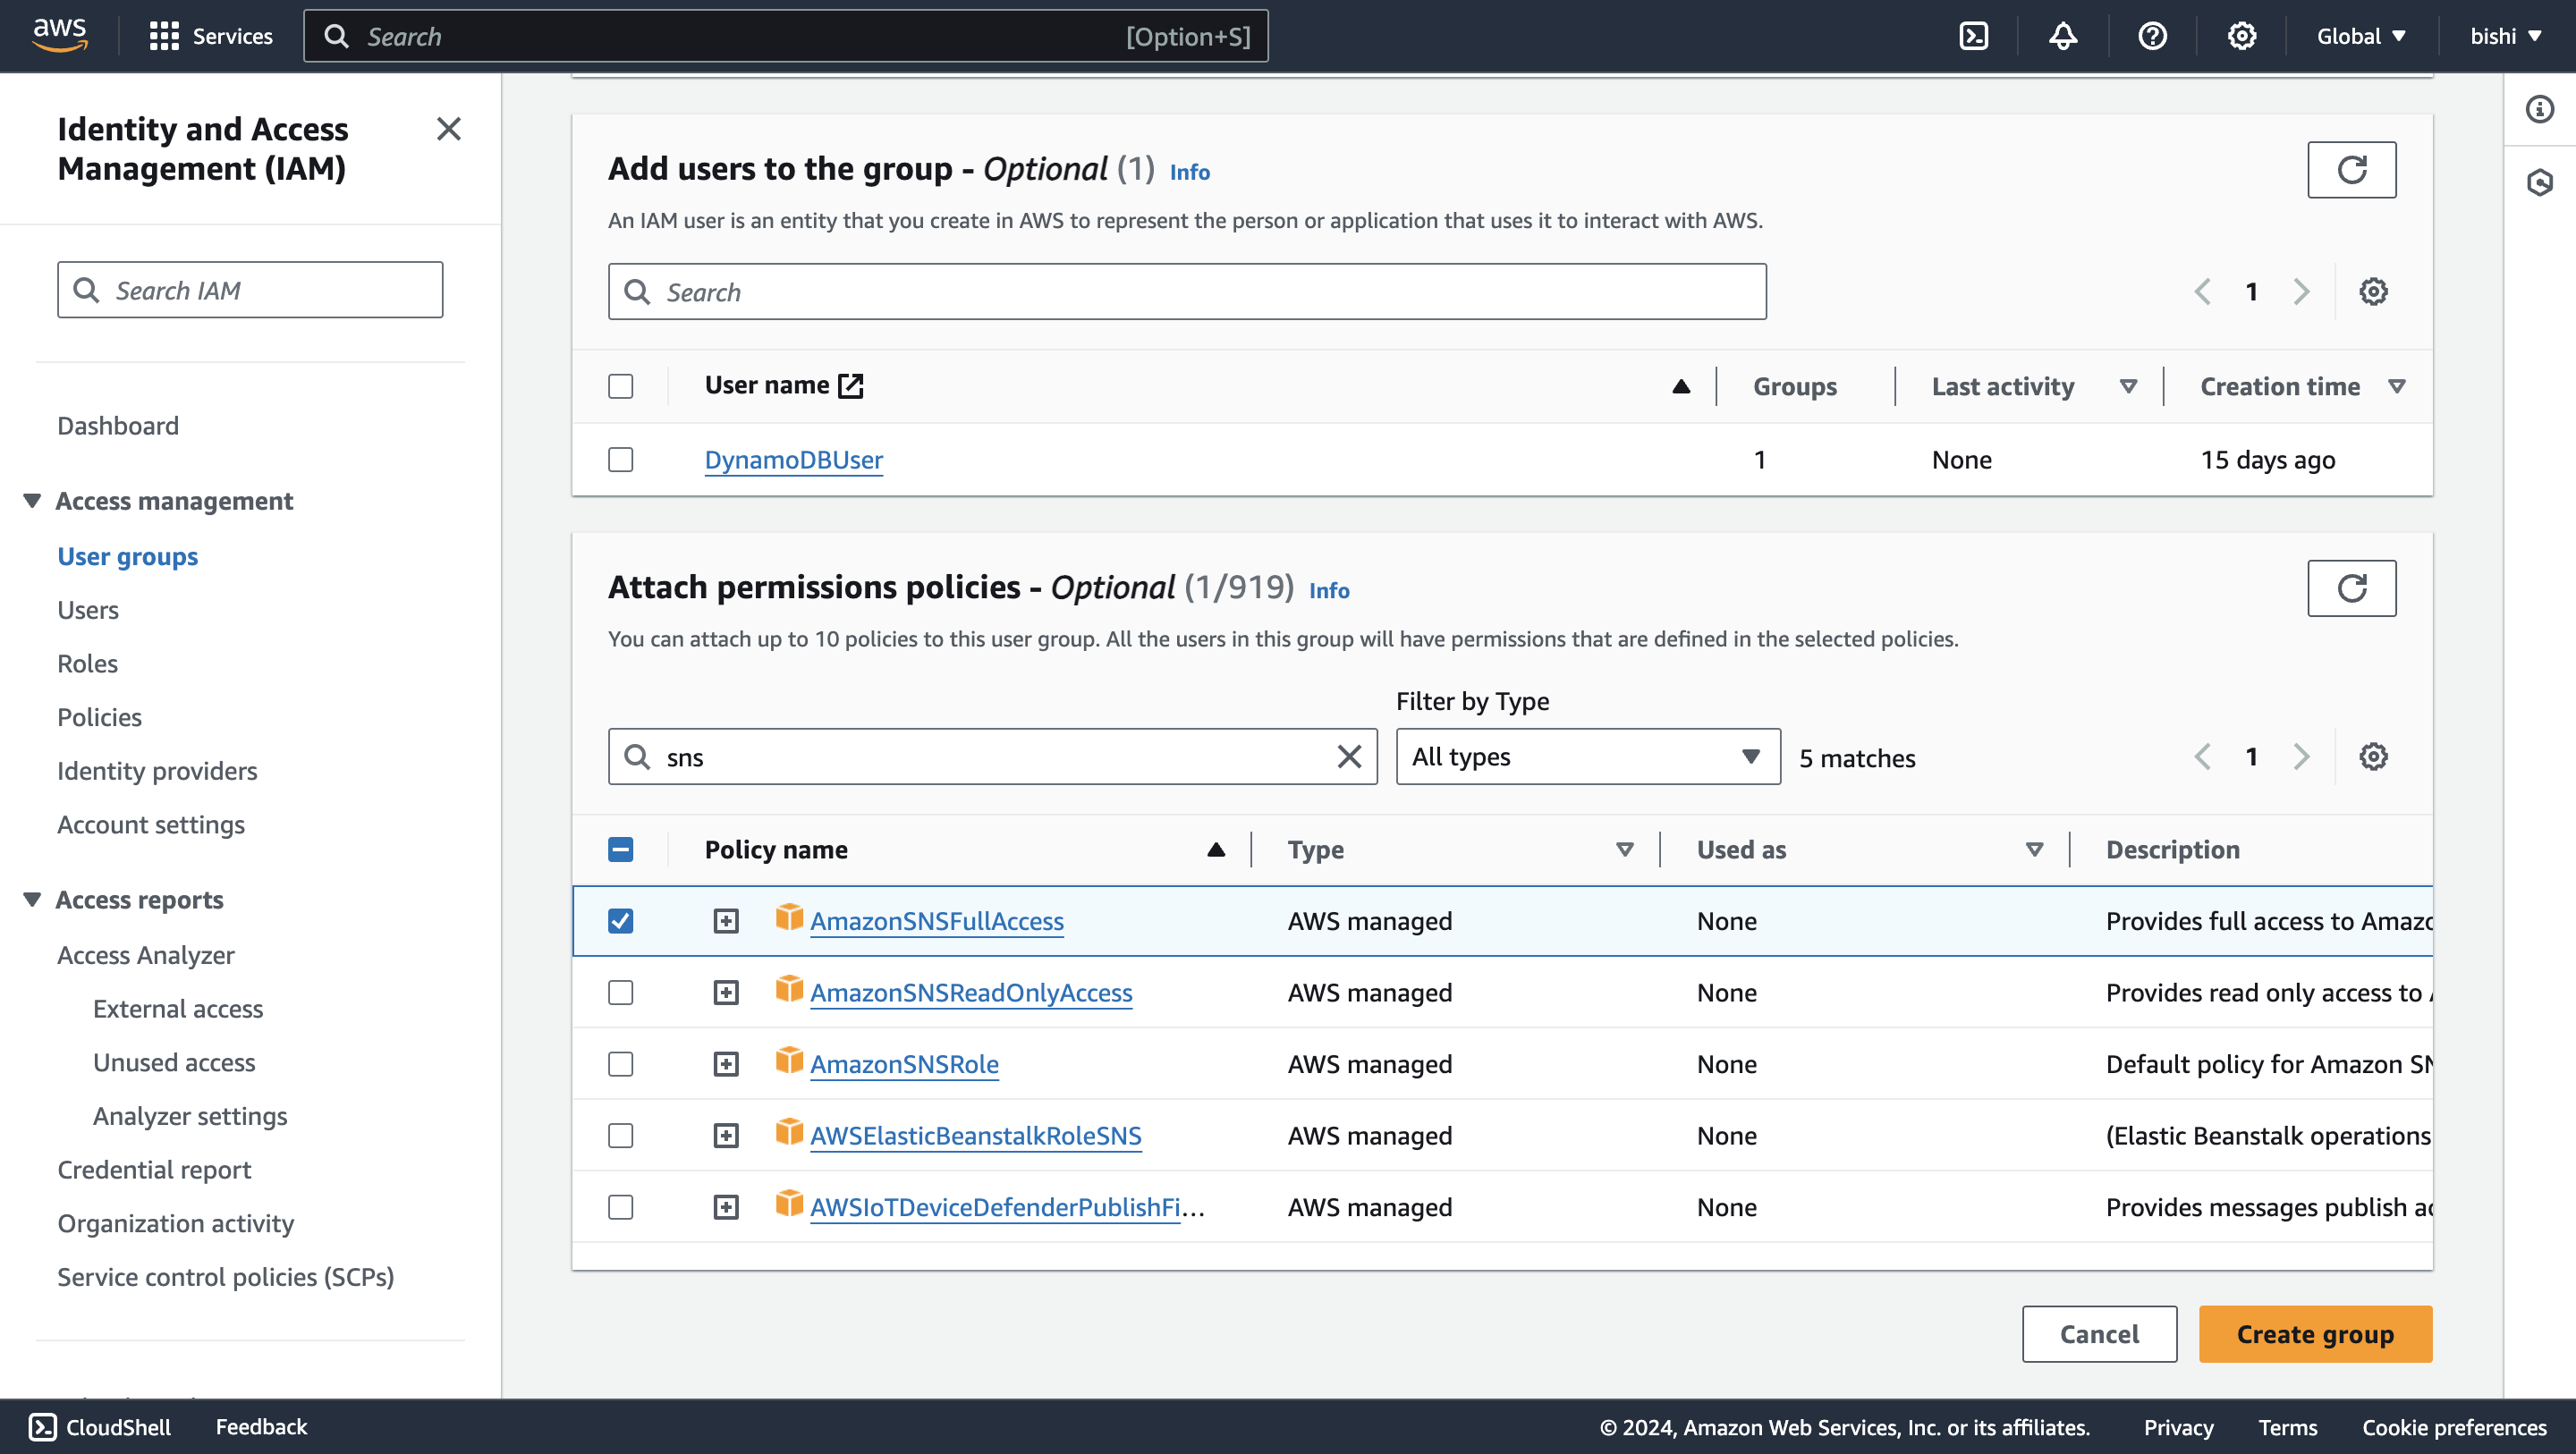
Enter a group name and attach the necessary policies to the group. For example, you can attach the "AmazonSNSFullAccess" policy to provide full access to SNS.
<img src=https://raw.githubusercontent.com/ballerina-platform/module-ballerinax-aws.sns/main/docs/setup/resources/create-group-policies.png alt="Attach policy" width="50%">
- Create an IAM user
-
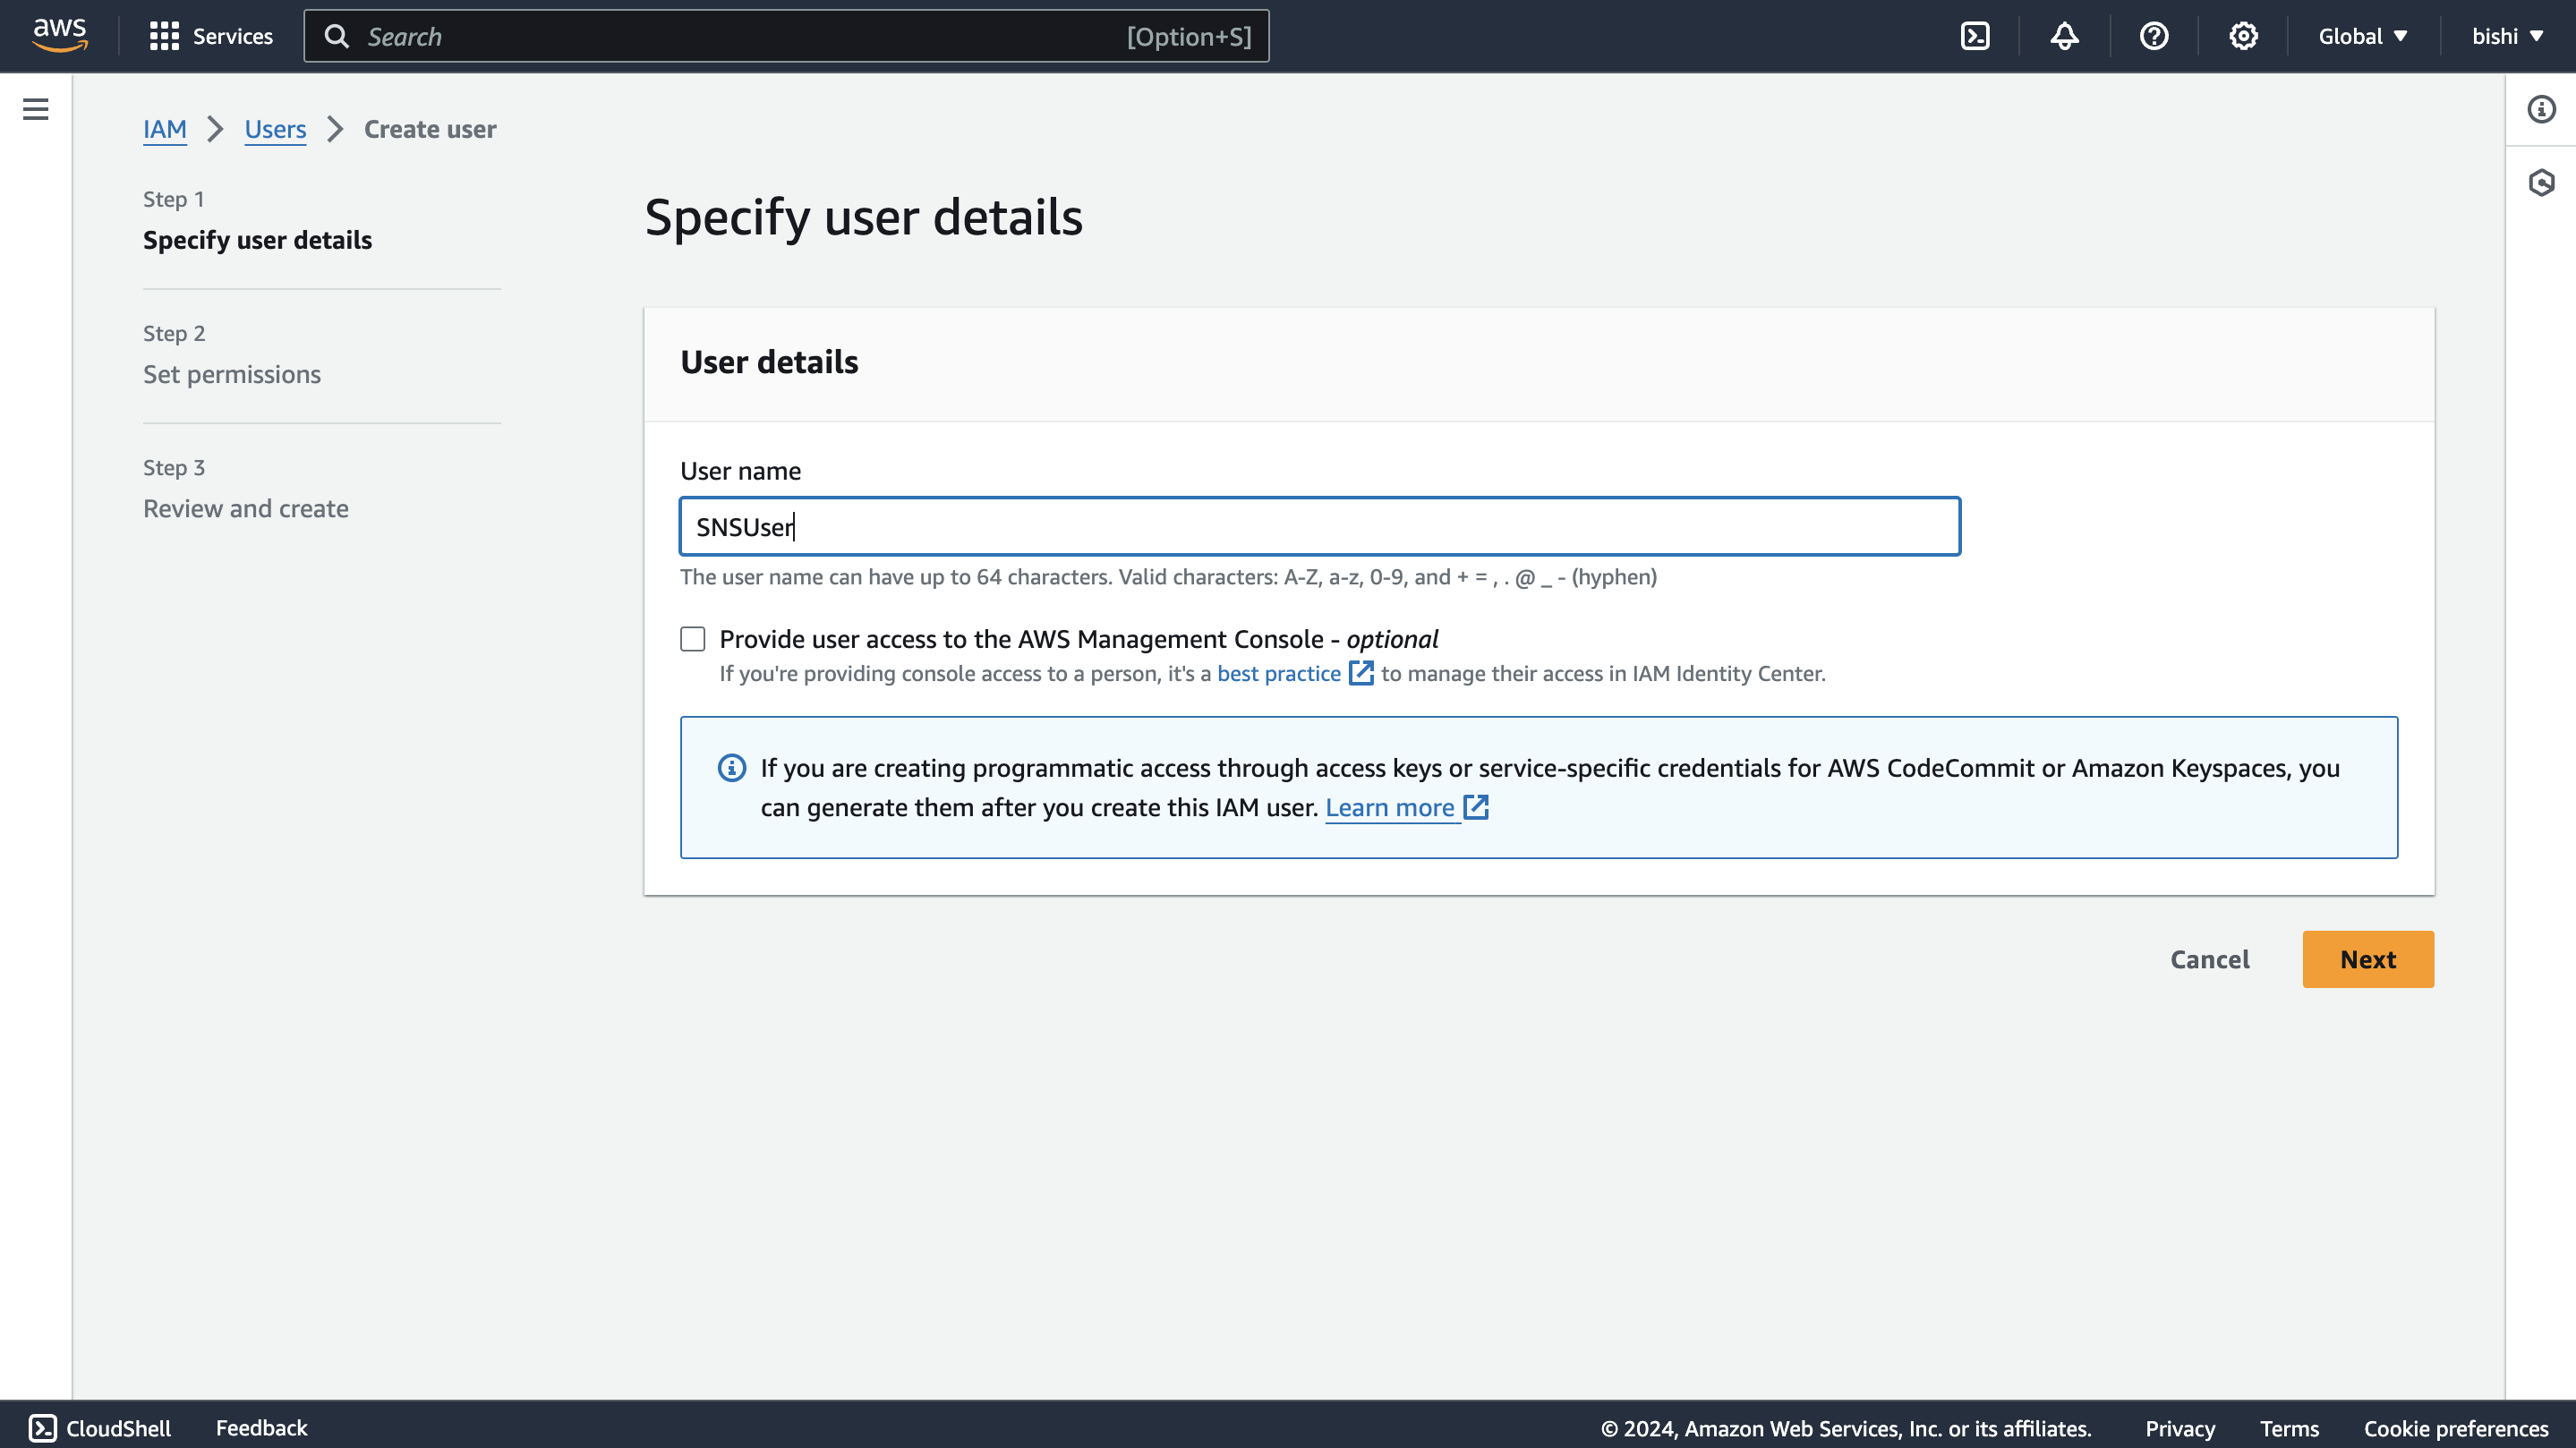
In the IAM console, navigate to "Users" and click on "Add user."
<img src=https://raw.githubusercontent.com/ballerina-platform/module-ballerinax-aws.sns/main/docs/setup/resources/create-user.png alt="Add user" width="50%">
-
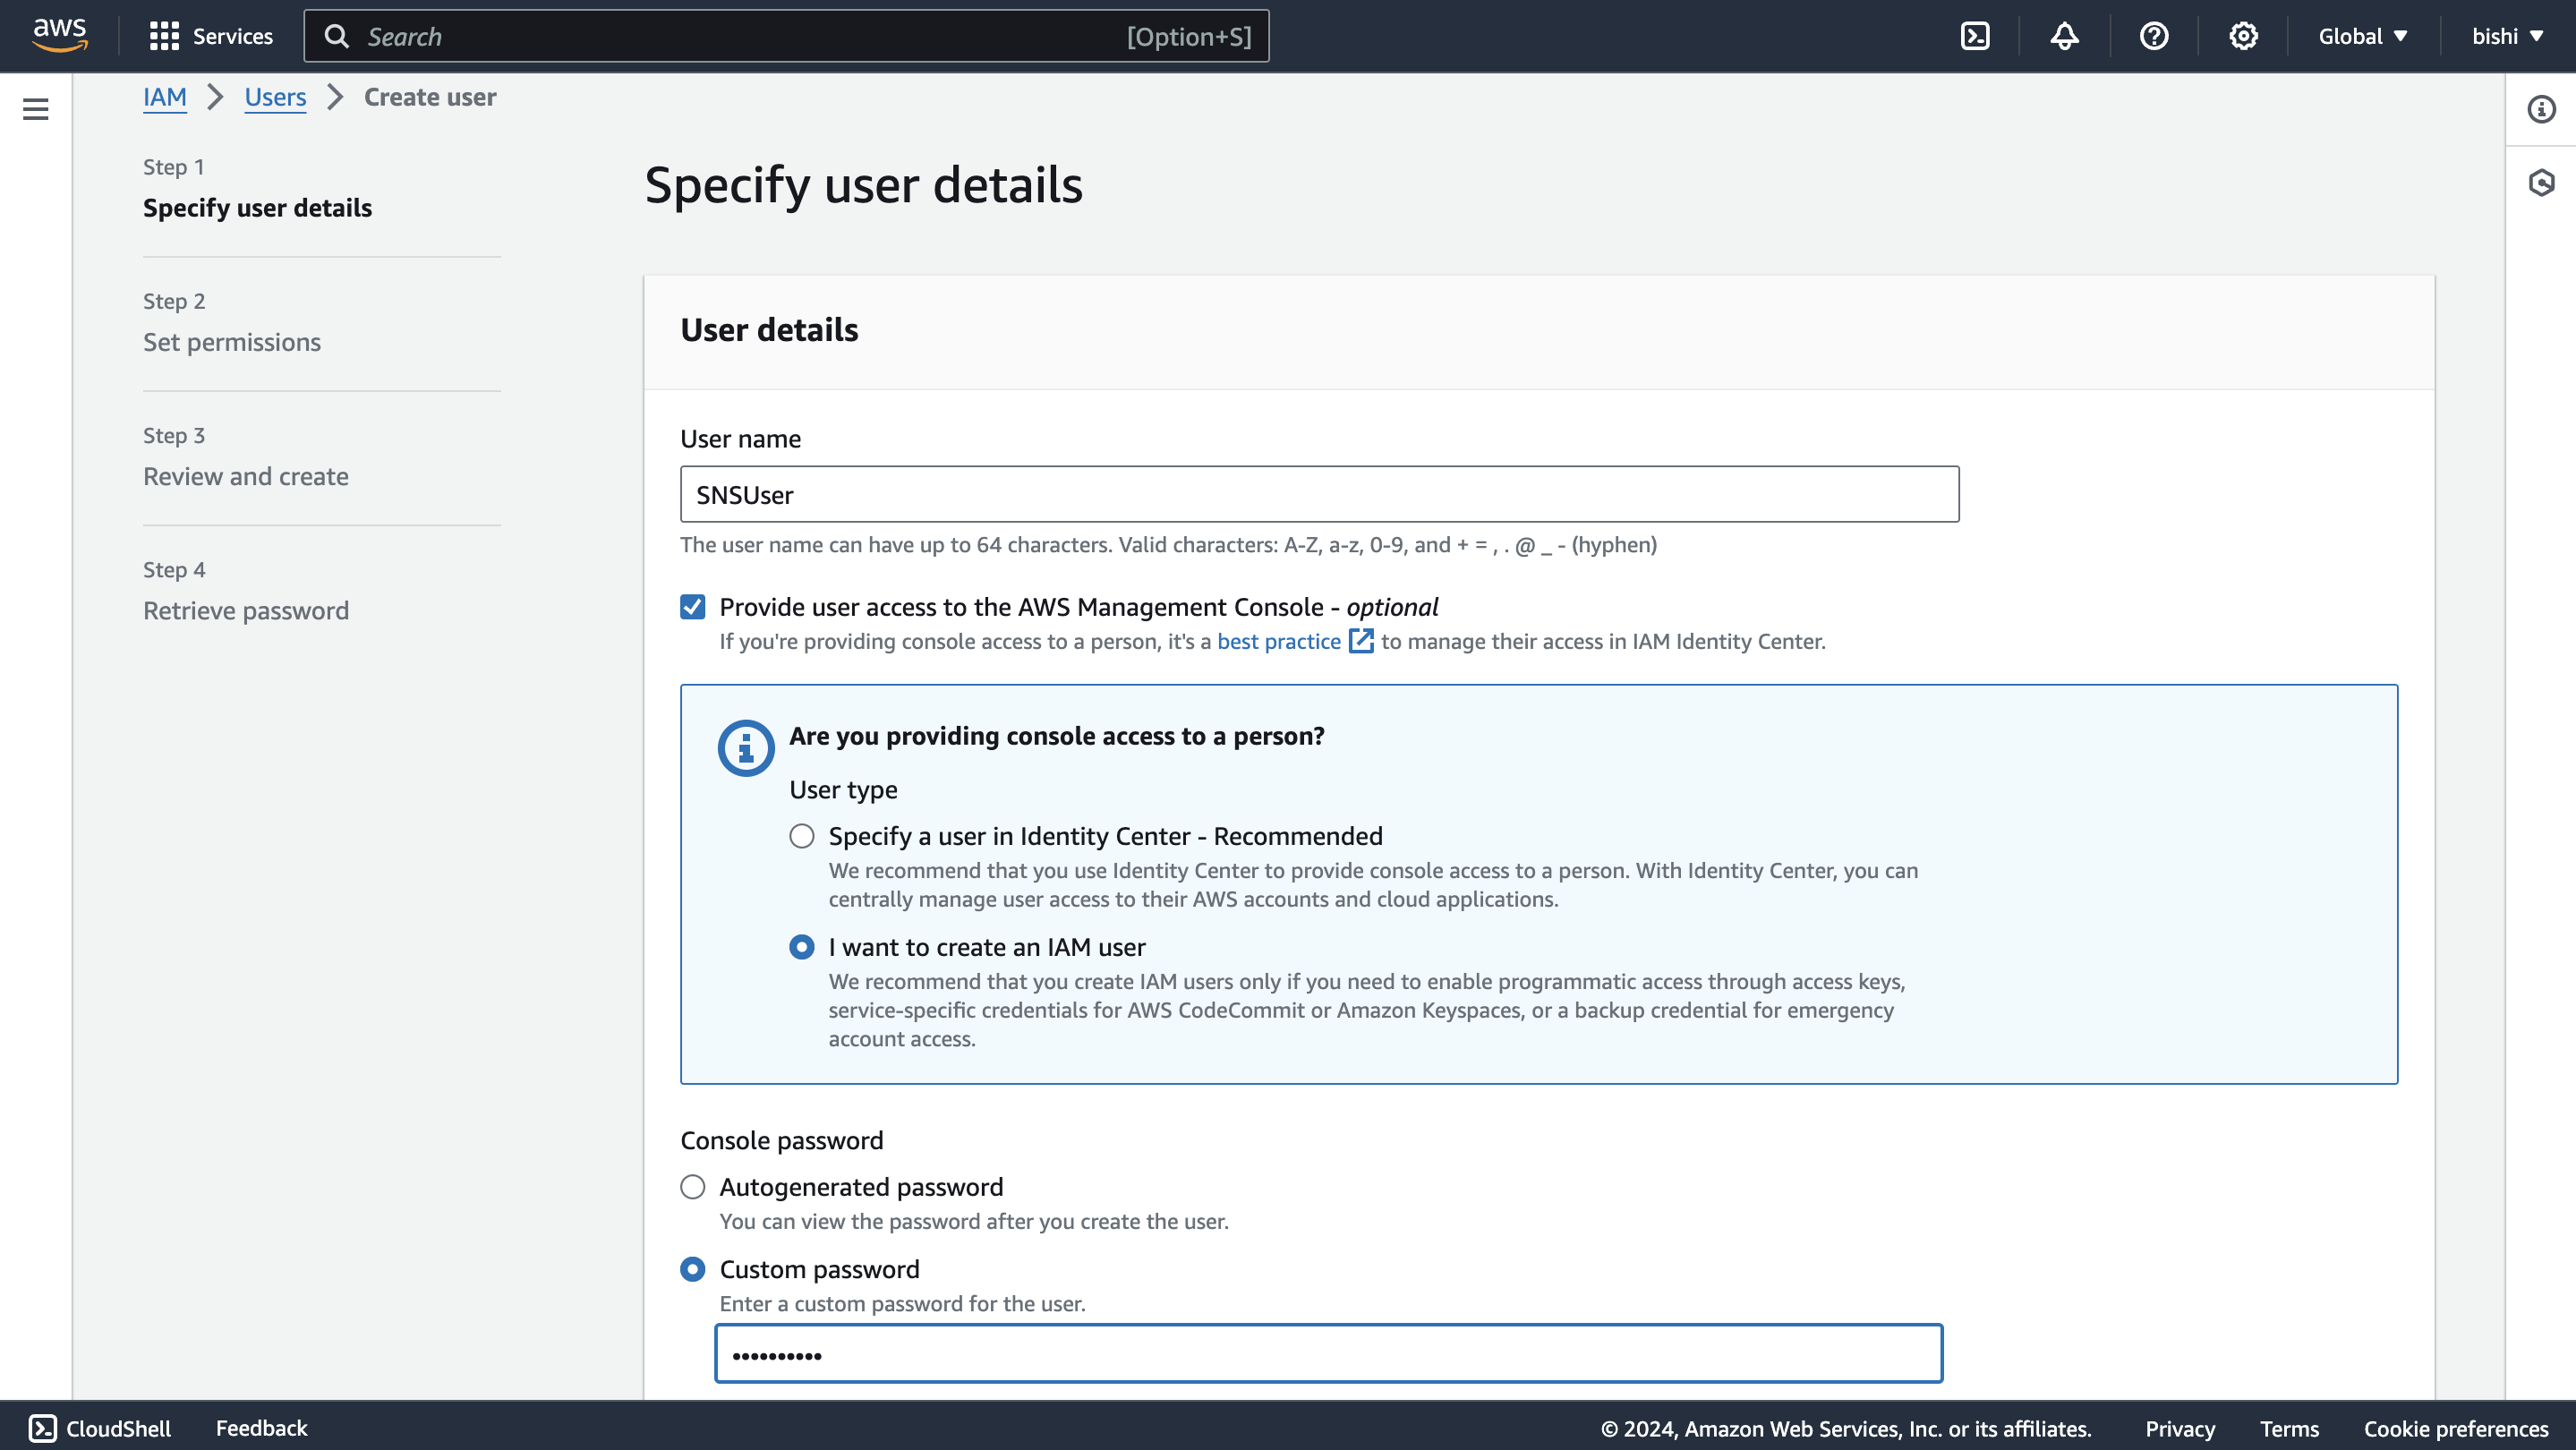
Enter a username, tick the "Provide user access to the AWS Management Console - optional" checkbox, and click "I want to create an IAM user". This will enable programmatic access through access keys.
<img src=https://raw.githubusercontent.com/ballerina-platform/module-ballerinax-aws.sns/main/docs/setup/resources/create-user-iam-user.png alt="Create IAM user" width="50%">
-
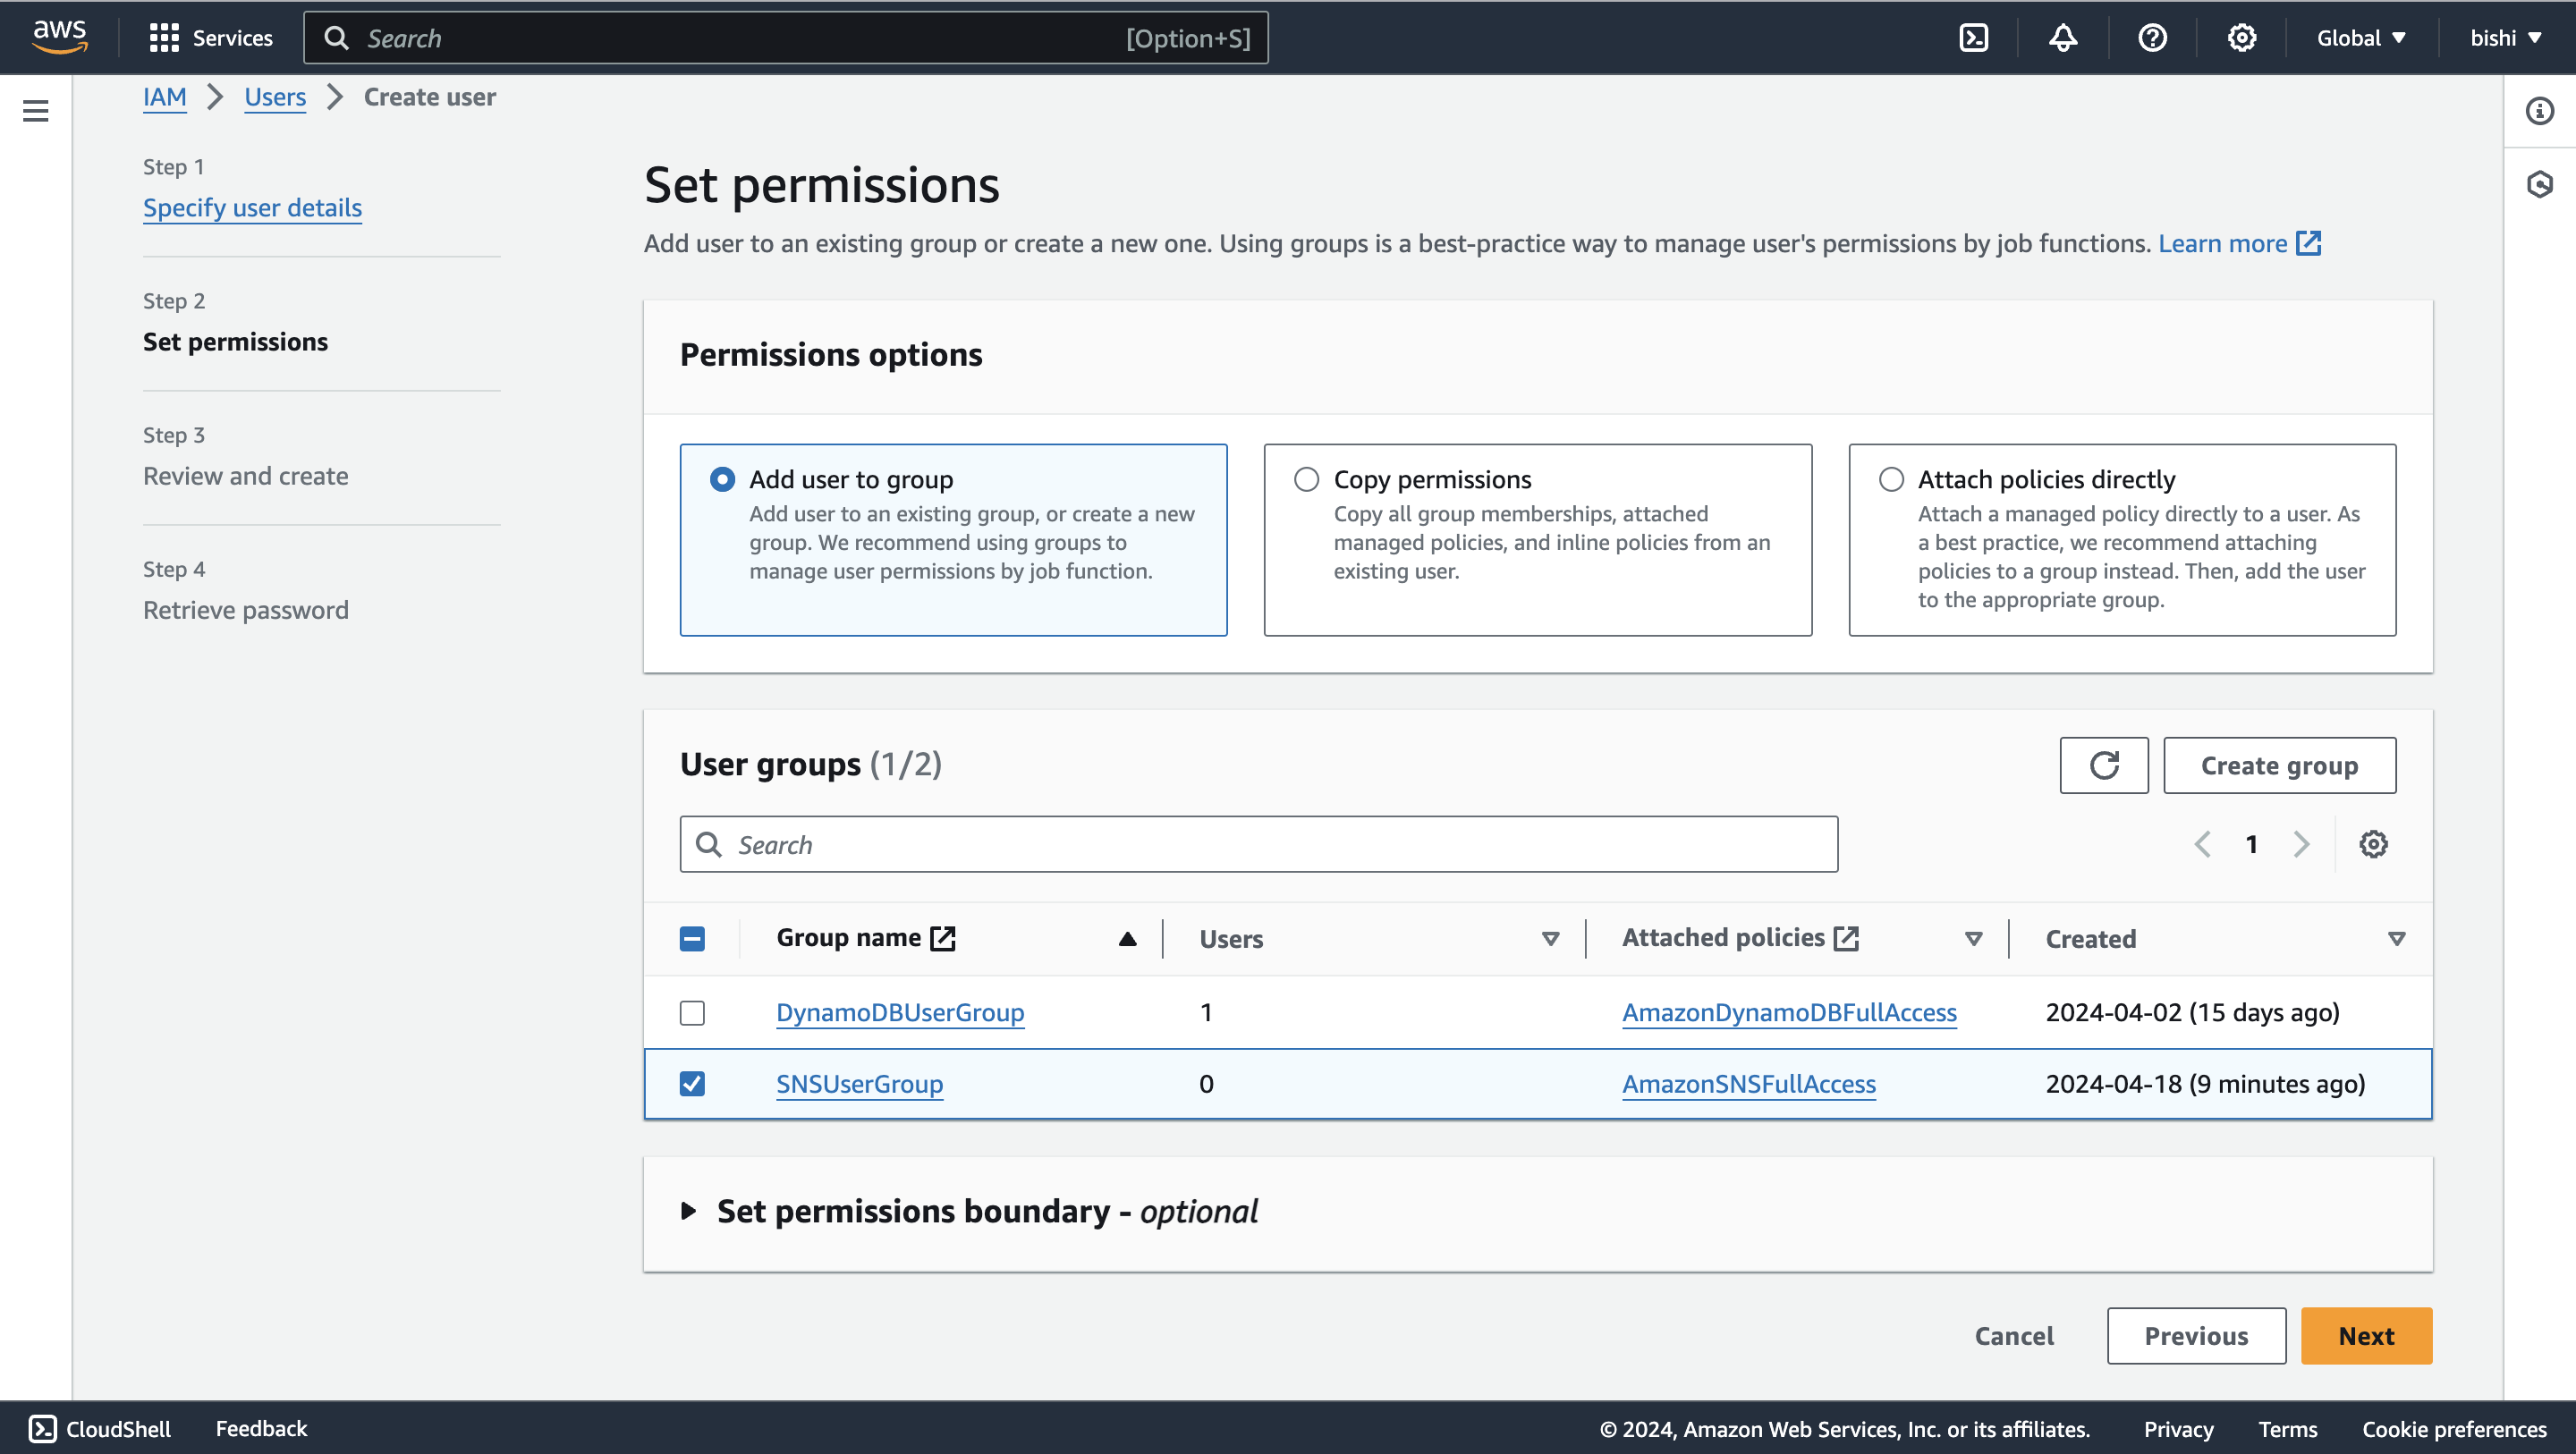
Click through the permission setup, and add the user to the user group we previously created.
<img src=https://raw.githubusercontent.com/ballerina-platform/module-ballerinax-aws.sns/main/docs/setup/resources/create-user-set-permission.png alt="Attach user group" width="50%">
-
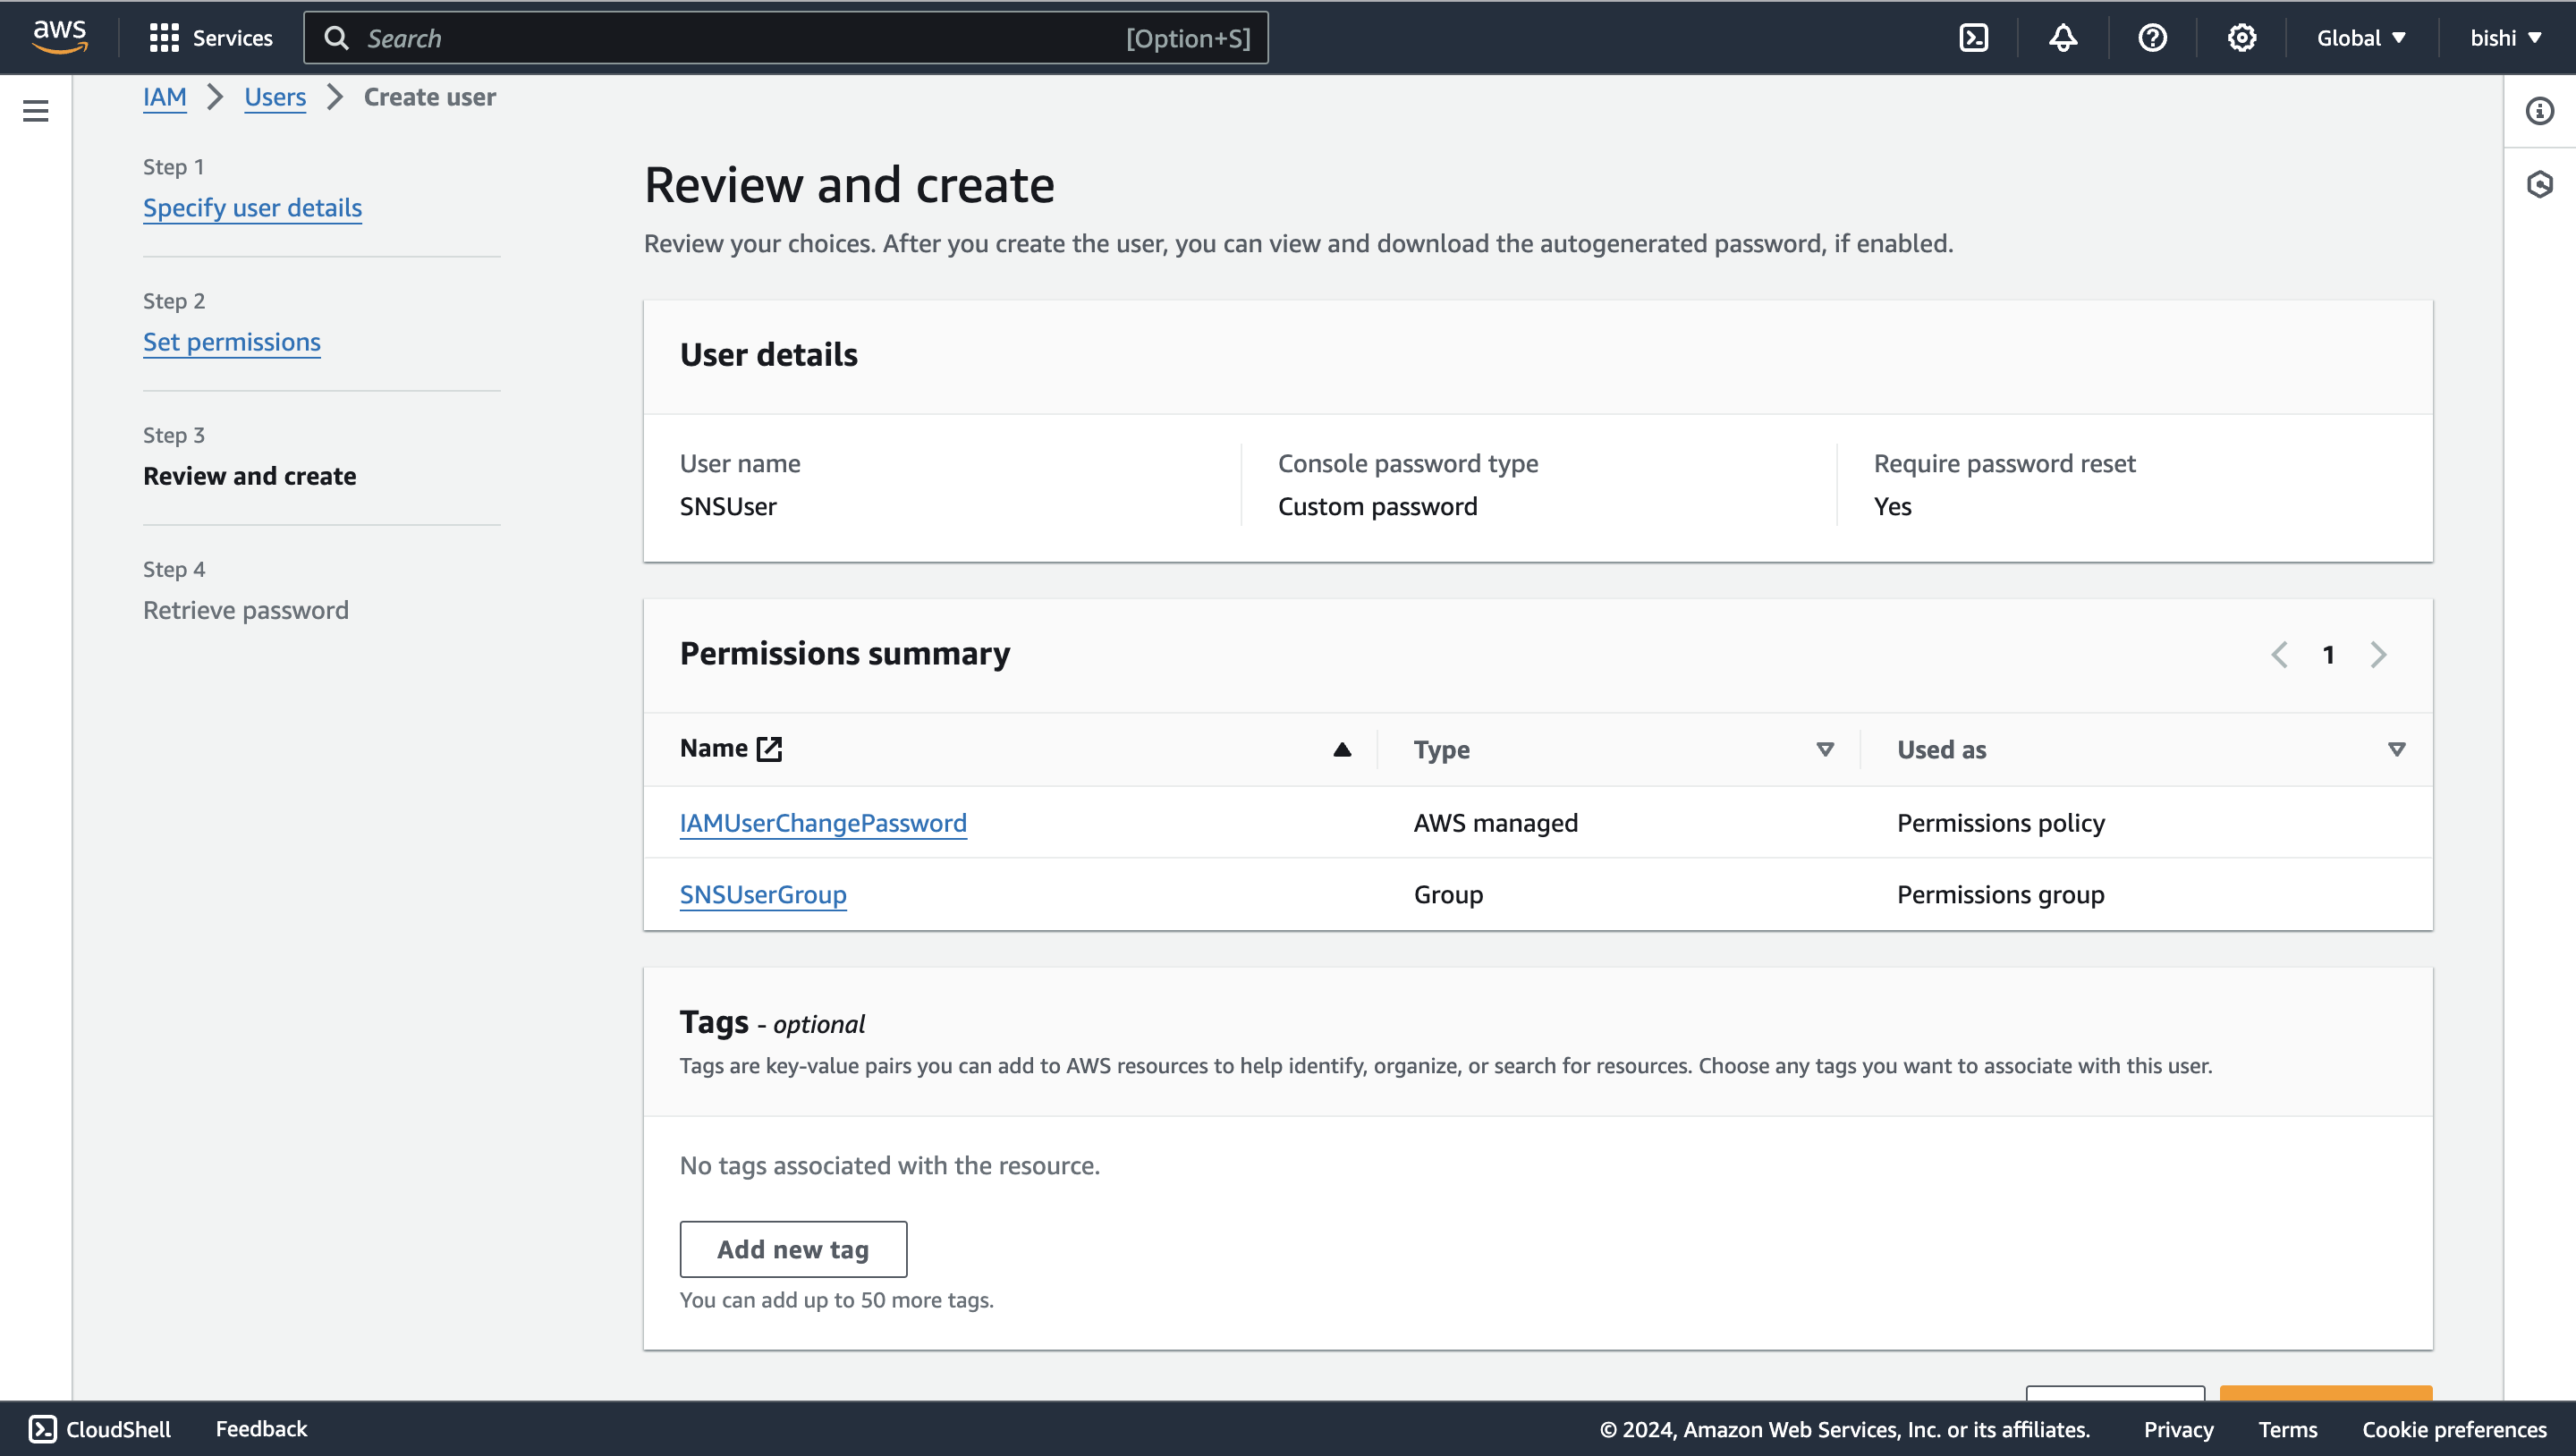
Review the details and click "Create user."
<img src=https://raw.githubusercontent.com/ballerina-platform/module-ballerinax-aws.sns/main/docs/setup/resources/create-user-review.png alt="Review user" width="50%">
- Generate access key ID and secret access key
-
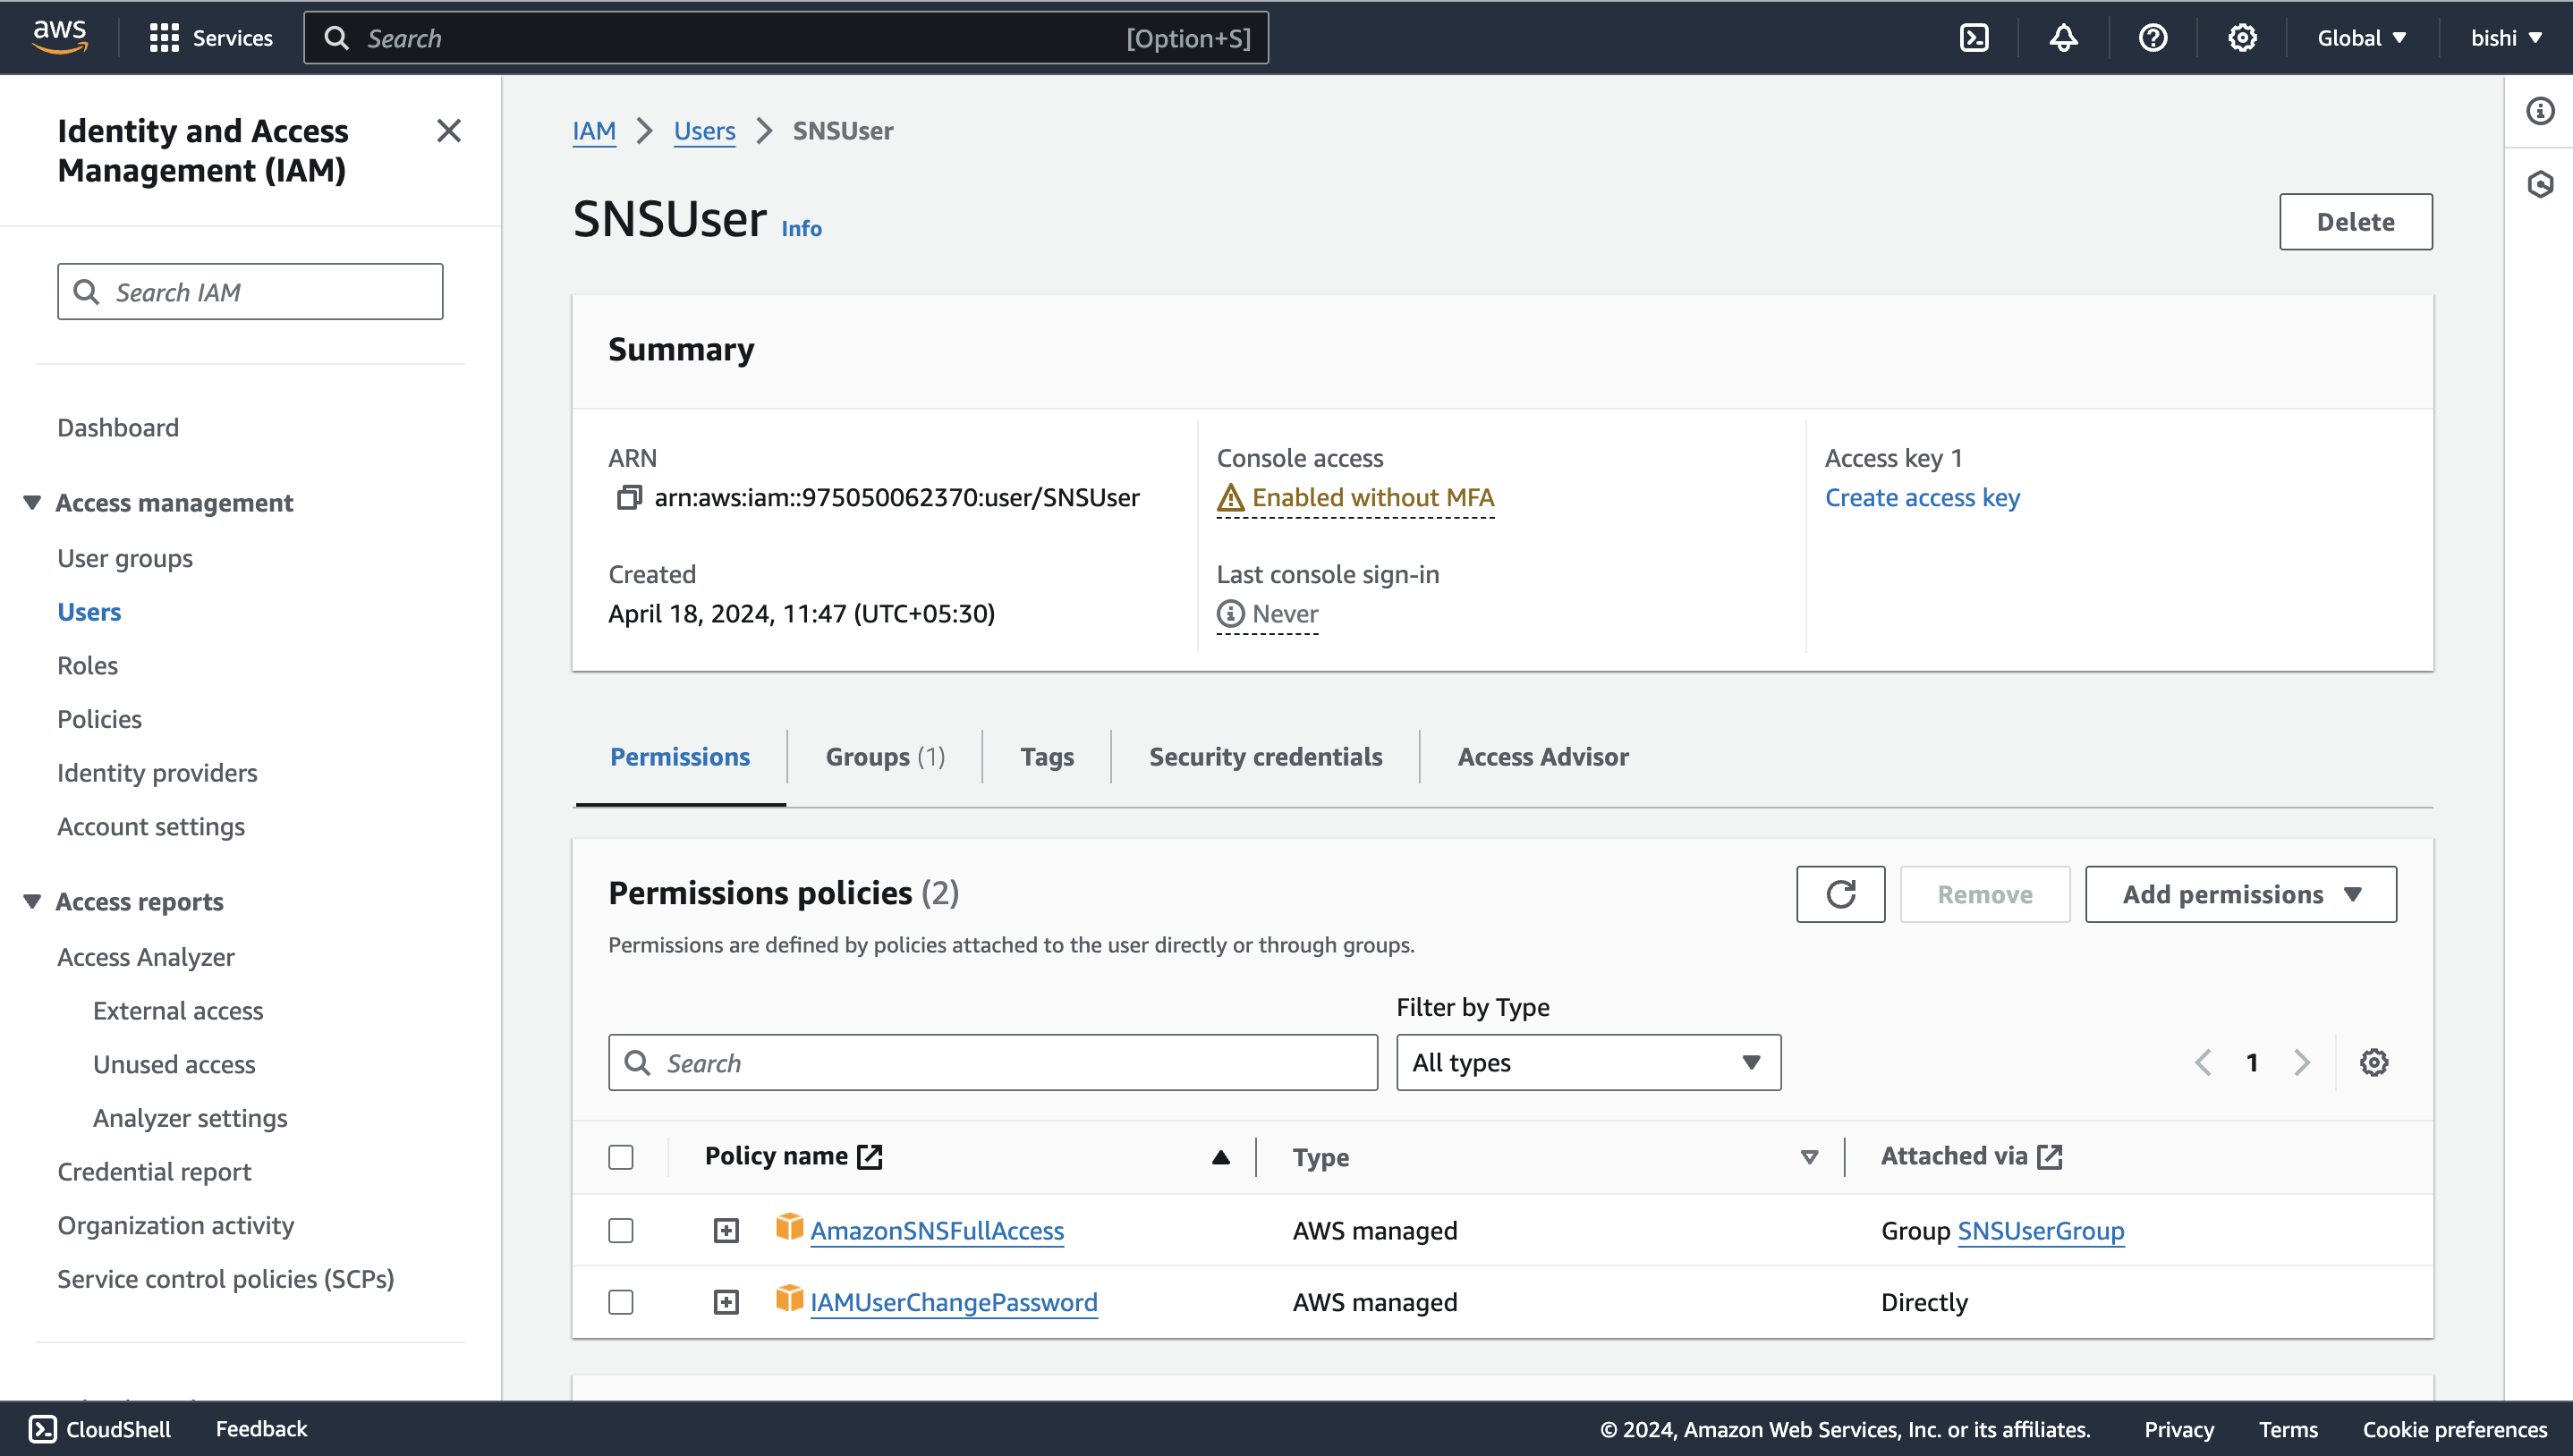
Once the user is created, you will see a success message. Navigate to the "Users" tab, and select the user you created.
<img src=https://raw.githubusercontent.com/ballerina-platform/module-ballerinax-aws.sns/main/docs/setup/resources/view-user.png alt="View User" width="50%">
-
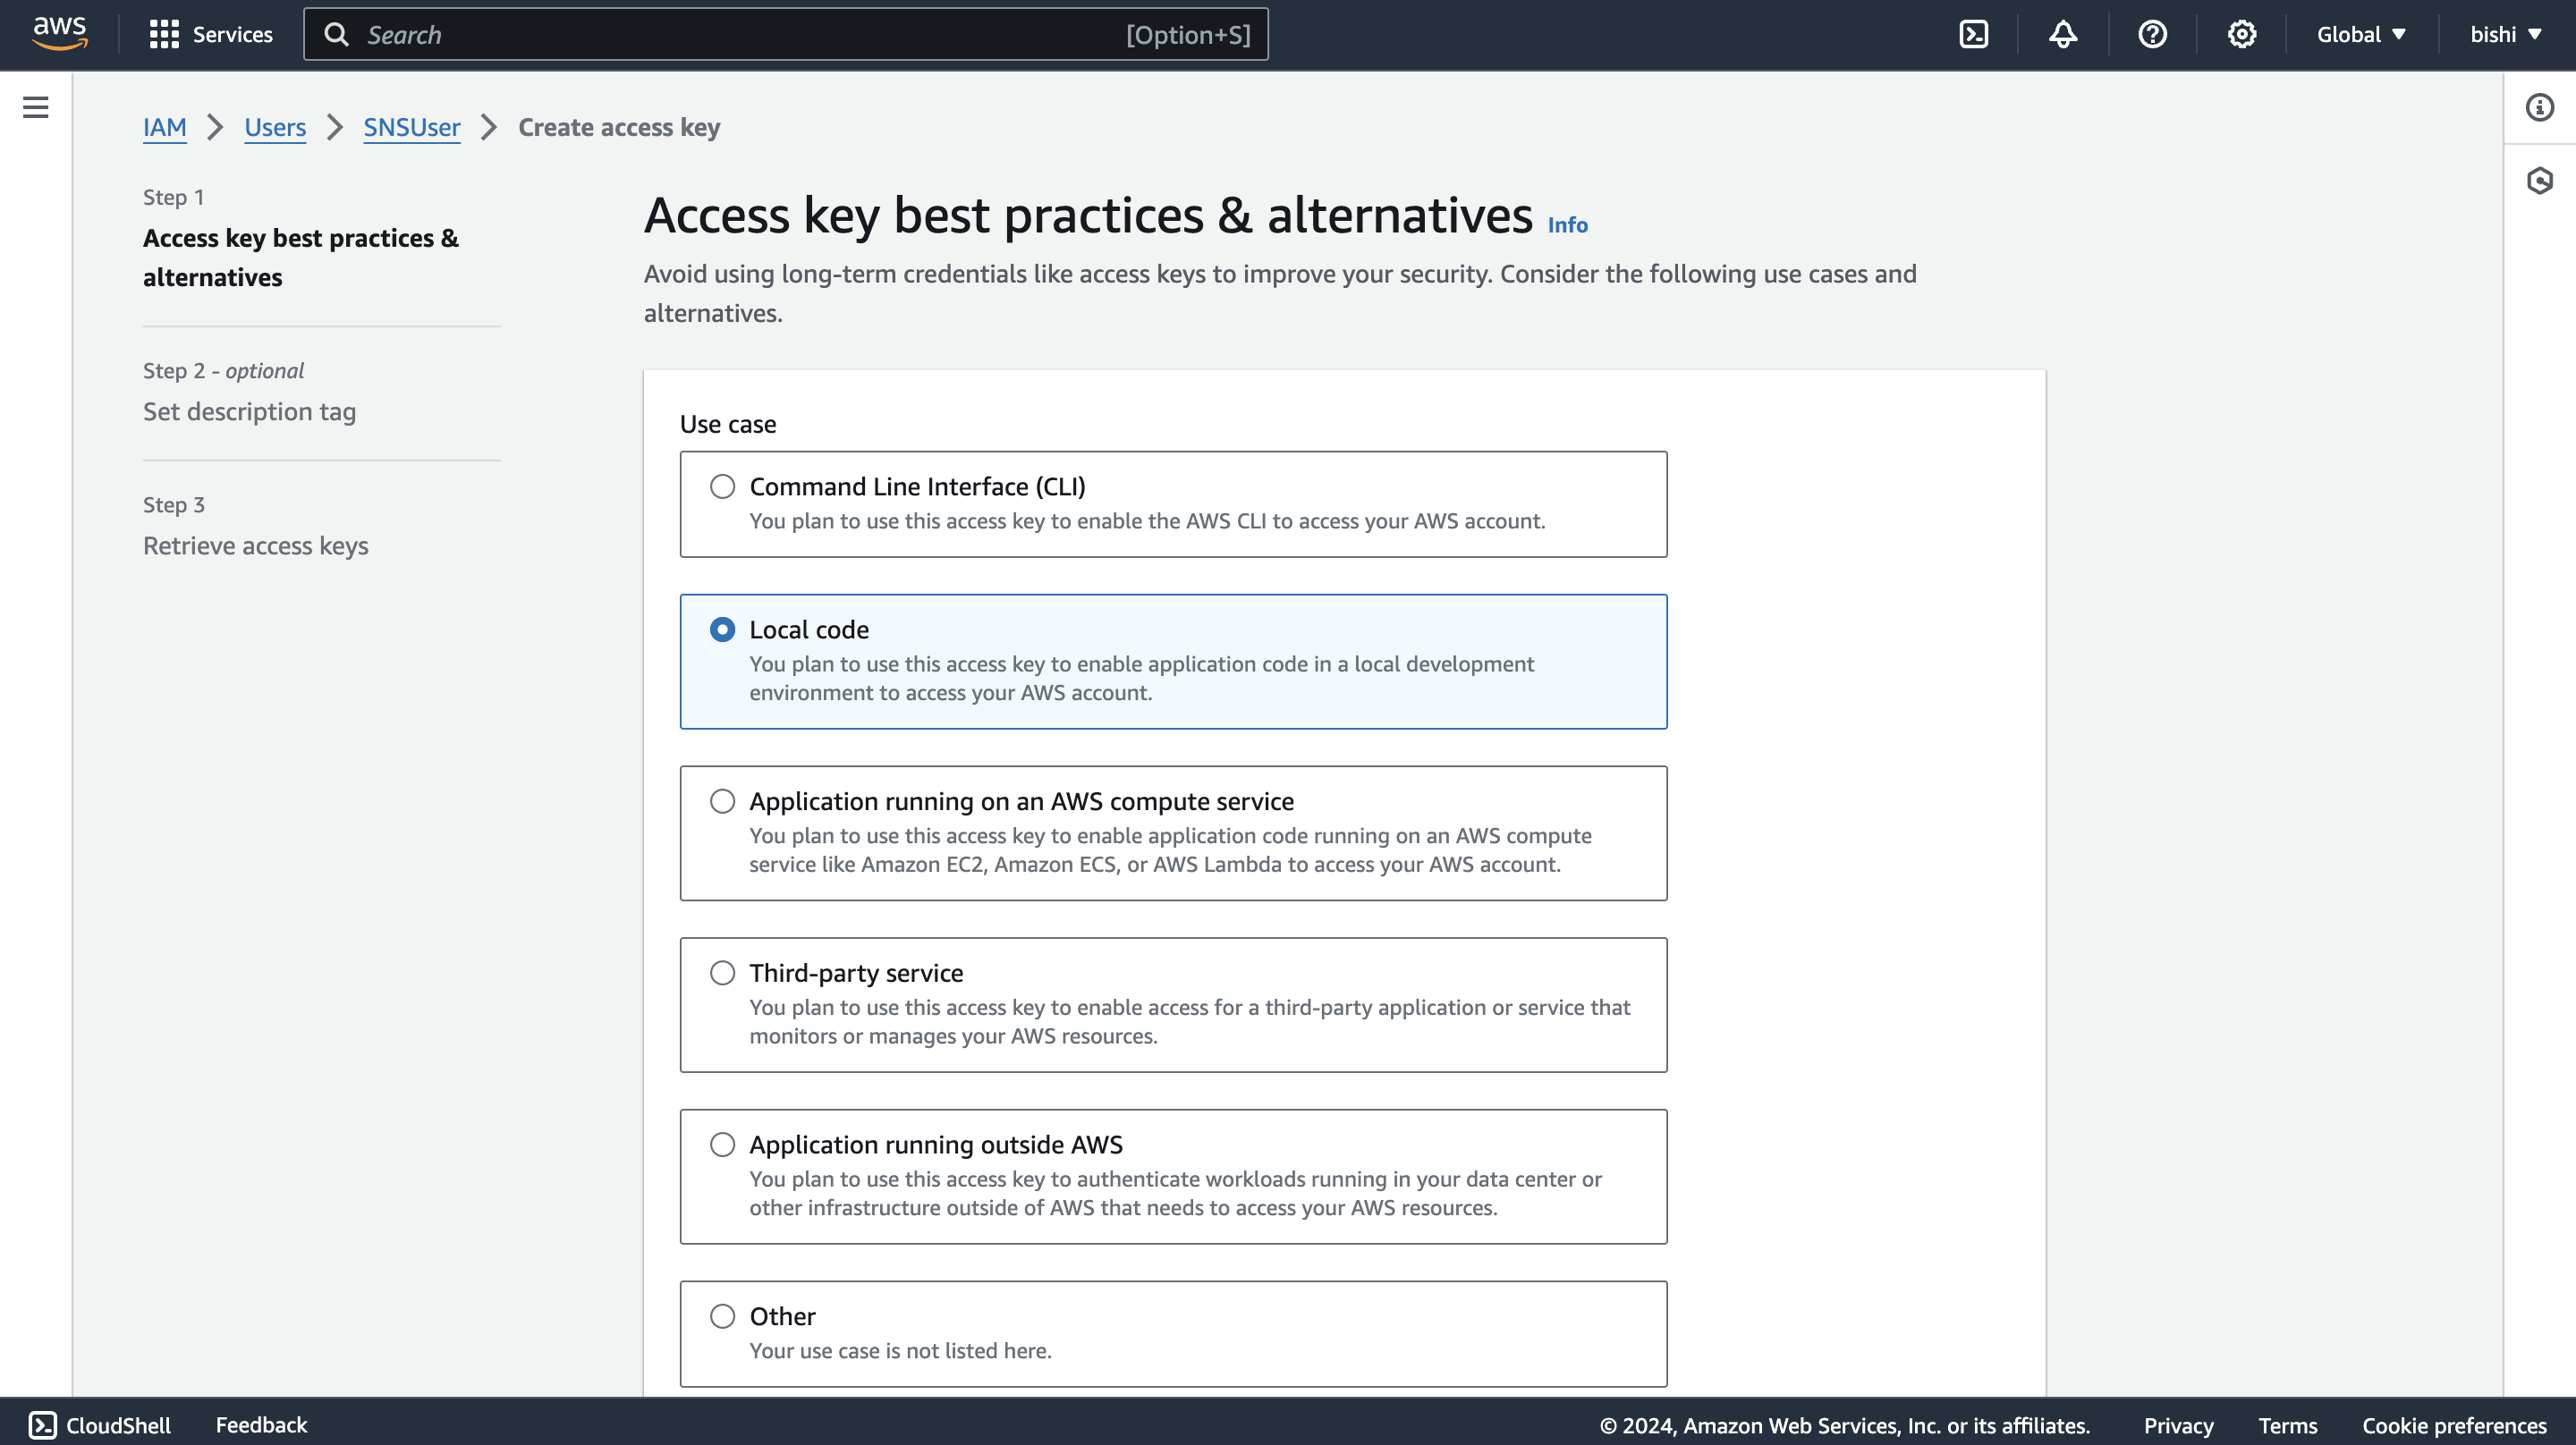
Click on the "Create access key" button to generate the access key ID and secret access key.
<img src=https://raw.githubusercontent.com/ballerina-platform/module-ballerinax-aws.sns/main/docs/setup/resources/create-access-key.png alt="Create access key" width="50%">
-
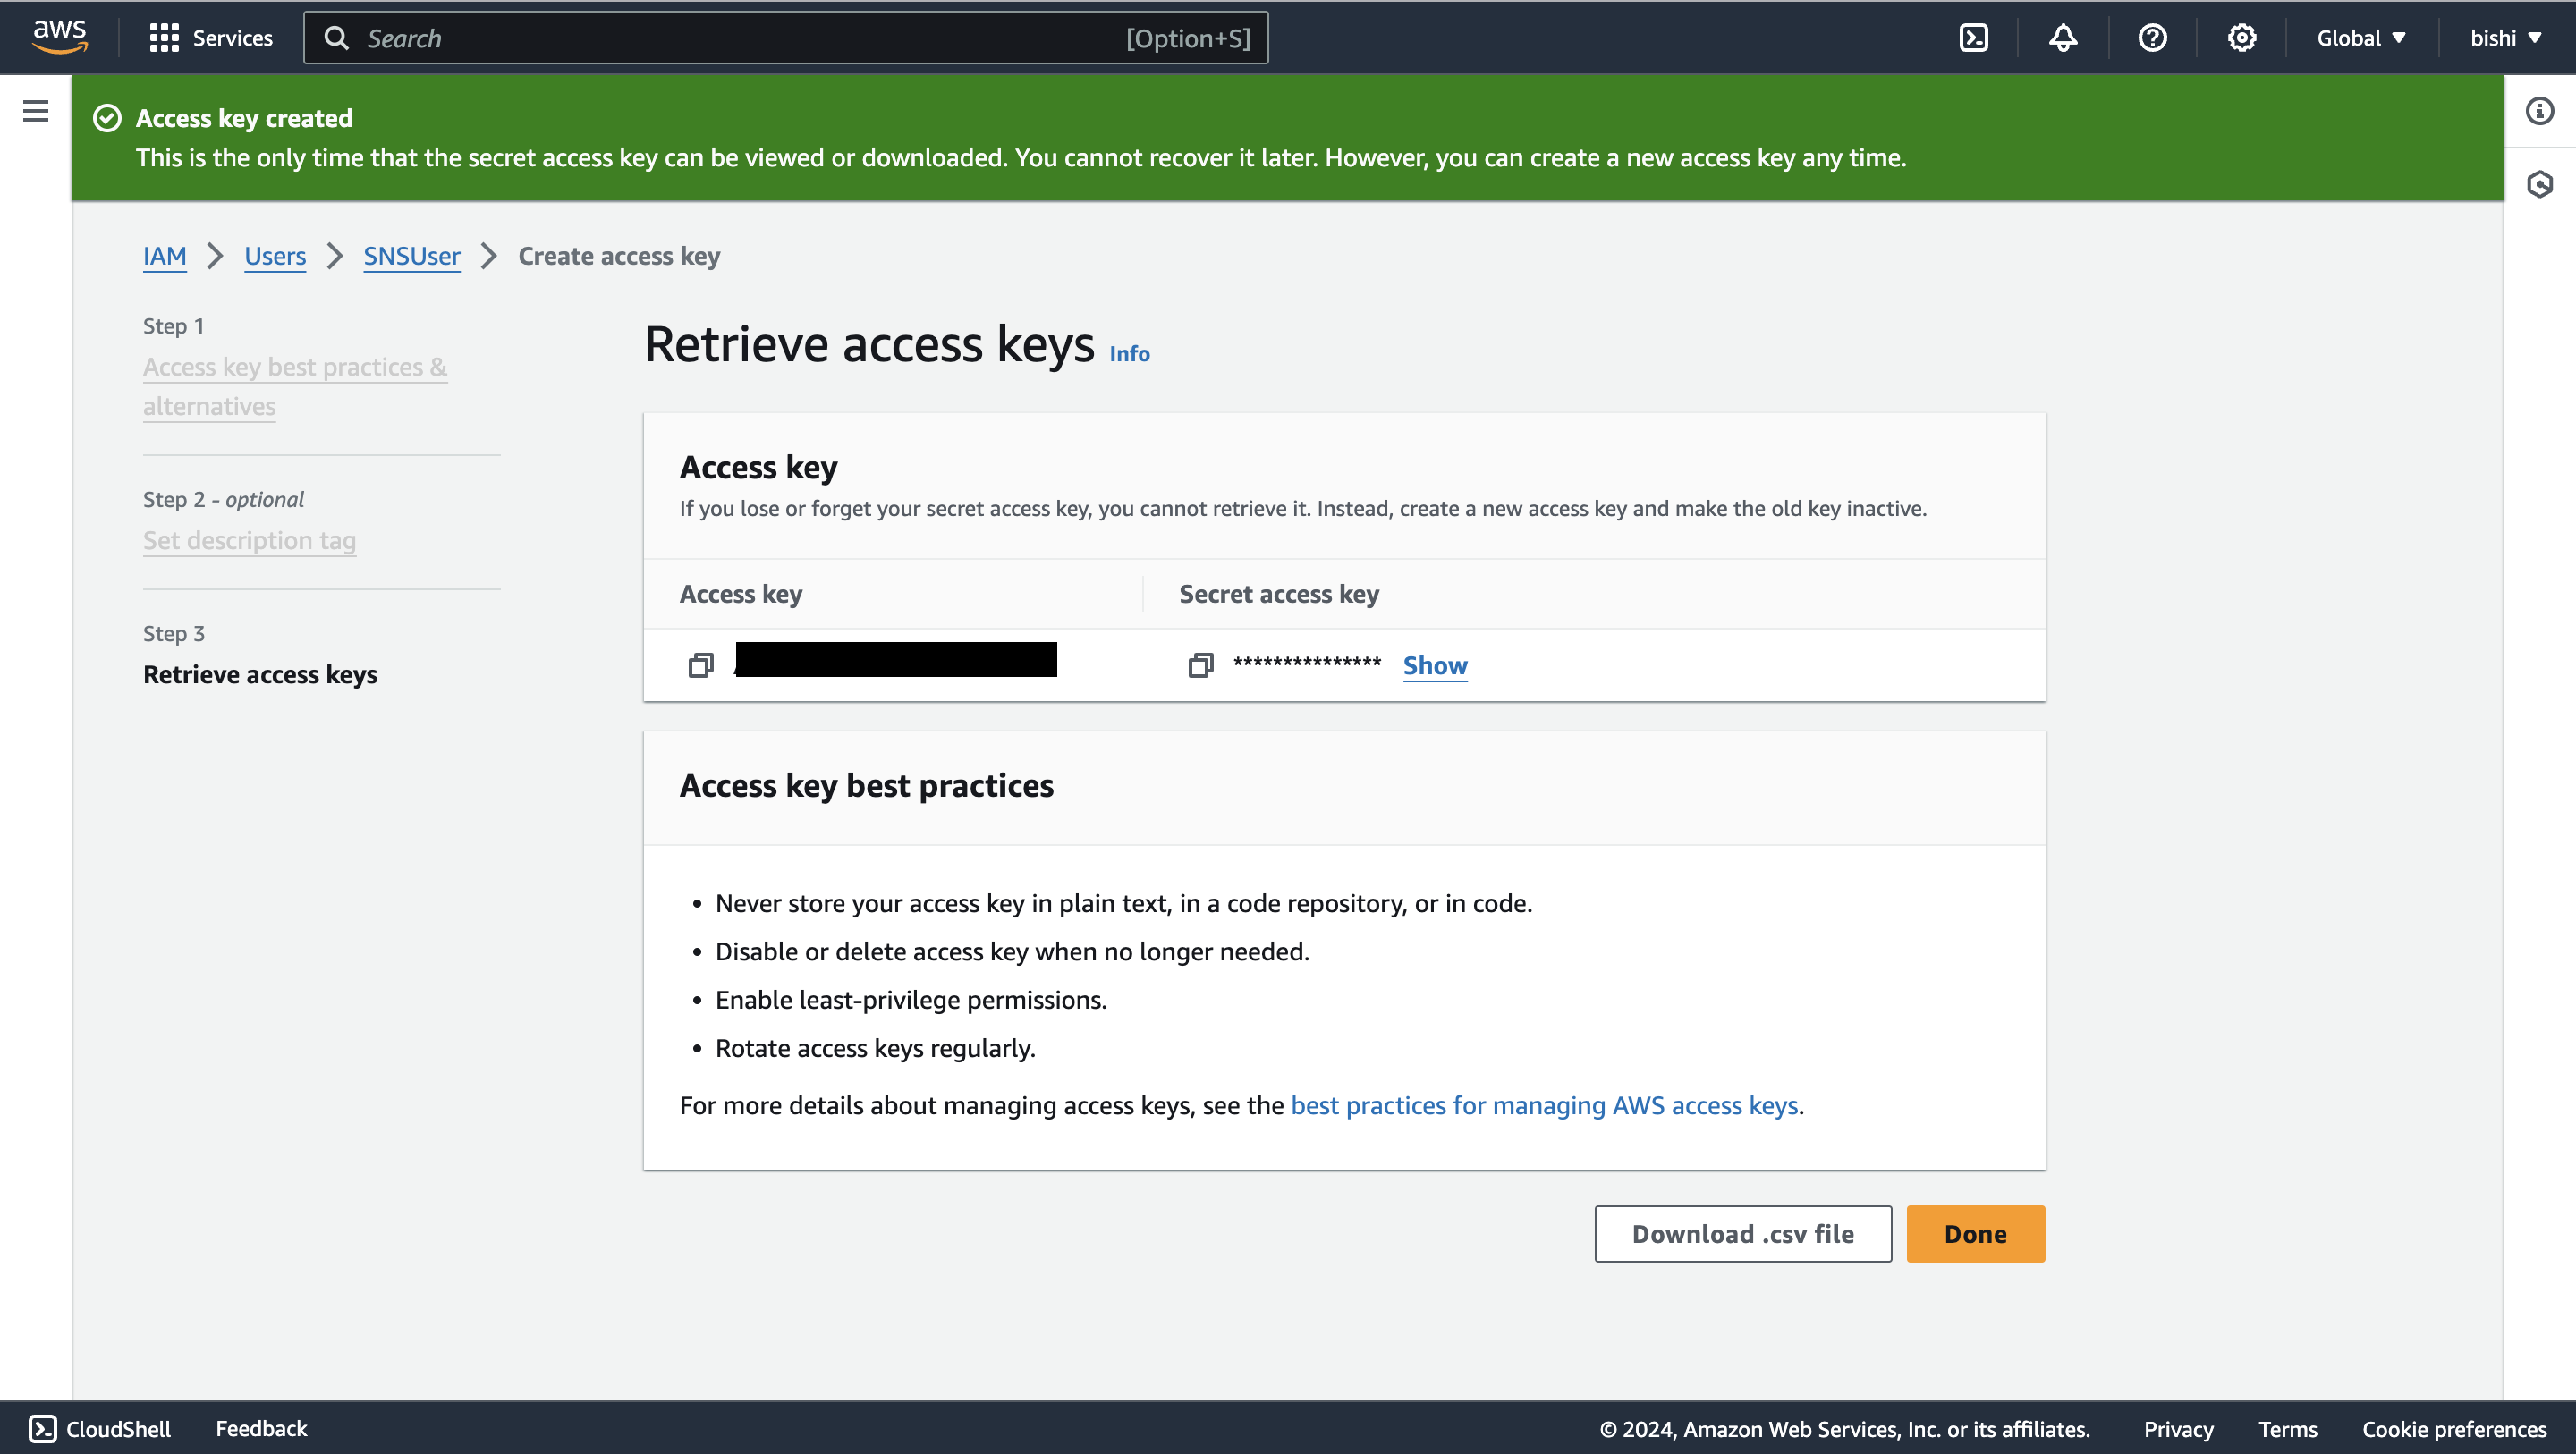
Follow the steps and download the CSV file containing the credentials.
<img src=https://raw.githubusercontent.com/ballerina-platform/module-ballerinax-aws.sns/main/docs/setup/resources/download-access-key.png alt="Download credentials" width="50%">
Quickstart
To use the aws.sns connector in your Ballerina project, modify the .bal file as follows:
Step 1: Import the connector
Import the ballerinax/aws.sns package into your Ballerina project.
import ballerinax/aws.sns;
Step 2: Instantiate a new connector
The sns:Client accepts a ConnectionConfig with a credentials field that supports three authentication modes.
Option 1: Static credentials
Use explicit AWS credentials. Suitable for local development and environments where credentials are managed directly.
sns:Client snsClient = check new ({
    credentials: {
        accessKeyId: "<AWS_ACCESS_KEY_ID>",
        secretAccessKey: "<AWS_SECRET_ACCESS_KEY>"
    },
    region: "<AWS_REGION>"
});
For temporary credentials (e.g., from aws sts get-session-token), include the session token:
sns:Client snsClient = check new ({
    credentials: {
        accessKeyId: "<AWS_ACCESS_KEY_ID>",
        secretAccessKey: "<AWS_SECRET_ACCESS_KEY>",
        sessionToken: "<AWS_SESSION_TOKEN>"
    },
    region: "<AWS_REGION>"
});
Option 2: AWS credentials file profile
Use a named profile from your ~/.aws/credentials file. Suitable for developer workstations with multiple AWS accounts.
sns:Client snsClient = check new ({
    credentials: {
        profileName: "my-profile",
        credentialsFilePath: "~/.aws/credentials"
    },
    region: "<AWS_REGION>"
});
Option 3: Default credential provider chain
Use sns:DEFAULT_CREDENTIALS to let the connector automatically resolve credentials from the environment. This is the recommended approach for AWS-managed environments.
sns:Client snsClient = check new ({
    credentials: sns:DEFAULT_CREDENTIALS,
    region: "<AWS_REGION>"
});
Credentials are resolved using the AWS SDK for Java 2.x DefaultCredentialsProvider.create() chain. Refer to the AWS SDK documentation for the current resolution order.
Step 3: Invoke the connector operation
Now, utilize the available connector operations.
string topicArn = check snsClient->createTopic("FirstTopic");
Step 4: Run the Ballerina application
Use the following command to compile and run the Ballerina program.
bal run
Examples
The sns connector provides practical examples illustrating usage in various scenarios. Explore these examples.
-
Football scores This example shows how to use SNS to implement an application to subscribe to receive football game scores.
-
Weather alert service This example shows how to use SNS to send weather alerts for multiple cities. Users can subscribe to different cities to receive alerts for their city only.
-
Pod Identity / default credentials This example shows how to use
DEFAULT_CREDENTIALSto run the connector without explicit credentials — works with EKS Pod Identity, ECS task roles, EC2 instance profiles, and AWS environment variables.
Issues and projects
The Issues and Projects tabs are disabled for this repository as this is part of the Ballerina library. To report bugs, request new features, start new discussions, view project boards, etc., visit the Ballerina library parent repository.
This repository only contains the source code for the package.
Building from the source
Prerequisites
-
Download and install Java SE Development Kit (JDK) version 21. You can download it from either of the following sources:
Note: After installation, remember to set the
JAVA_HOMEenvironment variable to the directory where JDK was installed. -
Download and install Ballerina Swan Lake.
-
Download and install Docker.
Note: Ensure that the Docker daemon is running before executing any tests.
-
Generate a Github access token with read package permissions, then set the following
envvariables:export packageUser=<Your GitHub Username> export packagePAT=<GitHub Personal Access Token>
Build options
Execute the commands below to build from the source.
-
To build the package:
./gradlew clean build -
To run the tests:
./gradlew clean test -
To build the without the tests:
./gradlew clean build -x test -
To debug package with a remote debugger:
./gradlew clean build -Pdebug=<port> -
To debug with Ballerina language:
./gradlew clean build -PbalJavaDebug=<port> -
Publish the generated artifacts to the local Ballerina central repository:
./gradlew clean build -PpublishToLocalCentral=true -
Publish the generated artifacts to the Ballerina central repository:
./gradlew clean build -PpublishToCentral=true
Contributing to Ballerina
As an open source project, Ballerina welcomes contributions from the community.
For more information, go to the contribution guidelines.
Code of conduct
All contributors are encouraged to read the Ballerina Code of Conduct.
Useful links
- For more information go to the
aws.snspackage. - For example demonstrations of the usage, go to Ballerina By Examples.
- Chat live with us via our Discord server.
- Post all technical questions on Stack Overflow with the #ballerina tag.