retroJam, a multi retro game console emulator
May 6, 2026 · View on GitHub
This project is a multi retro console emulator primarely for Adafruit Fruit Jam, capable of emulating a few classic 8-bit systems and even the 16-bit Sega Genesis.
Some emulators have savestate support.
It also can play .wav music files.
Other configurations are possible. See below.
See the release section for precompiled binaries and metadata packs.
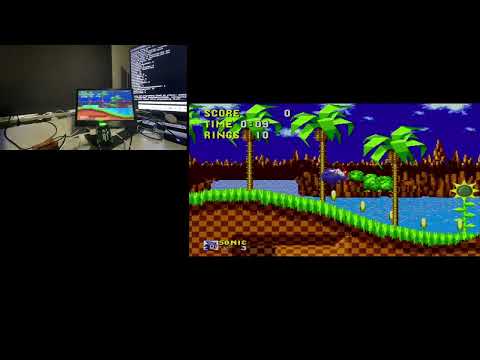
Video
Click on image below to see a demo video.
Supported Emulators
Use a FAT32 formatted sd-card and put your roms on it. You can use folders to origanize them. This emulator framework supports the following file extensions:
- Nintendo Entertainment System:
.nesNintendo Entertainment System. With save state support..fdsFamicom Disk System games. See #famicom-disk-system-fds-games.nsfNintendo Sound Format. With controls to change track, stop and resume playback. See #playing-nsf-audio-files
.gg- Sega Game Gear - With save state support..sms- Sega Master System - With save state support..gb- Nintendo GameBoy.gbc- Nintendo GameBoy Color.md,.bin,.gen- Sega Genesis/MegaDrive. Note: Sound quality is average.
Gamepad and keyboard usage
| (S)NES | Genesis | XInput | Dual Shock/Sense | |
|---|---|---|---|---|
| Button1 | B | A | A | X |
| Button2 | A | B | B | Circle |
| Select | select | Mode or C | Select | Select |
Menu
Gamepad buttons:
- UP/DOWN: Next/previous item in the menu.
- LEFT/RIGHT: next/previous page.
- Button2: Open folder/start game.
- Button1: Back to parent folder.
- START: Show metadata and box art (when available)
- SELECT: Opens a setting menu. Here you can change settings like screen mode, scanlines, framerate display, menu colors and other board specific settings. Settings can also be changed in-game by pressing some button combinations as explained below. The settings menu can also be opened in-game.
When using an USB-Keyboard:
- Cursor keys: Up, Down, left, right
- Z: Back to parent folder
- X: Open Folder/flash and start a game
- S: Show metadata and box art (when available).
- A: acts as the select button.
Emulator (in game)
Gamepad buttons:
- SELECT + START, Xbox button: opens the settings menu. From there, you can:
- Quit the game and return to the SD card menu
- Manage save states (NES/SMS/Game Gear only). Load or save your game state to one of 5 slots. Enable auto save/load state on exit/start.
- Adjust settings and resume your game.
- SELECT + UP/SELECT + DOWN: switches screen modes.
- SELECT + Button1/Button2: toggle rapid-fire.
- START + Button2: Toggle framerate display
- START + DOWN : (quick) Save state. (slot 5)
- START + UP : (quick) Load state. (slot 5)
- Pimoroni Pico DV Demo Base only: SELECT + LEFT: Switch audio output to the connected speakers on the line-out jack of the Pimoroni Pico DV Demo Base. The speaker setting will be remembered when the emulator is restarted.
- Fruit Jam Only
- SELECT + UP: Toggle scanlines.
- pushbutton 1 (on board): Mute audio of built-in speaker. Audio is still outputted to the audio jack.
- pushbutton 2 (on board) or SELECT + RIGHT: Toggles the VU meter on or off. (NeoPixel LEDs light up in sync with the music rhythm)
- START + LEFT/RIGHT: Adjust volume of built-in speaker and external audio jack.
- RP2350 with PSRAM only: Record about 30 seconds of audio by pressing START to pause the game and then START + BUTTON1. Audio is recorded to /soundrecorder.wav on the SD-card.
- Genesis Mini Controller: When using a Genesis Mini controller with 3 buttons, press C for SELECT. 8 buttons Genesis controllers press MODE for SELECT
- USB-keyboard: When using an USB-Keyboard
- Cursor keys: up, down, left, right
- A: SELECT
- S: START
- Z: Button1
- X: Button2
NES Save States should work for mapper 0,1,2,3 and 4. Other mappers may or may not work. Below the games that use these mappers.
- https://nesdir.github.io/mapper1.html
- https://nesdir.github.io/mapper2.html
- https://nesdir.github.io/mapper3.html
- https://nesdir.github.io/mapper4.html
The mapper number is also shown in the Save State screen.
Famicom Disk System (FDS) Games
FDS games are supported with the following requirements:
- A BIOS file is required. Place it at
/bios/fds-bios.romon the SD card. - An RP2350 board with PSRAM is required.
- You need roms with the
.fdsextension.
FDS games have these features:
- For games that support write save data back to disk, you must go back to the menu to save the game. Saves are written to
/saves/gamename_fds.sav. Save states are not supported for FDS games. - Audio is not perfect but acceptable.
Swapping Disks
When prompted to swap disks, use the in-game settings menu:
- Press SELECT + START to open the settings menu.
- Select the first option to change the disk.
- Press LEFT/RIGHT to choose the disk side.
- Press Button2 to confirm and return.
Auto Swapping disks
In the settings menu, there is an option Auto Swap FDS Disks. This is disabled by default. When enabled, the emulator will automatically swap disks when needed. Note that in some cases you still need to manually swap the disks.
Playing NSF audio files
The emulator can play Nintendo Sound Format files. These are roms with the .nsf extension.
Each NSF file can have multiple tracks. Loading a .nsf rom from the menu will automatically start the first track. Each track is played for the maximum duration of 3 minutes. Then the next track is played. When there is silence for more than 4 seconds, the next track is played.
Controls
- Right/Left: Next/Previous track.
- Button1: Stop Playback
- Button2: Resume playback.
- Select + Start: Back to the menu.
Using Metadata
When a game is selected in the menu, pressing the START button will show metadata information about the game, such as title, publisher, year of release, genre, and box art (if available). For this to work, extract the metadata packs from the releases section to your SD card.
Music playback in menu
The menu allows you to play music files. Files must meet the following requirements:
- Format: WAV
- Bit depth: 16-bit or 24-bit (will be downsampled to 16-bit)
- Sample rate: 44.1 kHz
- Channels: Stereo
- File extension:
.wav
You can find some free retro tunes here: https://lonepeakmusic.itch.io/retro-midi-music-pack-1
Starting playback
- Select a music file from the menu.
- Press Button2 or START to start playback.
- Press Button2 or START again to stop playback.
Converting MP3 to WAV
You can easily convert MP3 files to WAV using Audacity:
- Open the MP3 file in Audacity.
- Go to File → Export → Export Audio.
- Choose the following settings:
- Format: WAV (Microsoft)
- Channels: Stereo
- Sample rate: 44,100 Hz
- Encoding: Signed 16-bit PCM
- Copy the exported WAV file to the SD card.
Other configurations
Murmulator M2
To be discussed.
Adafruit Feather RP2350 with HSTX and PSRAM
This config can be used for breadboard projects and requires the following hardware:
- Breadboard.
- Adafruit Feather RP2350 with HSTX and PSRAM
- TLV320DAC3100 - I2S DAC with Headphone and Speaker Out
- Adafruit Micro SD SPI or SDIO Card Breakout Board - 3V ONLY!
- Adafruit RP2350 22-pin FPC HSTX to DVI Adapter for HDMI Displays
- 22-pin 0.5mm pitch FPC Flex Cable for DSI CSI or HSTX - 5cm
- Speaker(s) like these:
- For USB gamecontrollers:
- When using a WII-Classic controller for input:
Note
Breadboard setups can introduce signal interference at higher clock speeds, which may result in video artifacts when running Genesis emulation. #7
How to Wire:
Micro SD Breakout:
| Breakout Pin | Feather Pin | GPIO |
|---|---|---|
| 3V | 3.3V | - |
| GND | GND | - |
| CLK | 6 | 6 |
| CS | 5 | 5 |
| SO | 4 | 4 |
| SI | MO | 23 |
USB- C Breakout for connecting your game controller:
Warning
Connect your USB game controller to this USB port. Do not connect power. Use the USB-port on the feather to connect power.
| Breakout Pin | Feather Pin | GPIO |
|---|---|---|
| VBUS | USB | - |
| GND | GND | - |
| D+ | 24 | 24 |
| D- | 25 | 25 |
I2S DAC
| Breakout Pin | Feather Pin | GPIO |
|---|---|---|
| VIN | USB | - |
| GND | GND | - |
| SCL | SCL | 3 |
| SDA | SDA | 2 |
| DIN | 11 | 11 |
| WSEL | 10 | 10 |
| BCK | 9 | 9 |
| RST | A0 | 26 |
Building from source
If you want to build the project yourself, follow these steps:
This project requires the Raspberry Pi Pico SDK and PIO USB. Follow these steps:
-
Set up the Pico SDK environment:
export PICO_SDK_PATH=/path/to/pico-sdk -
Download and extract the latest PICO-PIO-USB repo in a folder of your choice: https://github.com/sekigon-gonnoc/Pico-PIO-USB/releases 0.7.2 is the latest as of this writing.
wget https://github.com/sekigon-gonnoc/Pico-PIO-USB/archive/refs/tags/0.7.2.zip unzip 0.7.2.zip -
Set PICO_PIO_USB_PATH environment variabele:
export PICO_PIO_USB_PATH=`pwd`/Pico-PIO-USB-0.7.2 -
Get the repo and initialize submodules in a folder of your choice:
git clone https://github.com/fhoedemakers/retroJam.git cd retroJam git submodule update --init --recursive -
Create build directory and compile, do this in the directory where you downloaded the retroJam repo:
chmod +x buildAll.sh ./buildAll.sh -
Flash the resulting
.uf2file from thereleasesfolder to your RP2350 board. -
Copy your roms to the sd-card and play!
Hardware
This project is designed for:
- Board: Adafruit Fruit Jam
- Controllers: USB Dual Shock, Dual Sense, XInput (XBOX), NES USB controller, and Wii Classic Controller support via STEMMA QT.
Other boards may follow. PSRAM must be available for it to work.
- USB controller support (submodule)
Credits
Based on pico-infonesPlus by @frenskefrens