Exploring distributional shift in imitation learning
January 19, 2020 · View on GitHub
In this tutorial, we are going to explain step by step how to install the simulator, how to collect our own dataset, how to reproduce the results obtained in the paper Exploring the Limitations of Behavior Cloning for Autonomous Driving, how the inputs and outputs are handled, how the models are constructed and how to come over with our own models and benchmark.
Requirements
In order to avoid hardware/software-related issues, we recommand the following requirements to be fulfilled.
- Hardware: A computer with a dedicated GPU capable of running Unreal Engine. NVIDIA 1070 or better is recommended.
- OS: Ubuntu also compatible with CARLA (16.04)
CARLA installation
-
First you need to download the version 0.8.2 of CARLA. This version is the latest stable release. It can be dowloaded here.
-
Extract the files and place them into an appropriate folder.
-
Inside the downloaded package you should find a shell script called
CarlaUE4.sh, this script launches the CARLA simulator.Run this script without arguments to launch CARLA simulator in standalone mode with default settings
./CarlaUE4.shThis launches the simulator window in full-screen, and you should be able now to drive around the city using the WASD keys, and Q for toggling reverse gear.
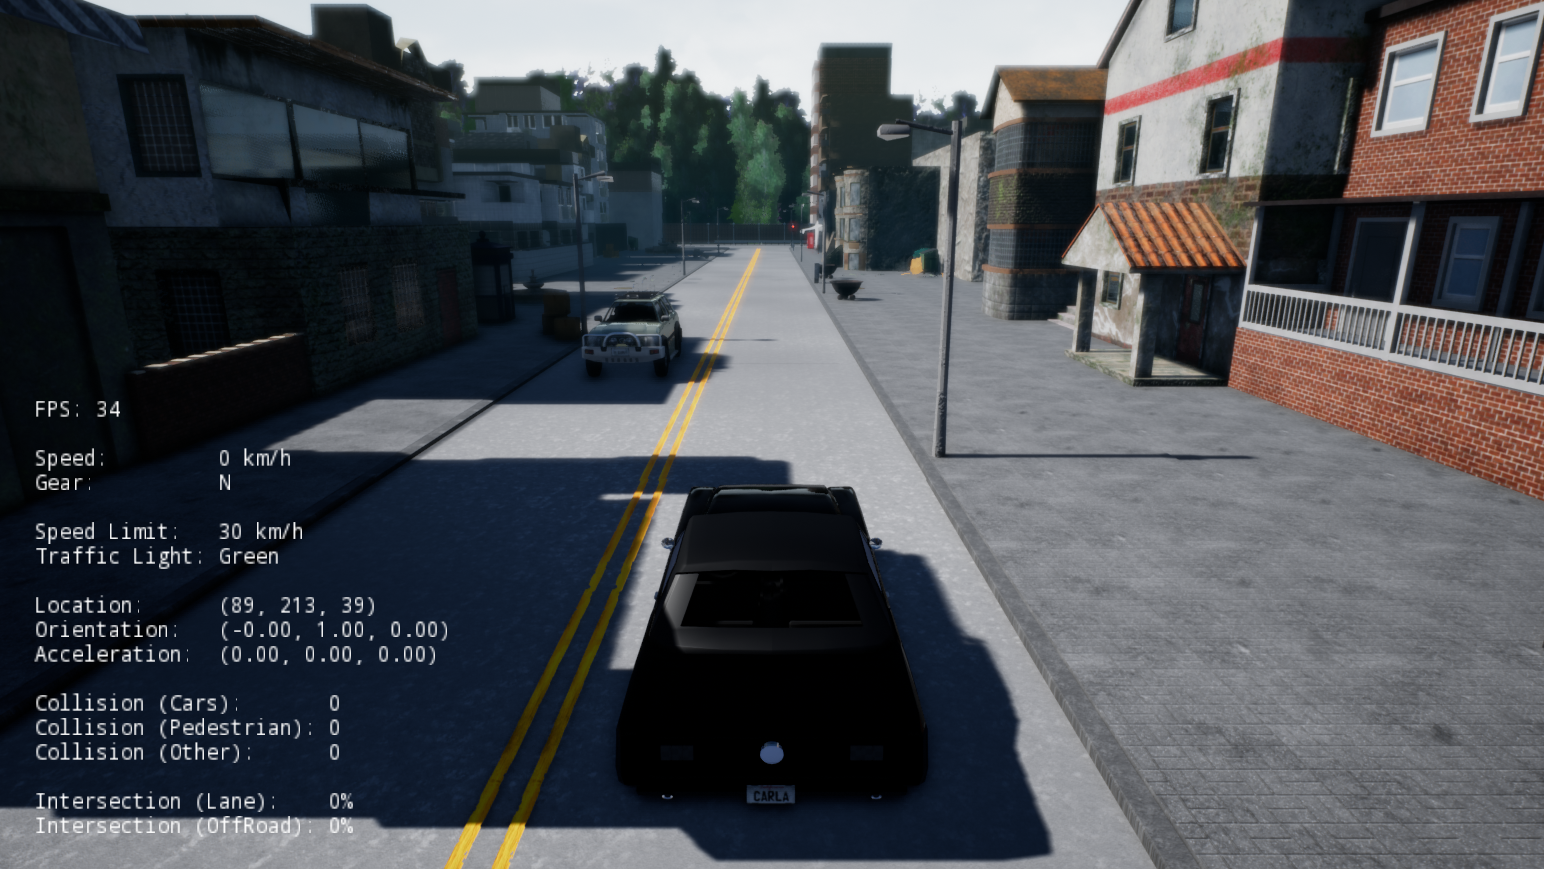
You can find more information about the simulator and the configuration here.
CarlaGear installation
In this project we are also going to use CarlaGear. CarlaGear is a special version of CARLA 0.8 in which the ego-vehicle has a single gear.
-
The server can be downloaded with this link. The extracted folder should be called CarlaGear
-
Clone the master branch of CARLA using:
git clone https://github.com/carla-simulator/carla.git -
Build the Docker image of CarlaGear using the command:
docker image build -f <path_to_carla_master>/Util/Docker/Release.Dockerfile -t carlagear <path_to_carla_gear>CarlaGearWhere
<path_to_carla_master>is the path of the cloned branch in point 2 and<path_to_carla_gear>is the path of the folder CarlaGear in point 1. -
Now you should be able to run the command
--docker carlagearduring the steps described below.
COiLTRAiNE: Conditional Imitation Learning Training Framework
This repository can be used to easily train and manage the trainings of imitation learning networks jointly with evaluations on the CARLA simulator.
-
Run the following command to clone the
coiltrainerepository:git clone https://github.com/felipecode/coiltraine.git -
Create the enrionment
coiltraineby running the command:conda env create -f requirements.yamland activate the environment:
conda activate coiltraine -
Define the datasets folder. This is the folder that will contain your training and validation datasets:
export COIL_DATASET_PATH=<Path to where your dataset folders are> -
Download a sample dataset pack, with one training and two validations, by running the command:
python3 tools/get_sample_datasets.pyThe dataset will be located in
<Path to where your dataset folders are>. The training and validations datasets consists of front view RGB images, left view RGB images (front view rotated by 30 degrees to the left), right view RGB image (front view rotated by 30 degrees to the right) as well as a json files containing all measurements for each frame captured.
Reproduce NoCrash benchmark results
Now that we have installed the coiltraine framework, we explain here how to reproduce the results obtained in the paper Exploring the Limitations of Behavior Cloning for Autonomous Driving The framework contains 5 models implemented:
- resnet34imnet10S1: is the model with the random seed 1 from Figure 6
- resnet34imnet10S2: is the model with the random seed 2 from Figure 6.
- resnet34imnet10-nospeed: without the speed prediction and ten hours of training (Yellow model Fig. 5).
- resnet34imnet100: the model with 100 hours of demonstrations (Blue model Fig. 5).
- resnet34imnet100-nospeed: the model with 100 hours of demonstrations and no-speed prediction (Red model Fig. 5).
Run the following command to download the models used in the NoCrash benchmark:
python3 tools/download_nocrash_models.py
The models are located in coiltraine/configs/nocrash.
There is actually many ways to reproduce the result obtained in the above mentionned paper.
Reproduce all the available models
-
To reproduce all of the available models, using the gpu 0, run:
python3 coiltraine.py --gpus 0 --folder nocrash -de NocrashNewWeatherTown_Town02 NocrashNewWeather_Town01 NocrashTraining_Town01 NocrashNewTown_Town02 --docker carlagearThis will perfom training, validation and testing for all the models located in
coiltrain/confis/nocrashfolder.The
-deargument is the driving environments used to train the models.
Reproduce one single model
-
Their best model is
resnet34imnet10S2. That is the one on which we will focus. The same process as above can be performed on one model. -
To train the model, run the following command:
python3 coiltraine.py --gpus 0 --single-process train -e resnet34imnet10S2 --folder nocrash -de NocrashNewWeatherTown_Town02 NocrashNewWeather_Town01 NocrashTraining_Town01 NocrashNewTown_Town02Where we train only the model
resnet34imnet10S2on the same driving environments as above. -
To validate the model, run the following command:
python3 coiltraine.py --gpus 0 --single-process validation -e resnet34imnet10S2 --folder nocrash -vd CoILVal2 -de NocrashNewWeatherTown_Town02 NocrashNewWeather_Town01 NocrashTraining_Town01 NocrashNewTown_Town02Where
-vdis the validation dataset that we are using. -
To test the model, run the follwing command:
python3 coiltraine.py --gpus 0 --single-process drive -e resnet34imnet10S2 --folder nocrash -de NocrashNewWeatherTown_Town02 --docker carlagearWhere
-de NocrashNewWeatherTown_Town02is the environment with the hardest conditions.
Data collection
Data collector
Eventhough there is a lot of dataset already existing online, CARLA allows us to gather our own data and therefore to create our own dataset for training, validating and testing our models. The data collector implements an Expert Demonstrator, i.e. the rules that the agent has to follow. The Expert Demonstrator implementation can be found here. The the data collector will run an infinite number of episodes with different itineraries. The itineraries are hard-coded in the code as an array of [start_point, end_point]. Each episode will randomly generates the weather, the pedestrians and the other vehicles. The data collector will therefore record the agent for many hours and extract nframes per seconds to construct the final dataset. The final dataset consists of thousands of images as well as all the properties corresponding to that timestamp. In the cloned version of the data collector, the images are in ego-centric view. This can be modified in the code (see section [Dataset augmentation](#Dataset augmentation)).
-
To start, run the following command in the appropriate folder to clone the repository:
git clone https://github.com/carla-simulator/data-collector.git -
Create the environment
datacby runningconda env create -f requirements.ymland activate the environment:
conda activate datac -
To run a single data collection process, first start the CarlaGear Server. Open a terminal window, go into the folder
CarlaGearand run:sh CarlaUE4.sh /Game/Maps/Town01 -windowed -world-port=2000 -benchmark -fps=10In a separate terminal window, go into the folder
data-collectorand runpython3 collect.py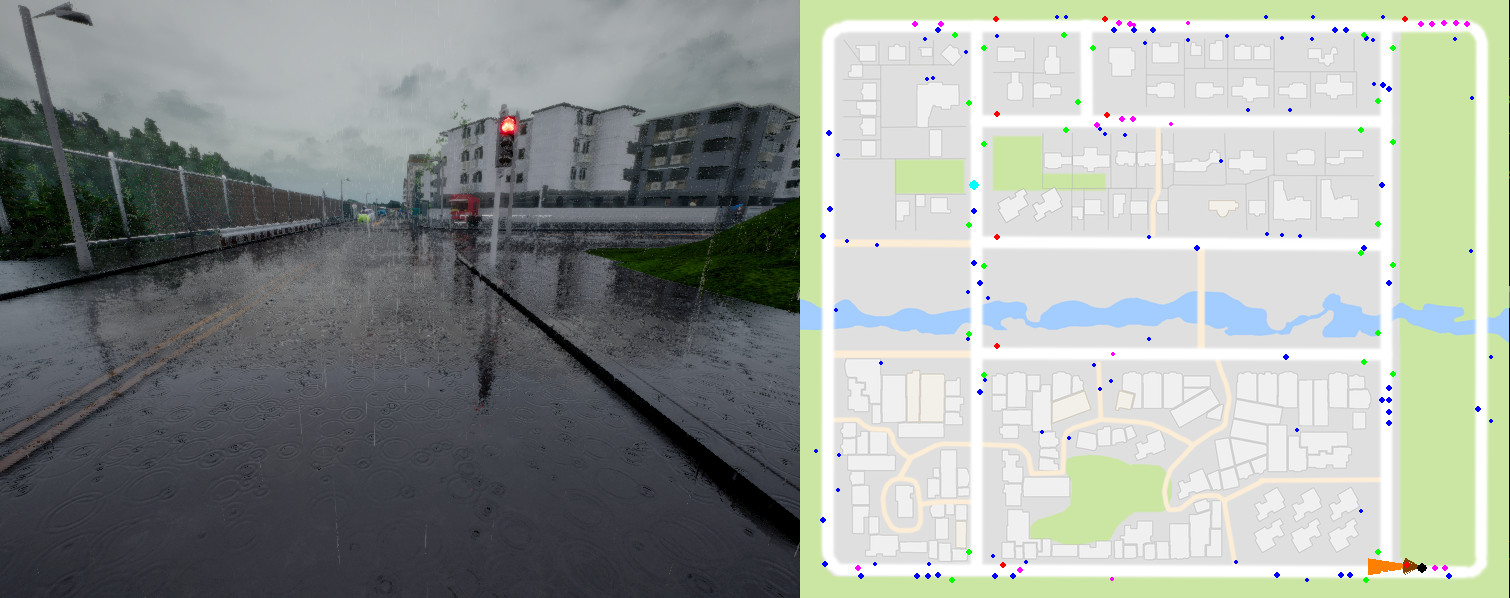
To see the debug screen above showing all the non player agents:
python3 collect.py -db -dp -dv -dtTo show only pedestrians:
python3 collect.py -db -dpTo show only vehicles:
python3 collect.py -db -dvTo show only traffic lights:
python3 collect.py -db -dtTo set the folder for placing the data:
python3 collect.py --data-path ~/Datasets/AmazingDataTo change the sensor/episodes/noise configuration of your data collection you can run:
python3 collect.py --data-configuration-name coil_training_datasetHint: if the data collection stops and you want to start again where it ended, run the following command, where the argument
episode_numberis the episode number where the datacollection should restart.python3 collect.py -e episode_number
Dataset augmentation
The left part of the image below represents the ego-centric view images that are collected by the standard data collector. In our project we collect:
- RGB ego-centric view
- Semantic segmented ego-centric view
- RGB bird view
- Semantic segmented bird view

Here we provide a brief documentation on how to augment the dataset. This can be achieved by increasing the number of cameras, changing the camera position or changing the type of output.
Camera
As discussed in the previous section, the script collect.py has a parameter called data-configuration-name. This a python script in which the parameters of the data collection are implemented. To access those files, open the folder data-collector/dataset_configurations. There is actually three configurations implemented:
coil_test_dataset_nocameras.pycoil_training_dataset_singlecamera.pycoil_training_dataset.py
The one that we are going to use is the third one, namely coil_training_dataset.py. On the three configuration scripts there is a function called make_carla_settings(). This function allows us to modify the type of output that we want to generate.
This function starts by generating the CARLA settings for the data collection:
settings = CarlaSettings()
settings.set(SendNonPlayerAgentsInfo=True, SynchronousMode=True, NumberOfVehicles=30,
						 NumberOfPedestrians=50, WeatherId=1)
settings.set(DisableTwoWheeledVehicles=True)
Once we have the settings ready, we can create a new camera and add it to the settings using the following code:
camera0 = sensor.Camera(SensorName=name PostProcessing=post_processing)
camera0.set_image_size(WINDOW_WIDTH, WINDOW_HEIGHT)
camera0.set(FOV=FOV)
camera0.set_position(x=x, y=y, z=z)
camera0.set_rotation(pitch=p, yaw=y, roll=r)
settings.add_sensor(camera0)
Where the parameters are:
name: the name of the output imagepost_processing: the post-processing applied to the output image (see Output section below)WINDOW_WIDTH, WINDOW_HEIGHT: size of the output imagex, y, z: camera positionp, y, r: camera rotation
Output
The CARLA simulator provides many different output as images. The default output is the RGB image. Other output can be produced by changing the parameter PostProcessing seen in the previous section. Here is a list of all possible output with their corresponding PostProcessing parameter.
- RGB:
PostProcessing=None - Depth:
PostProcessing='Depth' - Semantic segmentation:
PostProcessing='SemanticSegmentation'
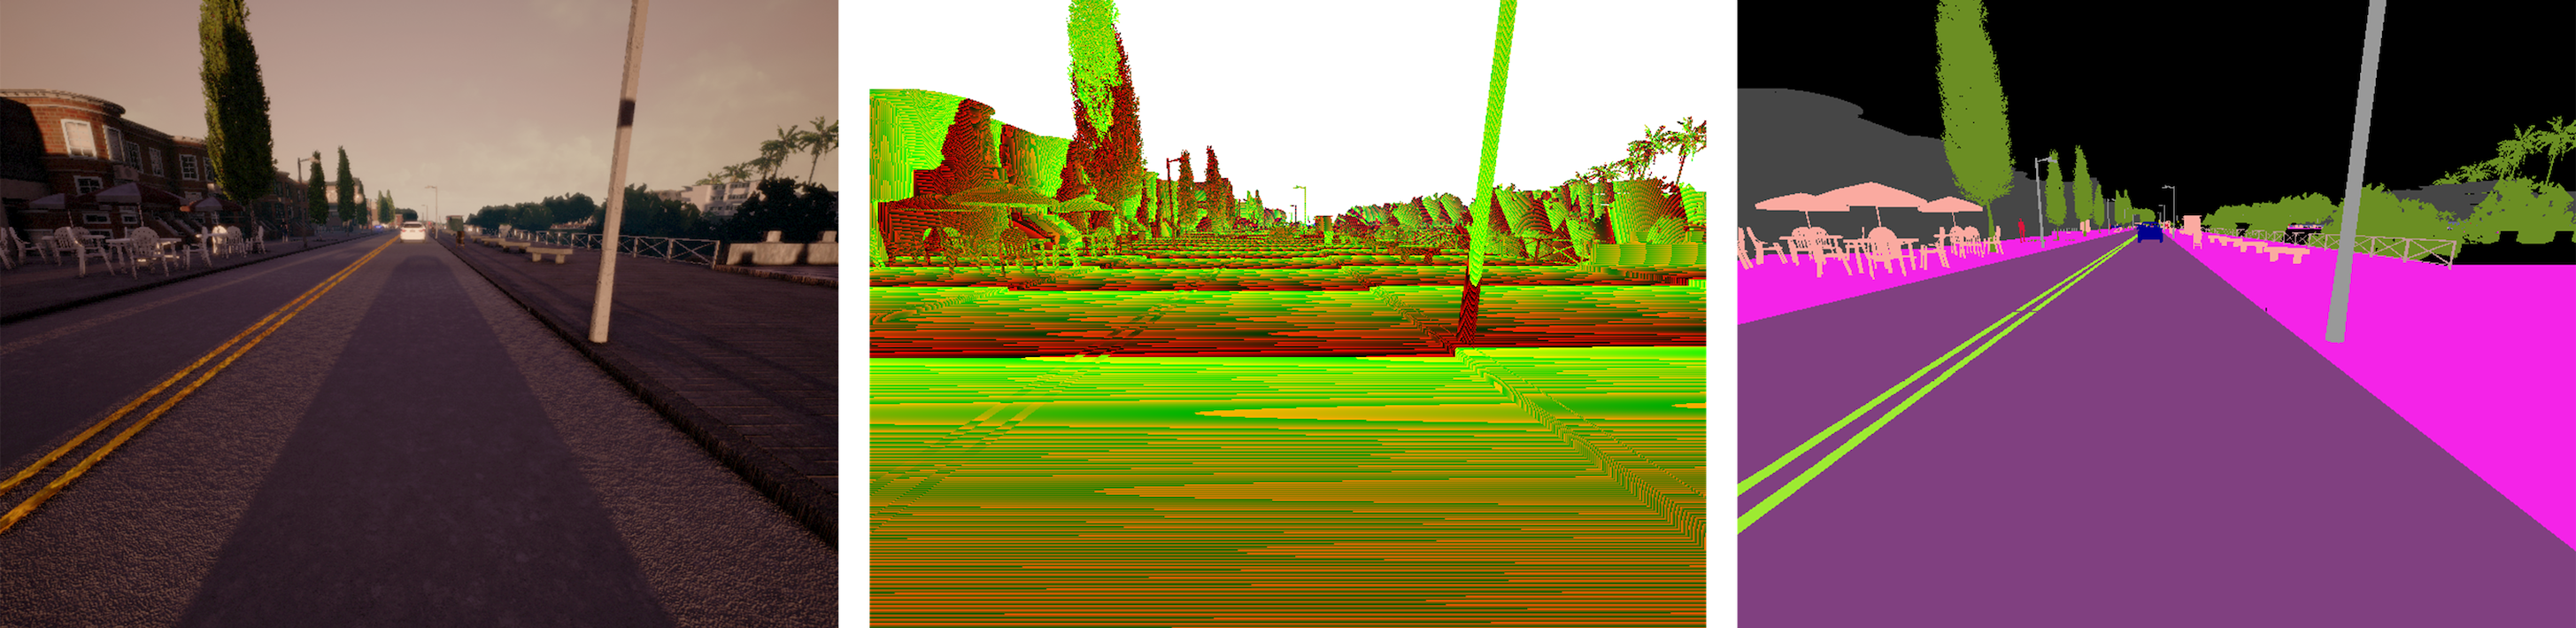
The semantic segementation output is possible since the towns are built using UnrealEngine. In UnrealEngine, each element has a label. The label is encoded in the red channel of the image provided by the server. A pixel with a red value of x displays an object with tag x. This implies that the output image seems to black at first, and need to be postprocessed, in order to obtain the above image. The following tags are currently available:
| Value | Tag | Converted Color |
|---|---|---|
| 0 | Unlabeled | (0, 0, 0) |
| 1 | Building | (70, 70, 70) |
| 2 | Fence | (190, 153, 153) |
| 3 | Other | (250, 170, 160) |
| 4 | Pedestrian | (220, 20, 60) |
| 5 | Pole | (153, 153, 153) |
| 6 | Road line | (157, 234, 50) |
| 7 | Road | (128, 64, 128) |
| 8 | Sidewalk | (244, 35, 232) |
| 9 | Vegetation | (107, 142, 35) |
| 10 | Car | (0, 0, 142) |
| 11 | Wall | (102, 102, 156) |
| 12 | Traffic sign | (220, 220, 0) |
We modified the script post_process.py to add the functions convert_segmented and conversion which will help us getting the semantic segmented images:
def convert_segmented(image_type, episode, data_point_number):
		center_name = 'Central' + image_type + '_' + data_point_number + '.png'
		top_name = 'Top' + image_type + '_' + data_point_number + '.png'
		center = scipy.ndimage.imread(os.path.join(episode, center_name))
		top = scipy.ndimage.imread(os.path.join(episode, top_name))

		def conversion(img):
				img[(img==np.array([0,0,0]))[:,:,0]] = np.array([0, 0, 0])
				img[(img==np.array([1,0,0]))[:,:,0]] = np.array([70, 70, 70])
        # ...
				img[(img==np.array([11,0,0]))[:,:,0]] = np.array([102, 102, 156])
				img[(img==np.array([12,0,0]))[:,:,0]] = np.array([220, 220, 0])
				return img

		center = conversion(center)
		scipy.misc.imsave(os.path.join(episode, center_name), center)
		top = conversion(top)
		scipy.misc.imsave(os.path.join(episode, top_name), top)
The new file VITA_post_process.py can be found here.
VITA dataset
To collect the same dataset as we did, with the 4 types of camera:
-
Download here our version of the configuration script
VITA_coil_training_dataset.py, which is based oncoil_training_dataset.py. -
Modify the file
collect.pyindata-collectorby changing this line:default='coil_training_dataset_singlecamera',into
default='VITA_coil_training_dataset',in order to avoid typing it manually in the terminal.
-
Download the post-processing script mentionned above here.
-
Run the code by following the instructions at the [beginning of this section](#Data collector).
-
Once the data collection is over, separate the images and measurements in order to have the following architecture:
- VITA_data_collection_central_rgb
- CoILTrain_central_rgb
- episode_00000
- episode_00001
- ...
- CoILVal1_central_rgb
- ...
- CoILVal2_central_rgb
- ...
- CoILTrain_central_rgb
- VITA_data_collection_central_seg
- CoILTrain_central_seg
- ...
- CoILVal1_central_seg
- ...
- CoILVal2_central_seg
- ...
- CoILTrain_central_seg
- VITA_data_collection_top_rgb
- CoILTrain_top_rgb
- ...
- CoILVal1_top_rgb
- ...
- CoILVal2_top_rgb
- ...
- CoILTrain_top_rgb
- VITA_data_collection_top_seg
- CoILTrain_top_seg
- ...
- CoILVal1_top_seg
- ...
- CoILVal2_top_seg
- ...
- CoILTrain_top_seg
- VITA_data_collection_central_rgb
Reproduce our results
-
To reproduce our results collect your own dataset following the instructions of the section [VITA dataset](#VITA dataset) or contact us to have access to our dataset.
-
In
coiltaine /configs, create a new folder calledVITA -
Download the following 4 ResNet models and place them the
VITAfolder that you just created. There is one ResNet for each type of input. -
Open the file
coil_agent.pyincoiltraine/driveand modify the lineattentions.append(imresize(att, [88, 200]))into
attentions.append(imresize(att, [150, 200]))in order to match the size of our images.
-
Open the file
resnet.pyincoiltraine/network/models/building_blocksand modify the lineself.fc = nn.Linear(1536, num_classes)into
self.fc = nn.Linear(3072, num_classes) -
In order to perform the test process using the different cameras, we modified the file
nocrash_new_weather_town_suite.pyincoiltraine/coil_core/drive/suites. The updated version can be found here.Depending on the camera you are using for testing, you will need to modify the parameter
camera_central_rgbin this line:conditions.add_sensor(camera_central_rgb)with the appropriate camera. The different cameras are already set up, you only have to change the name of the parameter. You can choose among these parameters:
camera_central_rgb,camera_central_seg,camera_top_rgborcamera_top_seg. -
To allow us to use the semantic segmented images sent back from the server during the testing process, we also modify the file
coil_agent.pyincoiltraine/drive. Indeed, when the semantic segmentation post-processing is applied to the images, the server sends back a 2D-array containing the labels. In order to feed this array into the network, we need to convert it into an image. You can find the updated file here. -
In the file
coil_dataset.pyincoiltraine/coil_core/inputmodify the linergb = 'NAME_OF_THE_INPUT_' + data_point_number + '.png'with the appropriate
NAME_OF_THE_INPUT_corresponding to the type of inputs you are using. You can choose amongCentralRGB_,CentralSemanticSeg_,TopRGB_orTopSemanticSeg_. Note that this names correspond to the basic denomination of the images in your datasets. You will need to change this each time you run the test process to be consistent with your dataset. -
To run the training process, the model, the command becomes:
python3 coiltraine.py --gpus 0 --single-process train -e resnet34imnet10S2_central_rgb --folder VITA -de NocrashNewWeatherTown_Town02 NocrashNewWeather_Town01 NocrashTraining_Town01 NocrashNewTown_Town02Remark 1:
resnet34imnet10S2_central_rgbneed to be consistent with the dataset you used to train and validate. You can choose amongresnet34imnet10S2_central_rgb,resnet34imnet10S2_central_seg,resnet34imnet10S2_top_rgborresnet34imnet10S2_top_seg.Remark 2: make sure to set the
COIL_DATASET_PATHvariable correctly before running the process. -
To run the validation process, the command becomes:
python3 coiltraine.py --gpus 0 --single-process validation -e resnet34imnet10S2_central_rgb --folder VITA -vd CoILVal1_central_rgb -de NocrashNewWeatherTown_Town02 NocrashNewWeather_Town01 NocrashTraining_Town01 NocrashNewTown_Town02
Where the same remarks as above applies for the parameter resnet34imnet10S2_central_rgb and CoILVal1_central_rgb.
-
To run the test process, the command becomes:
python3 coiltraine.py --gpus 0 --single-process drive -e resnet34imnet10S2_central_rgb --folder VITA -de NocrashNewWeatherTown_Town02 --docker carlagear
Contact
If you have any question or issue regarding the above documentation, please contact Franck Dessimoz, franck.dessimoz@epfl.ch