README.md
March 28, 2024 · View on GitHub
The WebUI is ported from Text-Generation-WebUI for running local LLM on Intel GPU (e.g., local PC with iGPU, discrete GPU such as Arc, Flex and Max) using IPEX-LLM.
Quick Start
To get started, please see the step-by-step quickstart.
User Guide
For more information, see the user guide below.
1. Download and Unzip WebUI
Before starting all the steps, you need to download and unzip the text-generation-webui based on IPEX-LLM optimizations.
https://github.com/intel-analytics/text-generation-webui/archive/refs/heads/ipex-llm.zip
2. Prepare the Environment on Windows
Please use a python environment management tool (we recommend using Conda) to create a python enviroment and install necessary libs.
2.1 Install IPEX-LLM
Please see IPEX-LLM Installation on Windows for more details to install IPEX-LLM on your Client.
2.2 Install Other Required Dependencies
pip install -r requirements_cpu_only.txt
Note: Text-Generation-WebUI requires transformers version >= 4.36.0
3. Start the WebUI Server
3.1 For INT4 Optimizations
For a quick start, you may run the script as below to start WebUI directly, it will automatically optimize and accelerate LLMs using INT4 optimizations.
python server.py --load-in-4bit
3.2 Optimizations for Other Percisions
To enable optimizations for more precisions (sym_int4, asym_int4, sym_int8, fp4, fp8, fp16, mixed_fp4, mixed_fp8, etc.), you may run the command as below:
python server.py --load-in-low-bit
3.3 Access the WebUI
After the successful startup of the WebUI server, it will provide links to access the WebUI as below. Please open the public URL in your browser to access the full functionality of the WebUI.
Running on local URL:  http://127.0.0.1:7860
Running on public URL: https://your_tokens_here.gradio.live

This share link expires in 72 hours. For free permanent hosting and GPU upgrades, run `gradio deploy` from Terminal to deploy to Spaces (https://huggingface.co/spaces)
4. Run Models
4.1 Select the Model
4.1.1 Download the Model
If you need to download a model, enter the Hugging Face username or model path, for instance: Qwen/Qwen-7B-Chat.

4.1.2 Place the Model
After you have downloaded the model (or if you already have the model locally), please place the model in Text-Generation-WebUI/models directory.
After completing the two steps above, you may click the Model button to select your model.

4.2 Enable IPEX-LLM Optimizations
Text-Generation-WebUI supports multiple backends, including IPEX-LLM, Transformers, llama.cpp, etc (the default backend is IPEX-LLM). You may select the IPEX-LLM backend as below to enable low-bit optimizations.
Then please select the device according to your device (the default device is GPU).

4.3 Load Model in Low Precision
One common use case of IPEX-LLM is to load a Hugging Face transformers model in low precision.
Notes:
-
When you start the web UI with
--load-in-4bit, you will not be allowed to choose the quantization precision inload-in-low-bit. The model will be loaded with the INT4 precision as default. -
When you want to load model in other precisions, you may run server.py with
--load-in-low-bitparameter. You may choose the precision from the list ofload-in-low-bitoption, and theload-in-4bitoption will be disabled. -
Please select the
optimize-modelanduse_cacheoptions to accelerate the model.
Now you may click the Load button to load the model with IPEX-LLM optimizations. If everything goes well, you will get a message as shown below.

4.4 Run the Model on WebUI
After completing the steps of model preparation, enabling IPEX-LLM optimizations, and loading model, you may need to sepecify parameters in the Parameters tab according to the needs of your task.
Notes:
-
max_new_tokens: Maximum number of tokens to generate. -
truncate_length: Used to prevent the prompt from getting bigger than the model's context length. -
Please see Parameters-Tab Wiki for more details.
Now you may do model inference on Text-Generation-WebUI with IPEX-LLM optimizations, including Chat, Default and Notebook Tabs.
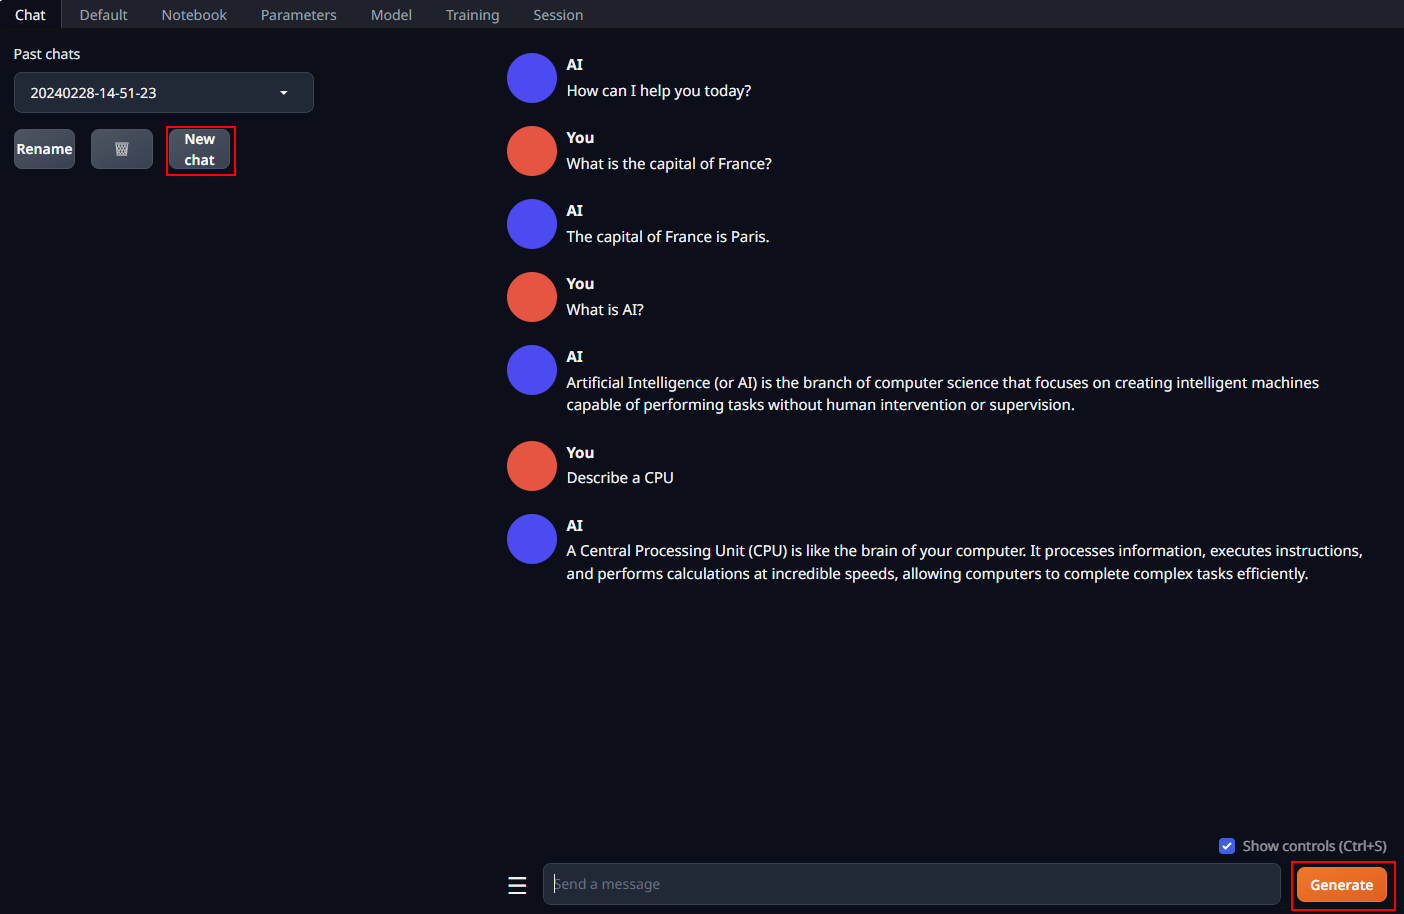
4.4.1 Chat Tab
Chat tab supports having multi-turn conversations with the model. You may simply enter prompts and click the Generate button to get responses.
Notes:
-
Multi-turn conversations may consume GPU memory, you may sepecify the
truncate lengthinParameters tabto reduce the GPU memory usage. -
You may switch to a single-turn conversation mode by turning off
Activate text streamingin the Parameters tab. -
Please see Chat-Tab Wiki for more details.

4.4.2 Default Tab
You may use the Default tab to generate raw completions starting from your prompt.
This tab contains two main text boxes: Input, where you enter your prompt, and Output, where the model output will appear.
Please see Default-Tab Wiki for more details.

4.4.3 Notebook Tab
You may use the Notebook tab to do exactly what the Default tab does, with the difference being that the output appears in the same text box as the input.
Please see Notebook-Tab Wiki for more details.
