Eauth Server
October 28, 2021 · View on GitHub
Introduction
An OAuth2-compatible service based on Ethereum credentials to authenticate users on website.
And also has these features:
- Contact Login ERC-1271
- ENS
- QRcode for mobile devices remote login
- Support Fortmatic, Wallet Connect
Demo
Eauth - An Oauth2 compatible authentication service: https://www.youtube.com/watch?v=fE5B7DaRHnA
Hakka Forum with Eauth: https://forum.hakka.finance
Usages: eauth-examples
Requirements
- Node.js 10 or higher
Installation
1. Clone this repo, and install dependencies.
Using yarn:
$ yarn install
Notice: For those who are not using SQLite:
$ yarn install --ignore-optional
2. Configure Eauth config.
2.1. Copy an example configuration:
$ cp .env.example .env
2.2. Configure your .env following .env.example:
See more information : Sequelize configuration
3. Setup OAuth Clients.
Manual
3.1.1 Connect to your database, and fulfill the table below with Oauth data
Table: oauth_clients
| client_id | client_secret | redirect_uri |
|---|---|---|
| ... | ... | ... |
Insert a client config when the server starts
3.2.1 Setup your client configs name, client_id, client_secret, redirect_uri in .env
Usage
Quickstart
Start the server: node -r dotenv/config index.js.
Test it on http://localhost:8080/.
Using PM2
$ npm i -g pm2

$ cp pm2.config.js.example pm2.config.js

$ pm2 start pm2.config.js --env development // development mode on port 8080

// or

$ pm2 start pm2.config.js --env production // production mode on port 80
Docker
Get it from DockerHub
For normal version
$ docker pull pelith/node-eauth-server:latest
$ docker run --net=host --env-file ./.env -d pelith/node-eauth-server
For ENS version
$ docker pull pelith/node-eauth-server:latest-ENS
$ docker run --net=host --env-file ./.env -d pelith/node-eauth-server
Optionally: Build docker image manually
$ docker build -t pelith/node-eauth-server .
Tutorial
This service requires a wallet which supports eth_signTypedData, personal_sign or customized method for your contract wallet. For first-time visitors, the simplest setup is to include a MetaMask download badge before proceeding to the authentication page.
| Browser Extensions (MetaMask) | Mobile Wallets (imToken / Trustwallet) | Other SDK (Fortmatic) |
|---|---|---|
 |   |  |
-
In the page
/, you can decide to login with your Ethereum wallet or contract wallet which implements ERC-1271.
-
For Ethereum wallet, there is no email/id/password input fields. Instead, you gotta sign in with your Ethereum credentials. If your MetaMask is locked or in the privacy mode, it would prompt you to unlock. You can also scan the QR Code to open the URL with your mobile wallet (imToken or Trustwallet), then sign the message for authentication through socket.

-
In your wallet, you should check the banner and the prefix of message, usually the brand name of a site. The challenge message should contain a token string. If it's the correct info from the site you are about to login, click "Sign" or "Confirm" to proceed.

-
Next, your wallet address is shown and you are asked for authorization. This step is to bind that wallet address to your account. Click "Authorize" to proceed, or click "Use another account" if this is not the account you intend to use.

-
If everything is fine, you will be redirected back to the original site. Clicking "Logout" will log you out and reset the session.
-
For contract wallet, you'll have to input your contract address (ENS is also acceptable if the feature is enabled), Click "Use Contract" and choose your way to verify.

-
The
eth_signTypedDataandpersonal_signwill both works if you implement the ERC-1271 like this. The signing process will be the same as Ethereum login. However, if you're using customized signature for verification, click "Customized Sign".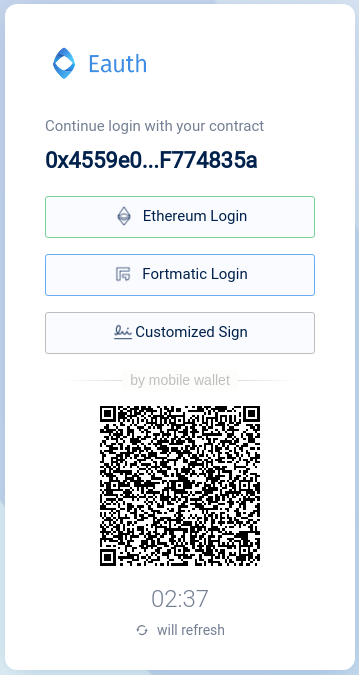
-
For Customized Sign, server will return the full message for signing and the hexed message after web3.sha3(message). Sign the message with your customized way and fill the signature below. Click "Verify Signature" to login with your contract wallet.

Discourse Integration
-
Install discourse-eauth plugin by following this guide.
-
Enable the plugin at
/admin/site_settings/category/plugins.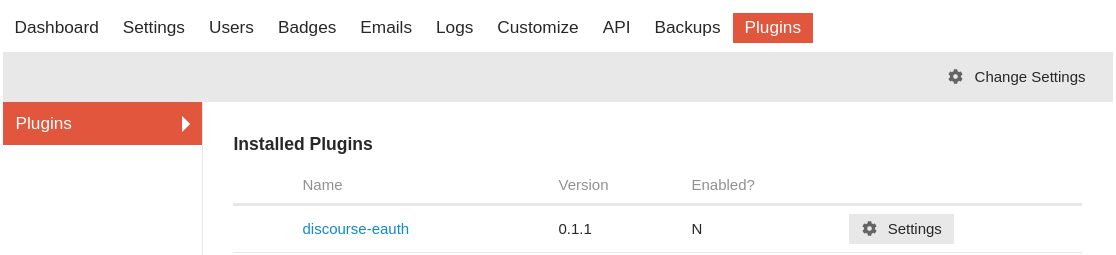

-
Set max username length up to 42. Remember to setup username change period if you're allowing users to edit their username instead of using the address they registered.


-
Setup OAuth client and use
http://your.domain/auth/eauthoauth2/callbackas your OAuthredirect_uri -
Finally, enjoy!
Fortmatic
Let users access blockchain apps from anywhere 💻📱 - without forcing them to wrestle with browser extensions, wallets, or seed phrases, see more at fortmatic.com
License
Node Eauth Server is MIT licensed.