Splitflap v0 Comprehensive Ordering Guide
January 22, 2025 · View on GitHub
<< Back to Documentation Index
The instructions below will walk you through ordering all the parts (excluding common tools) needed to build a splitflap v0.7 display with 6 modules using the latest Chainlink electronics.
Ready to assemble? Jump ahead to the Assembly Guide
If you have any questions, please feel free to reach out to me (scott@bezeklabs.com). Or, join the Discord server, to discuss or ask questions from the wider split-flap community!
😩 Feeling overwhelmed by this document? I don’t blame you, there’s a LOT here… So I put together a much shorter document that favors simplicity over comprehensiveness/lowest-cost, for people in the US: +Splitflap Ordering (the “easy” route)
💡 These instructions have been updated for the “Chainlink” electronics system, which is recommended over the legacy (circa 2016) “Classic Controller” for all new builds due to easier assembly and more flexibility. If you’re looking for the older Classic Controller instructions, they’ve been moved to the Appendix.
- Order laser-cut parts
- Order electronics
- Order hardware
- Appendix A: Older laser-cut file versions
- Appendix B: Hall effect sensor options
- Appendix C: Legacy Classic Controller
Order laser-cut parts
There are many places you can get laser-cut parts, but I’ve personally used Ponoko and Elecrow for ordering shipped to the US with an easy online-only process. I’ve been using Ponoko for several years and they offer a lot of different material options and good quality, but recently I’ve found Elecrow’s laser-cutting service, which can be significantly cheaper with good quality (though very limited material options).
The front face of each module is approximately 82.6mm wide and 147.8mm tall.
For advanced makers: if you want to cut a single front panel that will be shared by an entire row (or grid) of modules, there is a script to do so with lots of configurable options like spacing, rows/cols, and even has a mode for generating geometry for CNC routing with necessary “dog-bones” applied to inside corners — see generate_combined_front_panel.py
💡 Note: v0.7 laser-cut parts are not dimensionally compatible with older v0.6 or v0.5 modules! If you’re extending an older display, make sure to use the older v0.6 files archived at the bottom of this document rather than the newer v0.7 files linked here.
Ponoko
- 1 module
    - 3mm MDF: https://github.com/scottbez1/splitflap/releases/download/v0.7/3d_laser_vector-ponoko-3mm-mdf_1x.svg [177.42mm x 173.37mm]
    - 3mm Acrylic: https://github.com/scottbez1/splitflap/releases/download/v0.7/3d_laser_vector-ponoko-3mm-acrylic_1x.svg [177.26mm x 173.05mm]
- 4 modules
    - 3mm MDF: https://github.com/scottbez1/splitflap/releases/download/v0.7/3d_laser_vector-ponoko-3mm-mdf_4x.svg [354.84mm x 346.74mm]
    - 3mm Acrylic: https://github.com/scottbez1/splitflap/releases/download/v0.7/3d_laser_vector-ponoko-3mm-acrylic_4x.svg [354.52mm x 346.10mm]
-
Go to Ponoko and sign up for an account.
-
Upload the SVG file from above. Confirm the dimensions match the values above, and check that blue lines are set for “Cutting” and black fill is set for “Area Engraving” (or turn this off to skip engraved features)

-
Select a material - MDF or Acrylic are recommended — choose 3.0mm (0.12 inches) thickness. Make sure to check the material’s maximum size against the dimensions provided next to the file links above; some materials may be too small to order the 4x versions.
💡 Important note if ordering Matte 1-Side ****acrylic at Ponoko: you must immediately send special instructions to Ponoko after placing your order, requesting to have the design engraved on the glossy side. This will result in the design being correctly cut so the matte surface will be on the exterior of the display when assembled. From Ponoko support (as of 2021-05-13):
The matte is [by default] cut with the matte side up (so engraving happens on this side as well).
If you would like to place an order and have us engrave on the glossy side, just reply to the order confirmation page with your request and we'll be sure to make note in the order details.
Elecrow
Elecrow will cut 5 copies of the design per order from “wood” (unspecified type), for $14.55 + shipping. I think you’d be hard-pressed to find a cheaper deal (but let me know if you do!).
From experience it appears to be a 3-ply construction, with thin veneers on the front and back and some kind of very lightweight wood core. The thickness came out slightly undersized, at ~2.8mm rather than 3mm as specified. The finish and material is not as nice as Ponoko’s MDF (my order had visible scorch marks near cuts), so keep that in mind when deciding.
-
Download the appropriate file:
- 3mm wood: https://github.com/scottbez1/splitflap/releases/download/v0.7/3d_laser_vector-elecrow-3mm-wood_1x.zip
- 3mm acrylic: [not yet tested. If you try this, I’d recommend starting with the Ponoko 3mm acrylic file from above; let me know which file you used and how it turns out - under/oversized, etc and I will use that feedback to generate a recommended file in the future]
-
Go to https://www.elecrow.com/5pcs-wood-laser-cutting-service.html
-
Select “20cm Max * 20cm Max(Thickness: 3.0mm)” for the dimension
-
Upload the .zip file you downloaded above
-
Add to cart and check out

-
For shipping, I would suggest avoiding “Registered Airmail” - it took well over a month and tracking was terrible; my second order with ShenZhenDHL just took a couple days.
-
Here are example shipping fees to California, as of 2020-06-1

Order electronics (Chainlink)
The Chainlink system is a newer electronics system based around the more powerful ESP32 microcontroller (which adds things like wifi support) and incorporates learnings from the earlier Classic Controller. New development is focused on the Chainlink system.
The basic pieces that you’ll need for a Chainlink system:
- Chainlink Driver board (1 for every 6 split-flap modules you want to control)
- Chainlink Buddy + ESP32 (1 for the whole display, regardless of size)
- Sensors (1 for every split-flap module)
The easiest and best-supported approach is to purchase each of those items from the Bezek Labs Etsy store (US only) - I’ve set up the store so that items comes with the necessary accessories, meaning there are fewer things you need to track down and purchase separately from different suppliers. Proceeds also help fund continued development of the project!
💡 See the Chainlink User Guide for more info about different configurations.
Order Chainlink Driver

The Chainlink Driver is what drives up to 6 split-flap modules. Multiple Chainlink Drivers can be chained (hence the name!) to create much larger displays (I have created a 108-module display using 18 Chainlink Driver boards).
The Chainlink Driver uses mostly surface-mount components so it’s optimized for factory production moreso than hand-soldering (though you can of course do that if you’d like)
[Recommended] Option 1: Purchase fully-tested PCBA on Etsy (US shipping only) I sell mostly-pre-assembled Chainlink Driver boards in the Bezek Labs Etsy store:
https://bezeklabs.etsy.com/listing/1123280069/splitflap-chainlink-driver-v11
(includes accessories: connectors, ribbon cable)
These have all the tricky surface-mount components already soldered for you. You’ll just need to solder the through-hole connectors, which are pretty easy.
Every single board that I sell goes through a rigorous 100% functionality test which validates every single motor output, sensor input, LED, and data line works as expected, using a custom test jig I developed.
This option also includes all the connectors and ribbon cable you’ll need, so you don’t need to order anything separately!
And, if you want to make sure you get the right 28byj-48 motors instead of just ordering on AliExpress and hoping for the best, I’ve added an option on Etsy to include 6x motors with your Chainlink Driver order! Yes, they’re more expensive than ordering on AliExpress directly, but they’ll ship quickly and you’ll know you’re getting good motors.
Option 2: Purchase assembled Chainlink Driver from JLCPCB, and purchase connectors and ribbon cable separately The Chainlink Driver design is optimized for JLCPCB assembly, so it’s mostly a drag-and-drop process, but you’ll need to carefully understand the options you select. Most importantly, if JLCPCB is out of stock of a component, they will continue to build your order and simply omit that component! So be careful to check all warnings or notices that appear when ordering.
Note that JLCPCB assembly involves a number of fixed costs (such as $3 per unique part) which make larger quantities a better value.
Download the following 3 items from the latest Chainlink Driver release (v1.1):
- gerber files (for the PCB)
- BOM (specifies which components are needed for assembly)
- CPL (specifies placement locations for components)
To order:

- Go to JLCPCB https://cart.jlcpcb.com/quote
- Upload gerber zip
- Select your quantity, PCB color
- Confirm other parameters:
- Dimensions: 30.48 x 198.12
- PCB Thickness: 1.6
- Outer Copper Weight: 1oz

- Select SMT Assembly
- Assemble top side
- Select your quantity to assemble
- Tooling holes: select Added by Customer (these are included in the design already, so you do not need JLC to add them)
- Confirm

- Upload BOM File
- Upload CPL (csv) file

-
Review parts
- ⚠️ Make sure you check this step carefully, as any parts that are out of stock will simply be omitted! ⚠️
- “No part selected” is normal for several connectors that will not be assembled by JLCPCB (see below) - these will be “J”-prefixed designators such as “Motor A”, “Sensor C”, or “Input” or “Output”
-
Review parts placement
-
Save to Cart
-
Checkout (note that JLC does NOT reserve parts until you’ve checked out and paid your order, so if stock is low there is a chance parts will be missing if you wait to pay!)
To keep assembly costs lower, and to avoid fluctuating stock issues for parts that are readily available elsewhere and easy to hand-solder, the design files for assembly do not include the following parts, which you should order separately (or you can use the LCSC part numbers below to select them during the Review Parts step and pay the additional costs for assembly):
- 2x IDC shrouded connectors, 2x4, 2.54mm spacing, e.g. JLC/LCSC C601937, or on Digi-Key
- 6x JST XH 5 pin connectors, e.g JLC/LCSC C161872. or C378947, or LCSC C157991, or on Digi-Key
- 6x 3-pin male headers, 2.54mm spacing, e.g. JLC/LCSC C49257, or on Digi-Key 3-pin or purchase 40-pin and break apart, (or readily available in bulk on Amazon, etc)
In order to connect your Chainlink Driver to your microcontroller (or to another Chainlink Driver in a chain), you’ll also need an IDC ribbon cable + connectors:
- 1x 8 conductor 1.27mm spacing ribbon cable (45cm recommended minimum length for chaining), e.g. on Digi-Key
- 2x IDC connectors, e.g. LCSC C601910, or on Digi-Key
You may get an email from JLCPCB after placing your order, asking to double-check the orientation of the screw terminals. See images below for the correct orientation: the wires would go over the Power labels on the PCB to be inserted into the front of the screw terminals.


Option 3: Purchase bare PCB, components, and hand-assemble This is an advanced option which will require hand-soldering surface mount components. While the components aren’t tiny (ICs are SOIC packages and passives are 0603), it will require some skill and patience.
You might also consider ordering a stencil and reflow soldering the components yourself. However, be aware that the PCB is long and thin so it is prone to warping when heated, so you may have difficulty if you plan to use a hot plate rather than an oven.
Follow the instructions from Option 2 above for ordering the PCBs, and instead of selecting assembly, you can use the BOM file to order all the components yourself. The BOM file uses LCSC part numbers.
Order Chainlink Buddy and ESP32
You’ll connect your ESP32 microcontroller to the first Chainlink Driver in the chain. The best way to do this is with one of the available Chainlink “Buddy” boards, which allow you to plug in the IDC/ribbon cable directly.
Many different ESP32 modules exist, and most of them should be compatible (as long as they are dual-core), but I strongly recommend the TTGO T-Display (on Amazon for quick shipping [affiliate links help support this project at no cost to you, or use a non-affiliate link if you’d prefer], or AliExpress if you don’t mind waiting). It includes a 240x135 LCD that the splitflap firmware supports out of the box, which can be very useful for debugging.
Chainlink Buddy [T-Display]

The Chainlink Buddy [T-Display] is the recommended approach for most people, and makes it really easy to connect a TTGO T-Display microcontroller to your Chainlink system, with a ribbon cable connector, screw terminals for power, and a barrel jack for convenient 12v power input.
[Recommended] Available in the Bezek Labs Etsy store (US only):
https://bezeklabs.etsy.com/listing/1109357786/splitflap-chainlink-buddy-t-display
(includes accessories: IDC connector, screw terminals, barrel jack, and female headers)
There’s also an option to include the T-Display ESP32 module as well if you want to make sure you get the right thing.
or you can order the PCB yourself using the gerbers, and you will also need to order the following items to go with it:
- 1x IDC shrouded connectors, 2x4, 2.54mm spacing, e.g. LCSC C601937
- 1x 3-pin 5.08mm spacing screw terminal, e.g. LCSC C72334
- 1x 2.1mm barrel jack, e.g. LCSC C381116
- 2x 12-pin 2.54mm spacing female headers, e.g. LCSC C350303
Chainlink Buddy [Breadboard]

If you’d like to use a different ESP32 module, the Breadboard Buddy is a simple way to cleanly connect the Chainlink ribbon cable to a breadboard for prototyping. This is not generally recommended, but is available for advanced users.
Available in the Bezek Labs Etsy Store (US only):
https://bezeklabs.etsy.com/listing/1123863267/splitflap-chainlink-buddy-breadboard
(includes accessories: IDC connector, male pin headers)
or you can order the PCB yourself using the gerbers and you will also need to order the following items to go with it:
- 1x IDC shrouded connectors, 2x4, 2.54mm spacing, e.g. LCSC C601937
- 1x 5-pin 2.54mm spacing male pin headers
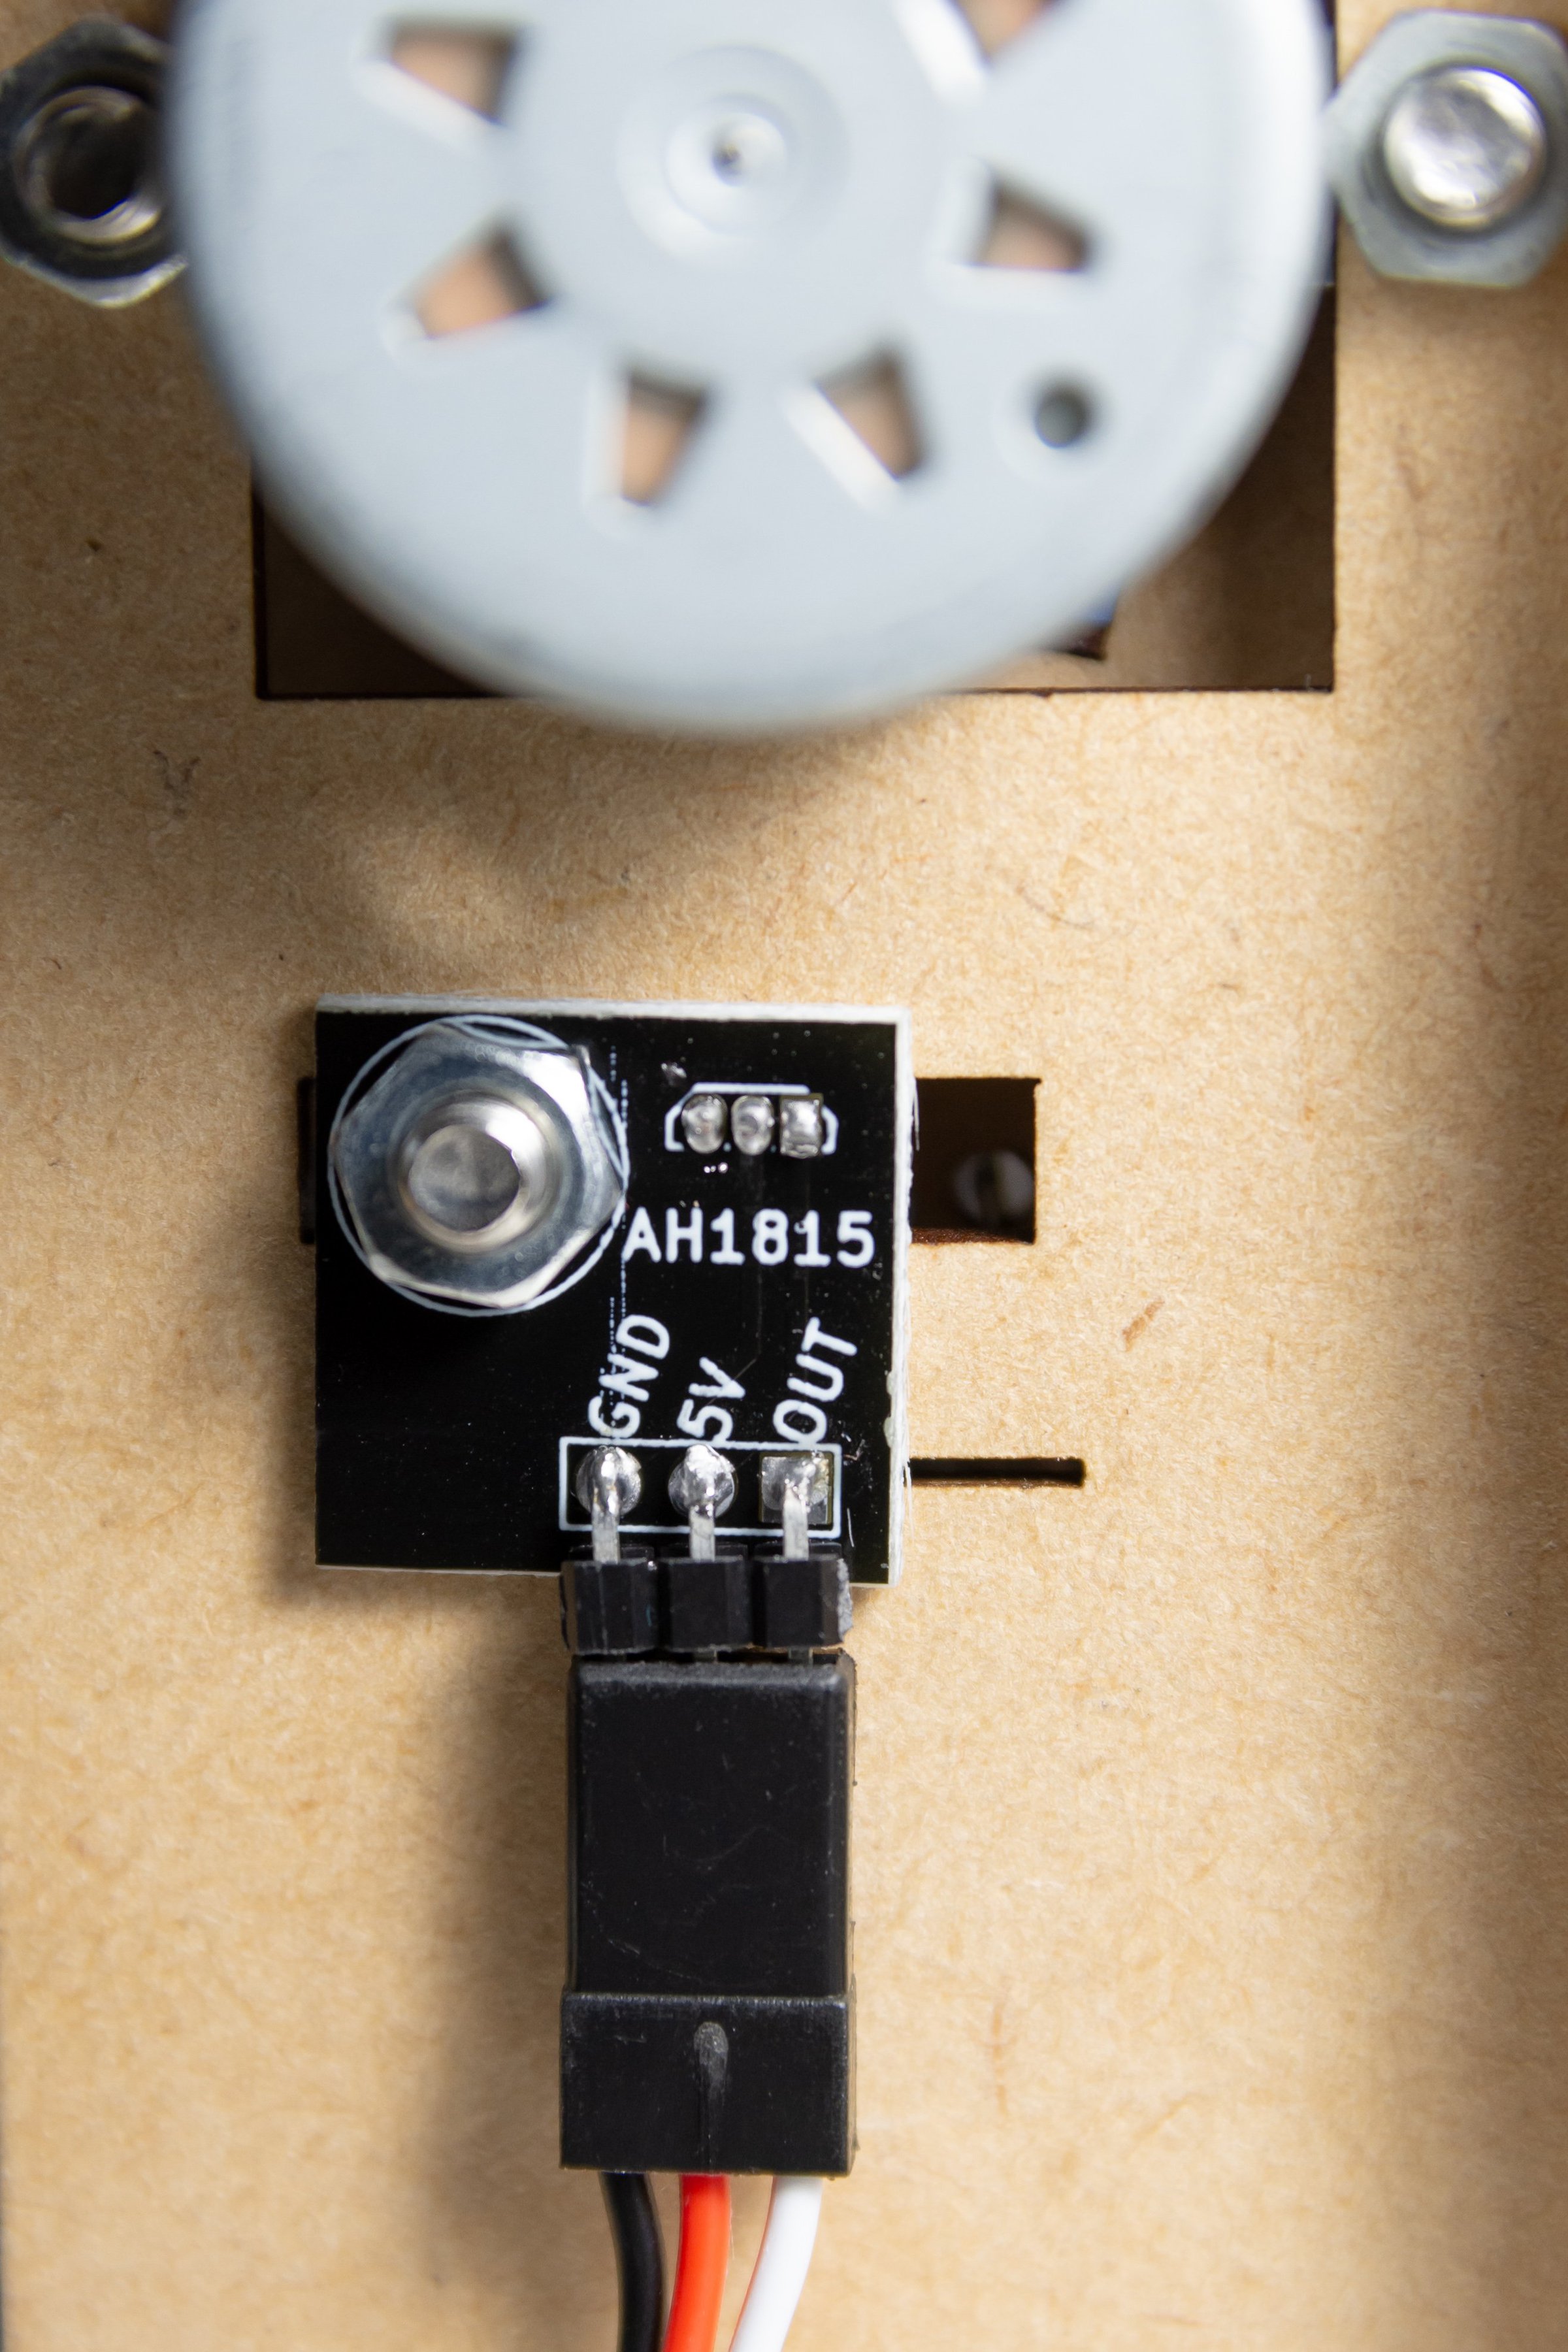
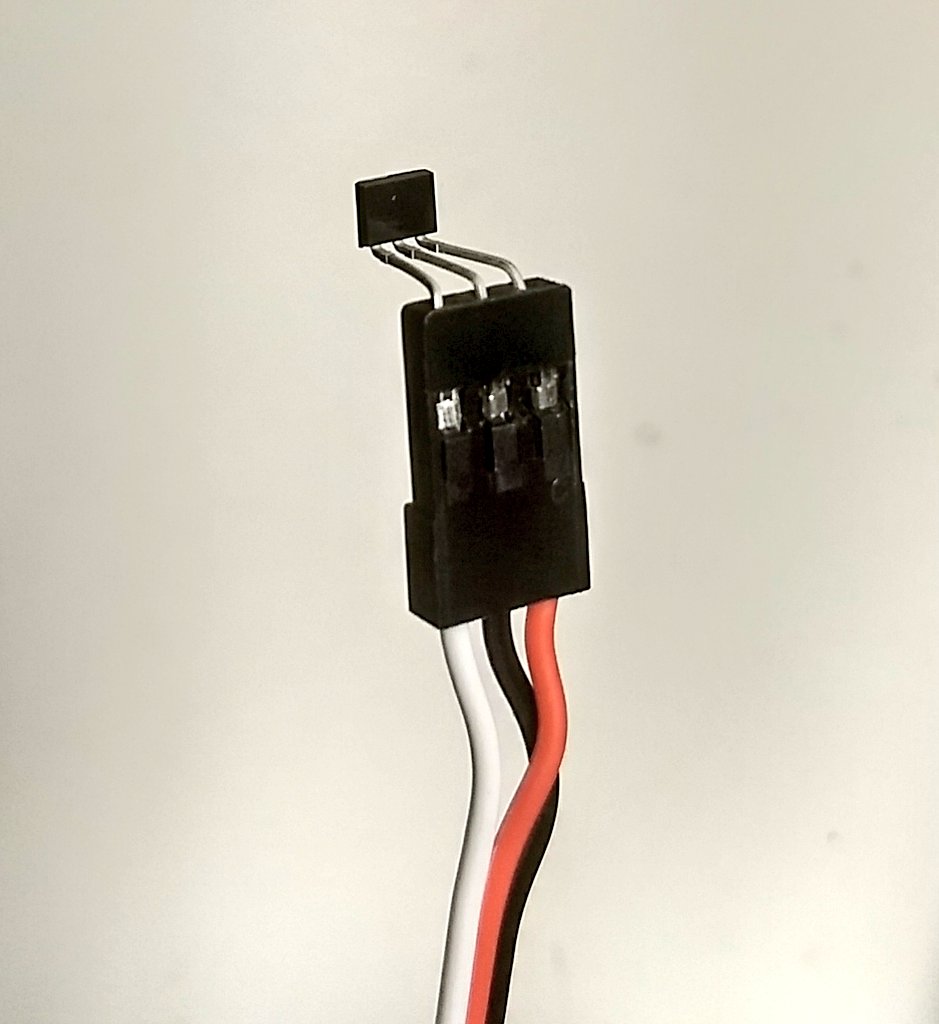
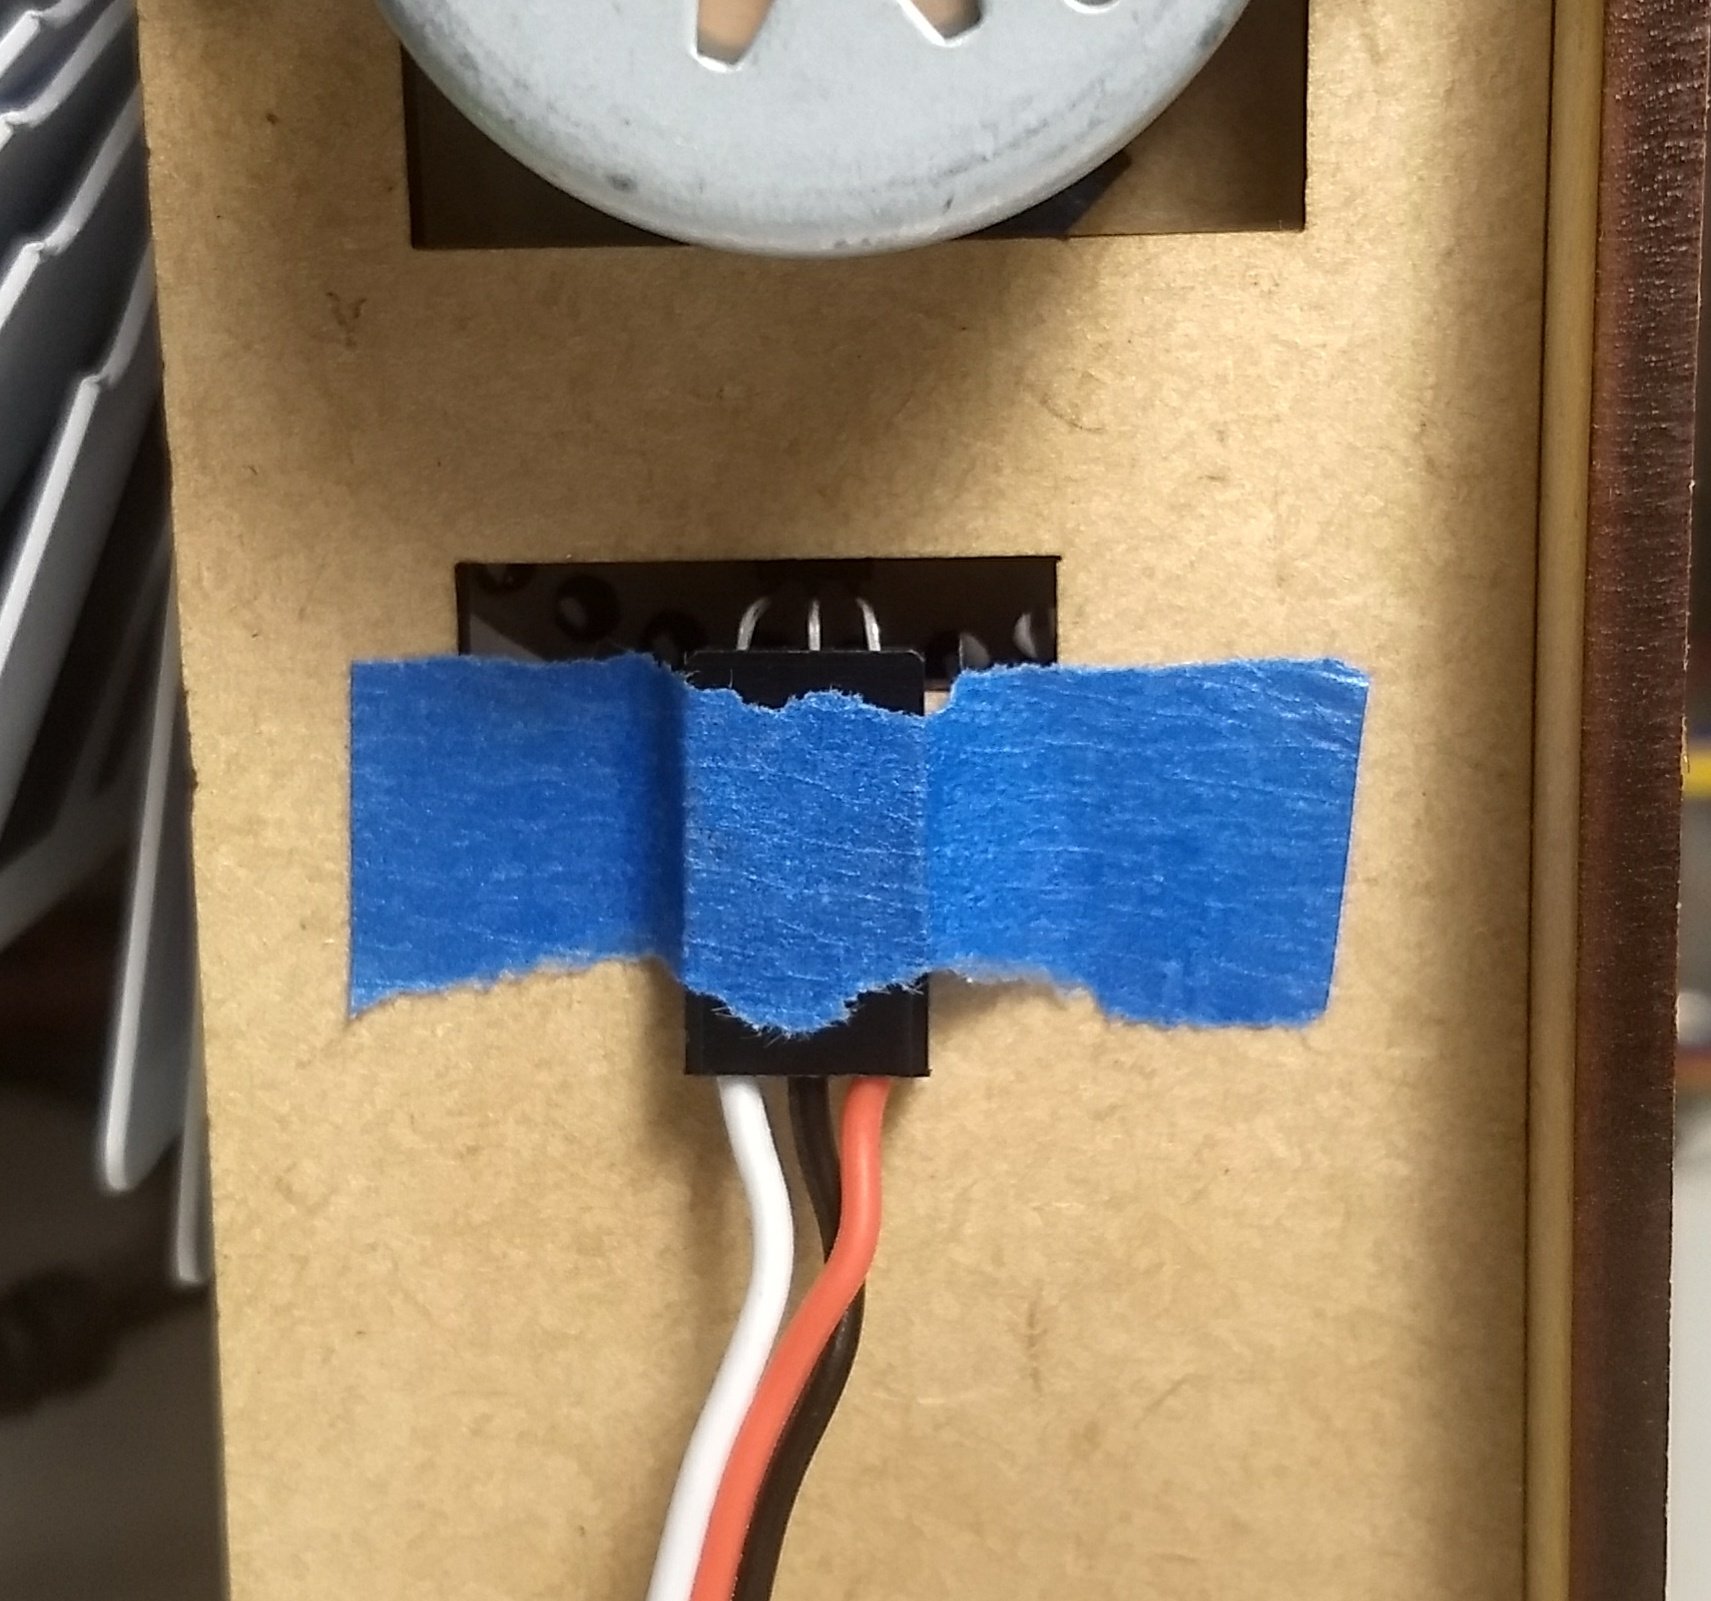
Order Sensors
Each split-flap module will need a hall effect sensor to detect the home position. The best way to mount this is with a small sensor PCB.
[Recommended] Option 1: Sensor kit on Etsy (US only) To keep things simple, this kit includes 6 sets of all the parts you’ll need to assemble sensors:
- 6x Sensor PCB
- 6x hall effect sensor (AH3391Q or similar based on availability - this will always be a brand name high quality sensor)
- 6x 3-pin right angle headers
- 6x 4mm magnet (this will mount onto your spool)
- (optional) 6x sensor cables https://bezeklabs.etsy.com/listing/1139795321/splitflap-sensor-kit-6x-with-sensors
Option 2: Bare sensor PCBs on Etsy (US only) and order parts separately I originally started selling these sets of bare PCBs for people building the Classic Controller, but they also work fine with the Chainlink system. This is potentially a cheaper option than the full sensor kits (above), though keep in mind that you’ll need to order these accessories separately so it may not come out cheaper in the end:
- hall effect sensor (e.g. AH3391Q from Digi-Key, or see Appendix for alternatives)
- 4mm round magnet (e.g. Digi-Key)
- 3-pin right-angle pin headers (e.g. Digi-Key)
- 300mm 3-pin “servo” male-to-male cable (e.g. Amazon (10 pack) [or, non-affiliate link], or AliExpress (10 pack)) https://bezeklabs.etsy.com/listing/966380990/splitflap-sensor-pcb-set-bare
Option 3: Order PCBs directly, and order parts separately Follow these instructions for ordering the PCBs, and you’ll also need to order the parts (sensors, headers, magnets) mentioned in Option 2 above.
Order misc hardware
Note: AliExpress listings have a tendency to change or disappear, or you may end up getting a different or inferior product even if you use the same product listing that has worked before (ask me how I know 🙁). These are suggestions only - they worked at one point but there is no guarantee you will get the same quality product when ordering again! Also, if you've never ordered from AliExpress before, keep in mind that most items will take 2-4 weeks to arrive; you can often find similar parts for a higher price on Amazon or ebay if you'd prefer faster shipping.
Shipping note: I’ve had a series of bad experiences (completely lost orders) with Cainiao Super Economy. You also can’t file a dispute for a refund until ~90 days have passed and the item still hasn’t shown up. I recommend choosing AliExpress Standard Shipping instead (usually 2 weeks to the US and very reliable in my experience).
Links with a ✅ have been used successfully in the past, links with a❓ have not been tried. Please comment inline below if you’ve used one of these links successfully or unsuccessfully and I’ll try to keep this updated.
Amazon links are affiliate links, which help support the project at no cost to you, but if you’d prefer to avoid using affiliate links, I’ve included non-affiliate direct links as well. All items are selected completely independently of the affiliate program, and I do not accept sponsorships or payments to recommend certain products.
| Item | Qty needed to build 6 modules | Link | Available from BezekLabs (US only) | Notes |
|---|---|---|---|---|
| 12V 28BYJ-48 Stepper Motor | 6 | See +28BYJ-48 Motor Buying Guide | Yes (optional addition to Chainlink Driver orders) | There are unfortunately a lot of different motors sold under the same name, and it can be hard to find the right ones. See the Motor Buying Guide for more details. |
| M4 x 10mm ISO 7380 bolt | 66 | Stainless steel: AliExpress - JINGRUI Hardware (20x per order, so order at least 3)❓ AliExpress - JINGRUI Hardware (200x per order - way too many) ✅ McMaster-Carr (100x per order) Black oxide: AliExpress - JINGRUI Hardware (50x per order) Fastenal (50x per order) ❓ SUGGESTIONS WELCOME - leave a comment here | No |  Make sure to get ISO 7380 (button head) bolts - other bolt head shapes may be too large for the design (see low clearance in photo to the right). Must be 10mm length. ---------- I’ve had good experience ordering large quantities from JINGRUI Hardware on AliExpress - good shipping and communication, and definitely stainless steel (non-magnetic). Fastenal has brick-and-mortar locations in the US if you’d rather pick up locally. If using black oxide for aesthetic reasons, note that they tend to be oily/dirtier to work with and will not have the same corrosion resistance as stainless. |
| M4 nut (hexagonal) | 66 | Stainless steel: AliExpress - JINGRUI Hardware (50x per order)❓ AliExpress (1000x per order - way too many) ✅ McMaster-Carr (100x per order) Black oxide: AliExpress - JINGRUI Hardware (50x per order) ✅ Fastenal❓ SUGGESTIONS WELCOME - leave a comment here | No | 11 nuts needed per module, so ordering a pack of 50 works well for 4 modules. ---------- I’ve had good experience ordering large quantities from JINGRUI Hardware on AliExpress - good shipping and communication, and definitely stainless steel (non-magnetic). Fastenal has brick-and-mortar locations in the US if you’d rather pick up locally. If using black oxide for aesthetic reasons, note that they tend to be oily/dirtier to work with and will not have the same corrosion resistance as stainless. |
| Flap | 240 | Blank flaps: Etsy (240+ per order) ✅ or purchase PVC ID cards and a Badge Slot Punch then build a cutting jig, and create flaps yourself ✅ | 👈 Yes | I may be a bit biased, but I highly recommend purchasing the die-cut flaps on Etsy if you’re in the US - it’s much easier and they’re much higher quality than cutting them yourself, though they do cost more than doing it yourself. If you’re in the US, message me on Etsy and I’ll send you a couple free samples. - Note (2023-12-12): I am sold out of my initial batch of PRINTED flaps. I am working on an updated design, expected to launch in early 2024. If you are waiting for these new printed flaps, I would also recommend holding off on ordering the laser-cut parts for now too; the updated design will come alongside a refreshed mechanical design to support 52 flaps per module rather than 40 flaps per module. |
| Letter Sticker Pack (If using blank flaps or cutting flaps yourself) | 3 | Amazon ✅ [or, non-affiliate link] | Each pack contains 2 of every letter (and a bunch of spares of more common letters, which isn’t helpful for us here) | |
| 12V Power Supply | 1 | Many options on Amazon | Each module requires about 0.25A, so for a 6 module kit you should get a supply rated for at least 1.5A. This will depend on the specific 28byj-48 motors you get; not all of them have the same resistance, and therefore may have different current requirements. “CCTV” is a good search term for 12V supplies with the 2.1mm barrel jack connector |
Assemble v0.5/v0.6/v0.7 Splitflap
Ready to assemble your display? See the complete assembly instructions document.
Appendix A: Older laser-cut file versions
Older v0.6 Laser cut files
Since v0.7 has breaking dimensional changes compared to v0.5/v0.6, the older v0.6 files are available for reference here in case you are expanding an existing v0.5/v0.6 display. For new builds, v0.7 or newer is recommended.
Ponoko
- 1 module
    - 3mm MDF: https://github.com/scottbez1/splitflap/releases/download/v0.6/v0.6_laser_vector_ponoko_mdf_1x.svg [178.6 x 173.33 mm]
    - 3mm Acrylic: https://github.com/scottbez1/splitflap/releases/download/v0.6/v0.6_laser_vector_ponoko_acrylic_0.08kerf_1x.svg [178.42 x 172.97]
- 4 modules
    - 3mm MDF: https://github.com/scottbez1/splitflap/releases/download/v0.6/v0.6_laser_vector_ponoko_mdf_4x.svg [357.2 x 346.66 mm]
    - 3mm Acrylic: https://github.com/scottbez1/splitflap/releases/download/v0.6/v0.6_laser_vector_ponoko_acrylic_0.08kerf_4x.svg [356.84 x 345.94 mm]
(Developer note: for legacy reasons, both MDF and Acrylic files are generated with design `thickness = 3.2`)
Elecrow
- 3mm wood: https://github.com/scottbez1/splitflap/releases/download/v0.6/v0.6_laser_vector_elecrow_wood_0.185kerf_1x.zip
- 3mm acrylic: [not yet tested. If you try this, I’d recommend starting with the Ponoko 3mm acrylic file from above; let me know which file you used and how it turns out - under/oversized, etc and I will use that feedback to generate a recommended file in the future]
Appendix B: Hall effect sensor options
It seems like the AH3391Q hall effect sensor is sometimes low on stock at digikey, so here are some alternatives I’ve tested that seemed to work ok. Make sure that you pick a through-hole package - you want a 3-SIP and not an SOT23 or other surface mount (SMT) model.
Cheap AliExpress Option I’ve ordered a “3144” hall-effect sensor from one of the numerous stores on AliExpress that sells them, and it seems to work alright, despite there being no technical specifications nor datasheet available. It might be a knockoff of Allegro’s discontinued A3144? But who knows exactly what you’ll receive. It’s certainly cheap though!
Note: there is an additional risk with an ESP32 or other 3.3v microcontroller; if these are indeed clones of the A3144, the datasheet indicates an acceptable voltage range of 4.5V-24V, so 3.3V operation may produce undefined results. Of course, since the real A3144 is discontinued and most sellers do not provide any datasheet at all, one could argue that all results are undefined regardless… 🤔
Legitimate alternatives from DigiKey I’ve personally tested each of these options and can confirm all will work.
| P/N | type | trip | release | notes |
|---|---|---|---|---|
| AH3391Q-P-B | unipolar South | 275G | 250G | Works well, recommended |
| AH3369Q-P-B | unipolar South | 175G | 150G | Works well |
| AH3366Q-P-B | unipolar South | 100G | 85G | Works well |
| AH3365Q-P-B | unipolar South | 100G | 80G | Works well |
| A1122LUA-T | unipolar South | 150G | 125G | Works well |
Alternatives from LCSC I’ve personally tested each of these options and can confirm all will work.
| P/N | type | trip | release | notes |
|---|---|---|---|---|
| HX6286UA | unipolar South | 80G | 60G | Works well |
| HX3144UA | unipolar South | 80G | 60G | Works well. Interestingly the datasheet is identical (except part number) to HX6286UA… |
| SS443R | unipolar South | 135G | 85G | Works well |
| CC6112TO | unipolar South | 40G | 30G | Works well. Trip point is a little lower than others (more sensitive to errant magnetic fields) |
Beware that many other common/cheap hall-effect sensors may not work correctly in this application. Particularly, hall-effect sensors advertised as “low power” generally won’t work as they achieve the low power by sampling the sensor at a low duty cycle that can’t achieve the precision needed for a split-flap display.
Similarly, beware of omnipolar hall-effect sensors and “latch” sensors.
Omnipolar sensors may work, but because the magnet approaches the sensor laterally, there is a risk of a false activation before and after the magnet passes if the magnet is strong enough, due to the magnetic field’s curvature which may exceed the threshold in the opposite direction (see images below). Unipolar sensors do not have this problem because they can only be activated by one magnetic pole and not the other.


“Latch” type sensors almost certainly won’t work, as they remain activated until an equally strong magnetic field is applied in the opposite direction.
Finding alternative parts on Digi-Key
In case a suggested part is out of stock or discontinued, Digi-Key makes it relatively easy to sort through possible alternatives. Here’s an example searching for alternatives for this part which was out of stock previously:
The "View Similar" section at the bottom of the part page is pretty useful. You can select the attributes that are critical (though this may be a bit tricky to decide when it's not your own design) and find other parts that match.
So in this case I selected Active (meaning it's still actively being manufactured, which probably isn't actually critical for you, but I always select this when recommending parts just so it's less likely to end up permanently out of stock), Female Socket, 6 pins, the same 0.1" spacing and through-hole mounting, the same overall height (since this is plugging in as a shield), and 2 rows.

Then on the results page I enter quantity "1" so results are ordered by price at single quantities, along with In Stock and Exclude marketplace (which is 3rd party sellers and may result in separate shipping fees).

After that it's always good to double-check the photo/datasheet to make sure it’s what you expect.
Appendix C: Legacy Classic Controller
The Classic Controller is no longer recommended for new builds. The Chainlink System is preferred.
Classic-specific hardware
| Qty needed to build 4 modules | Link | Notes | |
|---|---|---|---|
| Arduino Uno | 1 | Many options on Amazon or AliExpress | (Only needed for Classic Controller) |
| 12V 28BYJ-48 Stepper Motor | 4 | See +28BYJ-48 Motor Buying Guide | There are unfortunately a lot of different motors sold under the same name, and it can be hard to find the right ones. See the Motor Buying Guide for more details. |
| M4 x 10mm ISO 7380 bolt | 44 | Stainless steel: AliExpress - JINGRUI Hardware (20x per order, so order at least 3)❓ AliExpress - JINGRUI Hardware (200x per order - way too many) ✅ McMaster-Carr (100x per order) Black oxide: AliExpress - JINGRUI Hardware (50x per order) Fastenal (50x per order) ❓ SUGGESTIONS WELCOME - leave a comment here | Make sure to get ISO 7380 (button head) bolts - other bolt head shapes may be too large for the design (see low clearance in photo to the right). Must be 10mm length. ---------- I’ve had good experience ordering large quantities from JINGRUI Hardware on AliExpress - good shipping and communication, and definitely stainless steel (non-magnetic). Fastenal has brick-and-mortar locations in the US if you’d rather pick up locally. If using black oxide for aesthetic reasons, note that they tend to be oily/dirtier to work with and will not have the same corrosion resistance as stainless. |
| M4 nut (hexagonal) | 44 | Stainless steel: AliExpress - JINGRUI Hardware (50x per order)❓ AliExpress (1000x per order - way too many) ✅ McMaster-Carr (100x per order) Black oxide: AliExpress - JINGRUI Hardware (50x per order) ✅ Fastenal❓ SUGGESTIONS WELCOME - leave a comment here | 11 nuts needed per module, so ordering a pack of 50 works well for 4 modules. ---------- I’ve had good experience ordering large quantities from JINGRUI Hardware on AliExpress - good shipping and communication, and definitely stainless steel (non-magnetic). Fastenal has brick-and-mortar locations in the US if you’d rather pick up locally. If using black oxide for aesthetic reasons, note that they tend to be oily/dirtier to work with and will not have the same corrosion resistance as stainless. |
| Flap | 160 | Blank flaps: Etsy (160+ per order) ✅ Pre-printed flaps: Etsy (40+ per order) ✅ or purchase PVC ID cards and a Badge Slot Punch then build a cutting jig, and create flaps yourself ✅ | I may be a bit biased, but I highly recommend purchasing the die-cut flaps on Etsy if you’re in the US - it’s much easier and they’re much higher quality than cutting them yourself, though they do cost more than doing it yourself. If you’re in the US, message me on Etsy and I’ll send you a couple free samples. |
| Letter Sticker Pack (If using blank flaps or cutting flaps yourself) | 3 | Amazon ✅ [or, non-affiliate link] | Each pack contains 2 of every letter (and a bunch of spares of more common letters, which isn’t helpful for us here) |
| 12V Power Supply | 1 | Many options on Amazon | Each module requires about 0.25A, so for a 4 module kit you should get a supply rated for at least 1A. This will depend on the specific 28byj-48 motors you get; not all of them have the same resistance, and therefore may have different current requirements. “CCTV” is a good search term for 12V supplies with the 2.1mm barrel jack connector |
Order controller PCB (Classic)
Option 1: Purchase on Etsy (US shipping only) Since you only need 1 control PCB for 4 modules, but most cheap PCB manufacturers sell a minimum of 10 boards (or at least have a high minimum shipping cost that makes small quantity orders somewhat expensive), I've made the controller PCBs available in single quantities in my Etsy store: https://www.etsy.com/listing/980030861/splitflap-classic-controller-pcb-bare
If you're going to be making a bunch of splitflap modules and need many control boards, it may be cheaper for you to get the PCBs manufacred yourself; see below for details.
Option 2: Custom-order PCB from SeeedStudio, JLCPCB, etc Generally it will cost ~$10-20 for shipping plus ~$5 for the PCBs (10 PCBs), with the order taking about 3-4 weeks to arrive.
- Download the zip file of gerbers
- (or choose the zip of panelized gerbers which includes 2 controllers per PCB, so you get 20 controllers from an order of “10” PCBs for the same $5 price, but shipping will likely be more expensive from the increased weight/size. Make sure to enter 96 x 96 as the dimensions instead of 48 x 96 when ordering!)
- Go to SeeedStudio
- Click “Add Gerber Files” and select the zip file you just downloaded
- You can click “Gerber Viewer” in the green box to preview the design and make sure SeeedStudio interpreted it correctly
- Enter the settings below:

Order sensor PCBs
Sensor PCBs (breakout boards) make it easy to mount and adjust the hall-effect sensor on each module. They’re not strictly necessary, as you can attach the hall-effect sensors another way, but the PCBs are much nicer.
| Qty needed to build 4 modules | Link | Notes | |
|---|---|---|---|
| 30cm Male-to-Male Servo Cable | 4 | AliExpress (10x per order) ✅ Amazon (10x per order) ✅ [or, non-affiliate link] | Only need ONE order - each is 10 pieces |
| Magnet 4mm diameter | 4 | Digi-Key ✅ | Most cheap 4mm diameter (1mm to 2.5mm thickness) neodymium magnets, e.g. from Amazon or AliExpress, will generally work fine. These are included in the simplified BOM with the classic controller above, so you won’t need to order them separately if you use that. |
[Recommended] Option 1: Purchase on Etsy (US shipping only) While you can order the sensor PCBs from your favorite PCB manufacturer (see below), you’ll likely end up with way more sensor PCBs than you need. As an alternative to paying for hundreds of PCBs when you only need a handful, I’m selling them in packs of 4 on Etsy: https://www.etsy.com/listing/966380990/splitflap-sensor-pcb-set-4x-bare
Option 2: Don’t use a sensor breakout PCB If you'd like to mount the hall-effect sensor without a sensor PCB, you can do so by swapping the 5V and GND pins of the servo cable and then simply plugging the sensor into the cable's connector.
Option 3: Custom-order PCBs from SeeedStudio (large orders only) If you’re familiar with ordering custom PCBs and plan to make a lot of split-flap modules, you can follow these directions to end up with 200(!!) sensor PCBs. The sensor PCB design is optimized for manufacture at SeeedStudio using their panelization rules (individual boards are separated by V-cut grooves), so these design files may not work out-of-the-box for other manufacturers. Generally it will cost ~$10-20 for shipping plus ~$5 for the PCBs (10 PCB panels, each with 20 sensor breakout boards for 200 total), with the order taking about 3-4 weeks to arrive. Since board manufacturing is a fixed price below 100x100mm and shipping doesn’t change much based on weight, it doesn’t really make sense to order non-panelized sensor PCBs from SeeedStudio since you’ll barely save money.

- Download the zip file of gerbers
- Go to SeeedStudio
- Click “Add Gerber Files” and select the zip file you just downloaded
- You can click “Gerber Viewer” in the green box to preview the design and make sure SeeedStudio interpreted it correctly
- Enter the settings seen to the right → (click photo to expand)
Order electronic components (Classic)
Note: These instructions are designed to be easy to follow, but not necessarily the cheapest option. For more experienced hobbyists, I’d recommend closely comparing the BOM below to the raw BOM that’s auto-generated from the schematic (found here). The raw BOM includes notes on alternative sources for some items and some line items can be combined for a slightly cheaper order. You also may already have some components (like common resistors) and can omit those if desired.
- Download this file: https://github.com/scottbez1/splitflap/releases/download/v0.5/bom_simplified_digikey.csv
- Go to https://www.digikey.com/ordering/shoppingcart
- Use the “Upload a File” option to upload the bom_simplified_digikey.csv file you downloaded above
- For “First Part Record Begins On Row:” enter 2
- For each of the table headers, click to select “Quantity”, “Digi-Key Part Number”, and “Customer Reference” in that order
- Click “Add to current cart”
- You may see a message like “An improved value option is available. View Options” — this generally means it would actually be cheaper to buy a higher quantity of an item. Click View Options to see the proposed change, and then click Add if it looks good:

Hall effect sensor options If the recommended hall effect sensor is out of stock at Digi-Key, see the appendix for more info on selecting/ordering alternatives.
Ordering expansion control boards (Classic)
The control board design is chainable, and up to 3 control boards can be connected to a single Arduino (1 main board plus 2 expansion boards).
Note: the original specified barrel jack is only rated for 2.5A but 3 boards would draw somewhere between 3-5A, exceeding the rating of a single connector. Consider using part number 839-1514-ND instead (rated for 6A and has the same footprint), or power each board individually (note that the ribbon cable connects 12V between boards via two wires which can be cut/disconnected, but GND is shared between 12V and 5V supplies and must remain connected between boards).
The 2 expansion control boards use the same PCB as the primary control board, but have a few small changes to the bill-of-materials and assembly:
| Change for controller boards 2 & 3 | Reference | Part number(s) | Explanation |
|---|---|---|---|
| ADD | J1, J2 | S9170-ND (x2) | Expansion connectors - solder one to the “EXP. OUT” location on the previous board and one to the “EXP. IN” location on this expansion board. |
| ADD | None | H3CCS-1418G-ND | Expansion ribbon cable |
| OMIT | CON1 | CP-202A-ND | Barrel jack connector isn’t needed on expansion boards - power is transferred to expansion boards through ribbon cable, so they don’t need their own power connectors |
| OMIT | JP1 | S1012EC-02-ND and S9337-ND | These are components used when plugging the PCB into an Arduino as a shield; the expansion boards don’t plug into an Arduino and instead get their data/power through the ribbon cable instead (see above) |
| OMIT | U1 | S1012EC-03-ND, S1012EC-02-ND, and S7106-ND | These are components used when plugging the PCB into an Arduino as a shield; the expansion boards don’t plug into an Arduino and instead get their data/power through the ribbon cable instead (see above) |
| OMIT | R9 | CF14JT470RCT-ND | 470 ohm resistor, related to Arduino connection (expansion boards don’t plug into an Arduino directly) |
[End of Classic Controller ordering instructions]
Jump to Assembly