Uncensored AI Studio
August 29, 2026 · View on GitHub
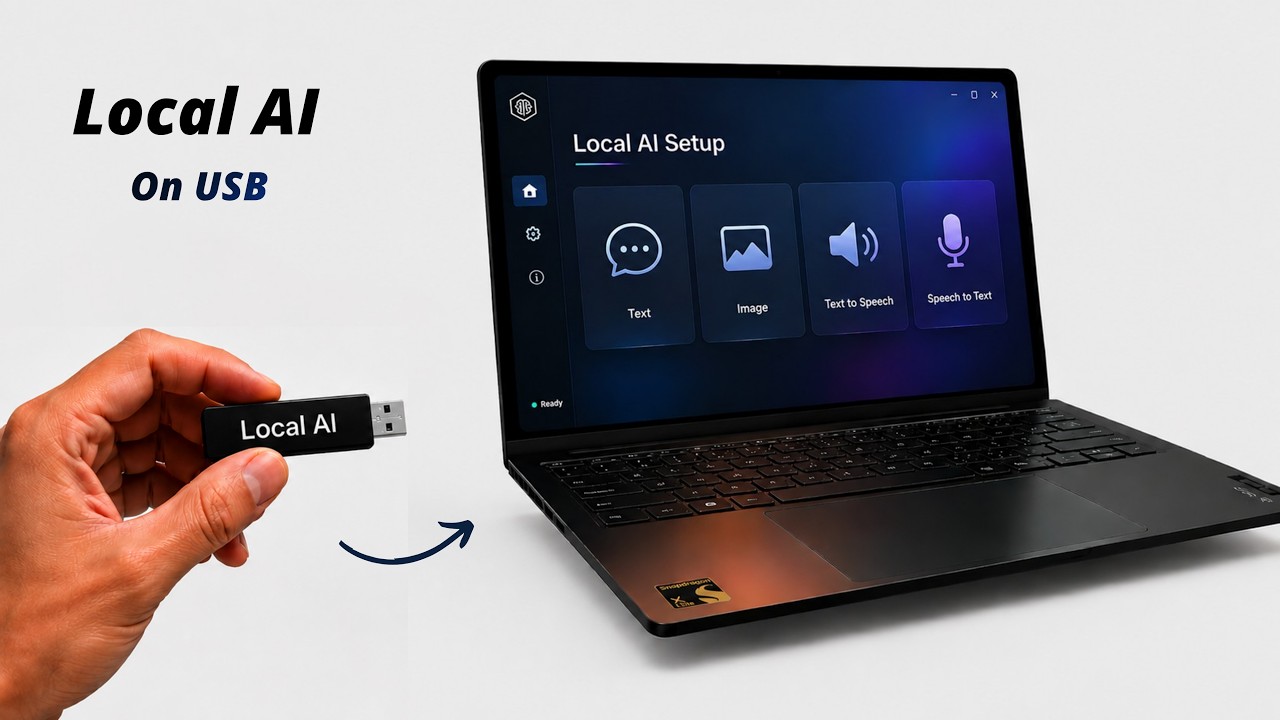
A premium, zero-configuration local AI studio and offline GUI for Stable Diffusion (Image Generation), LLMs (Chat), Whisper (Speech-to-Text), and Kokoro (Text-to-Speech). Powered by hardware-accelerated GPU and NPU execution on Windows, Linux, and macOS.



🎥 Watch the Setup & Demo Video: https://youtu.be/yeFvP3SWMak
📖 Table of Contents
- What is Uncensored AI Studio?
- Key Features
- Workspace & Engine Architecture
- Supported Models
- Folder Architecture
- Getting Started
- Hardware Compatibility & Acceleration
- Troubleshooting & FAQ
- Building From Source
- Licensing
📖 What is Uncensored AI Studio?
Uncensored AI Studio is a completely offline, zero-setup, self-contained AI studio for Windows, Linux, and macOS. Unlike cloud-based AI systems, it runs entirely on your own hardware with no censorship, tracking, subscriptions, or login requirements.
It unifies four major local AI capabilities into one high-performance desktop interface:
- 🎨 Image Generation (Stable Diffusion): Generate and edit high-quality images offline using
.safetensors,.gguf, or.ckptmodel weights. - 💬 Text Chat (LLMs): Converse privately with open-source language models (GGUF format) powered by official, high-performance
llama.cppbackends. - 🎙️ Speech-to-Text (Whisper): Transcribe voice recordings and speech to text in real-time with an integrated
whisper.cppengine. - 🗣️ Text-to-Speech (Kokoro TTS): Convert text outputs into highly natural, lifelike vocal audio offline using the
Kokoro-82MONNX model.
🌟 Key Features
- 100% Offline & Private: Run inferences locally. No internet, telemetry, cloud logging, or API keys required.
- Zero-Install Portability: Entire runtime (Node.js, models, GPU backends) is self-contained. Zero global system environment changes.
- Auto-Configured Acceleration: Auto-detects hardware specs to load CUDA (Nvidia), ROCm (AMD), Vulkan (Intel/AMD/NVIDIA), Metal (macOS), or OpenVINO (Intel NPU) backends.
- Integrated Model Manager: Paste Hugging Face URLs to download weights directly, or drag-and-drop local weights to import them.
- Live Performance Monitor: Track CPU, RAM, GPU, and VRAM utilization in real-time directly inside the web UI.
- Local Output Gallery: Saves generated images side-by-side with prompt parameters and metadata JSON files.
⚙️ Workspace & Engine Architecture
To avoid exhausting system RAM or VRAM, text and image engines are mutually exclusive by default. You can switch between workspaces inside the UI:
- Image Generation Workspace: Uses a dedicated
stable-diffusion.cppbackend node. Model weights are stored inapp/models/. - Text Chat Workspace: Uses a portable
llama.cppserver backend. Model weights (.gguf) are stored inapp/llm-models/. A small Qwen2.5 Coder starter model can be downloaded directly from the Text Chat panel. - Speech Worker (Whisper): Runs a localized
whisper-cliprocess to convert your vocal input to text. - Audio Output (Kokoro TTS): Utilizes
kokoro-jslocally on the server side to read responses in natural voices.
Supported Models
The app is designed around single-file local models that can be loaded directly by the bundled backend engines.
Image generation
| Model type | Supported | Put files in | Notes |
|---|---|---|---|
| Stable Diffusion 1.5 checkpoints | Yes | app/models/ | Best compatibility. Use .safetensors or .ckpt files. |
| SDXL checkpoints | Yes | app/models/ | Supported as single-file checkpoints. Requires more RAM/VRAM than SD 1.5. |
| Single-file SD/SDXL GGUF checkpoints | Limited | app/models/ | Only complete single-file checkpoints are supported. |
| OpenVINO image model folders | Intel NPU only | app/openvino-models/ | Download from the Model Manager after running the OpenVINO setup. |
| CoreML image models | Apple Silicon only | app/models/ | Requires macOS on Apple Silicon and the CoreML setup path. |
| Flux, HiDream, Hunyuan, Wan, Qwen Image, Z-Image workflows | No | N/A | These usually require separate diffusion, VAE, and text encoder files and are not one-click checkpoint loads in this app. |
| LoRA, ControlNet, VAE-only, text-encoder-only, or diffusion-only files | No | N/A | Companion files are not loaded as standalone image models. |
Known-good image models available from the Model Manager:
| Name | Filename | Type | Approx. size | Recommended use |
|---|---|---|---|---|
| Juggernaut XL v9 Lightning | Juggernaut_RunDiffusionPhoto2_Lightning_4Steps.safetensors | SDXL | 6.6 GB | High-quality photorealism on mid/high tier machines. |
| DreamShaper XL Lightning | DreamShaperXL_Lightning.safetensors | SDXL | 6.6 GB | General SDXL images, fantasy, renders, and illustration. |
| DreamShaper 8 | DreamShaper_8_pruned.safetensors | SD 1.5 | 2.1 GB | Faster, lower-memory image generation. |
| CyberRealistic V8 | CyberRealistic_V8_FP16.safetensors | SD 1.5 | 2.0 GB | Realistic SD 1.5 images and lower-memory systems. |
| Rev Animated | rev-animated-v1-2-2.safetensors | SD 1.5 | 2.0 GB | Stylized/anime SD 1.5 images. |
| LCM DreamShaper OpenVINO | OpenVINO/LCM_Dreamshaper_v7-fp16-ov | OpenVINO | 2.7 GB | Intel Core Ultra NPU test model. |
Text, speech, and TTS
| Workspace | Supported model files | Put files in | Notes |
|---|---|---|---|
| Text Chat | .gguf llama.cpp models | app/llm-models/ | Use single-file GGUF chat/instruct models. Vision models may also require a matching mmproj file. |
| Speech-to-Text | whisper.cpp .bin models | app/speech-models/ | Use Whisper GGML/whisper.cpp model files. |
| Text-to-Speech | Kokoro .json manifests and model assets | app/tts-models/ / app/tts-runtime/ | Use the built-in Kokoro setup and Model Manager entries. |
Note
Linux release binaries are built for Ubuntu 24.04-era systems and require glibc 2.38+ plus GLIBCXX_3.4.32+. On older Ubuntu/Debian VMs, a model such as CyberRealistic may be valid but the backend can still fail before loading it. Upgrade the VM OS or build the backend from source.
📁 Folder Architecture
Uncensored-AI-Studio/
├── windows.bat                # Windows Launcher (Double-click entrypoint)
├── linux.sh                   # Linux Launcher (Terminal entrypoint)
├── mac.sh                     # macOS Launcher (Terminal entrypoint)
├── LICENSE                    # MIT Open Source License
├── .gitignore                 # Excludes models and output images from version control
├── README.md                  # Detailed system documentation
├── scripts/
│   ├── setup/                 # Platform setup and backend installers
│   ├── reset/                 # Clean install & environment repair
│   ├── server/                # UI web server and backend lifecycle manager
│   ├── workers/               # Local worker processes
│   ├── build/                 # Optional source build helpers
│   └── config/                # Runtime configuration catalogs
└── app/
    ├── frontend/              # UI source code (Vite + React)
    ├── models/                # Place image weights here (.safetensors, .gguf, .ckpt)
    ├── llm-models/            # Place text GGUF weights here
    └── outputs/               # Saved images and parameters metadata
🚀 Getting Started
Ensure you have a modern web browser installed. Follow the quick guide below for your platform:
Windows Setup
- Launch: Double-click
windows.bat.Note
On the first run, the script will automatically download a portable Node.js runtime and configure pre-compiled GPU/CPU backend binaries.
- Add Models: Drop
.safetensors,.gguf, or.ckptweights intoapp/models/(or download them via the Model Manager tab in the UI). - Generate: Open
http://localhost:1420in your browser, select your model, and write a prompt.
Linux Setup
- Make executable: Open a terminal in the project folder and make the script executable:
chmod +x linux.sh - Launch: Run
./linux.sh.- NVIDIA GPU Users: You will be prompted to set up the high-performance CUDA backend (downloads prebuilt or automatically compiles from source as a fallback).
- AMD Radeon Performance: Run with
./linux.sh --max-perfto add the ROCm backend (~1.3 GB download). - Intel Core Ultra NPU: Run with
./linux.sh --setup-openvinoto configure Intel NPU support (requires Intel Linux NPU driver).
- Add Models: Drop your weights into
app/models/or download them via the Model Manager tab. - Generate: Open
http://localhost:1420in your browser.
macOS Setup
- Make executable: Open a terminal in the project folder and make the script executable:
chmod +x mac.sh - Launch: Run
./mac.sh.Important
The prebuilt macOS backend is optimized for Apple Silicon (M1 or newer) and uses Metal GPU acceleration. (macOS Intel hardware is completely unsupported).
- Add Models: Drop your weights into
app/models/or download them via the Model Manager tab. - Generate: Open
http://localhost:1420in your browser.
🖥️ Hardware Compatibility & Acceleration
Windows
| GPU Vendor | Tech | Status | Notes |
|---|---|---|---|
| Nvidia | CUDA | ✅ Native | Maps sd-cuda.exe with Nvidia SDK 12 optimizations. |
| AMD Radeon | Vulkan | ✅ Native | Maps sd-vulkan.exe with Vulkan API acceleration. |
| Intel Arc | Vulkan | ✅ Native | Maps sd-vulkan.exe for Intel hardware. |
| Integrated / None | CPU | ⚠️ Fallback | Runs on logical CPU threads (slow). |
Linux
| GPU Vendor | Primary | Fallback | Notes |
|---|---|---|---|
| NVIDIA | CUDA / Vulkan | Vulkan / CPU | Auto-detects NVIDIA. Prompt-driven CUDA setup downloads prebuilt or compiles from source. Falls back to Vulkan for GTX. |
| AMD Radeon | ROCm | Vulkan | ROCm provides best AMD performance when host ROCm drivers are available. |
| Intel Arc / integrated | Vulkan | CPU | Cross-vendor Vulkan support. |
| Intel Core Ultra NPU | OpenVINO NPU | CPU | Requires the Intel Linux NPU driver, kernel 6.6+, Python 3, and ./linux.sh --setup-openvino. |
| Integrated / None | CPU | — | Runs on logical CPU threads (slow). |
macOS
| Hardware | Primary | Fallback | Notes |
|---|---|---|---|
| Apple Silicon (M1 or newer) | Metal | CPU | Uses the official Darwin arm64 stable-diffusion.cpp backend. |
Important
System Requirements & Notes:
- 64-bit Windows 10 or Windows 11 is required for the portable Node.js 22 runtime used by the Windows launcher.
- glibc 2.38 or newer is required for the prebuilt Linux backends (Ubuntu 24.04, Fedora 40+, etc.). The setup script will warn you if your glibc is older.
- Linux runtime libraries: The prebuilt backends require
libgomp.so.1; Vulkan additionally requireslibvulkan.so.1and a working GPU driver. The setup script now checks these before installing a backend and prints the exact distro package command when one is missing. - Linux OpenVINO NPU: Intel Core Ultra, x86_64 Linux, kernel 6.6+, a working
/dev/accel/accel0device, Python 3 withvenv, and the Intel Linux NPU driver are required.
🛠️ Troubleshooting & FAQ
Reset Environment: If a build fails or you want to clear dependencies
Run scripts/reset/reset.ps1 (Windows) or scripts/reset/reset.sh (Linux/macOS). This will clear temporary compilation and package caches to repair your environment. (Note: This preserves your model weights and generated output images).
Linux backends fail to start with GLIBC_2.38 not found
The prebuilt binaries require glibc 2.38+ (e.g. Ubuntu 24.04). If your distribution uses an older glibc version, you can upgrade your operating system or compile the backend from source (see the Building From Source guide below).
Port Conflicts: Default port address already busy
The web user interface runs on port 1420 by default. The GPU backend manager attempts to bind to port 8080 first, then automatically detects and falls back to a free system port if 8080 is already occupied.
Linux ROCm not loading for AMD Radeon GPUs
Ensure your AMD GPU hardware and host kernel are fully compatible with ROCm 7.13. If ROCm fails to initialize correctly, the application will automatically fall back to Vulkan acceleration.
Linux uses the integrated GPU instead of the discrete GPU
On dual-GPU Linux systems, Vulkan device order can put the integrated Intel GPU at vulkan0 and the discrete AMD/NVIDIA GPU at vulkan1. The launcher now tries to prefer a discrete Vulkan device when vulkaninfo --summary is available. To force a device manually, start the app with SD_VULKAN_DEVICE=vulkan1 ./linux.sh or use another index such as vulkan0/vulkan2.
Windows exits with code 3221225781 (0xC0000135)
This code means Windows could not locate a required backend DLL:
- For AMD/Intel Vulkan: Rerun
scripts/setup/setup.ps1. Setup installs the required Microsoft Visual C++ x64 runtime and replaces stale Vulkan binaries with the compatible pinned build. Approve the Windows administrator prompt when it appears. - For NVIDIA CUDA: Install or update your NVIDIA graphics driver, then rerun the setup script to restore the CUDA runtime DLLs.
If setup cannot install the runtime, install Microsoft's official Visual C++ Redistributable for x64 manually, restart Windows, and rerun setup. A custom Vulkan build is not the first fix for this exit code.
Windows exits with code 3221225501 (0xC000001D)
This is an illegal CPU instruction from an older machine-specific Windows backend build; it is not evidence that the model or RTX GPU is unsupported. Rerun scripts/setup/setup.ps1 to replace the CPU/CUDA binaries with runtime-dispatched builds and install the matching CUDA 12.8 runtime. The corrected CUDA package includes Blackwell targets for RTX 50-series GPUs.
Generation shows "server is not responding or crashed"
This indicates that the local backend engine process terminated. Check your launch terminal (where you executed windows.bat, ./linux.sh, or ./mac.sh) for the exact console error. Common causes include glibc version mismatches, missing Vulkan drivers, or system out-of-memory (OOM) issues.
🔨 Building From Source
The setup script (scripts/setup/setup.sh) now automates building and setting up the CUDA backend from source when selected. If you want to manually build all backends (CPU, Vulkan, and CUDA) at once, you can run the included scripts/build/build_from_source.sh script.
For macOS, the included scripts/build/build_from_source.sh builds the Metal backend and copies it to app/backend/mac/sd.
Requirements
git,cmake,make(orninja), and a C++17 compiler (g++/clang++).- For CUDA: the NVIDIA CUDA toolkit (
nvcc) must be on yourPATH. - For Vulkan: the Vulkan SDK / loader, a compatible driver, and
glslc(Ubuntu/Debian package:glslc). - For ROCm: AMD ROCm development libraries.
- For macOS Metal: Apple Command Line Tools or Xcode.
Build commands
# 1. Clone upstream
git clone https://github.com/leejet/stable-diffusion.cpp.git
cd stable-diffusion.cpp
mkdir build && cd build

# 2. Configure for your backend (pick ONE)
# CPU only
cmake .. -DSD_BUILD_SHARED_LIBS=ON -DCMAKE_BUILD_TYPE=Release

# CUDA
cmake .. -DSD_CUDA=ON -DSD_BUILD_SHARED_LIBS=ON -DCMAKE_BUILD_TYPE=Release

# Vulkan
cmake .. -DSD_VULKAN=ON -DSD_BUILD_SHARED_LIBS=ON -DCMAKE_BUILD_TYPE=Release

# ROCm
cmake .. -DSD_HIPBLAS=ON -DSD_BUILD_SHARED_LIBS=ON -DCMAKE_BUILD_TYPE=Release

# macOS Metal
cmake .. -DSD_METAL=ON -DSD_BUILD_SHARED_LIBS=ON -DCMAKE_BUILD_TYPE=Release

# 3. Build
cmake --build . --config Release -j$(getconf _NPROCESSORS_ONLN 2>/dev/null || sysctl -n hw.ncpu)

# 4. Copy the binaries into this project
cp bin/sd* /path/to/Uncensored-AI-Studio/app/backend/linux/<backend>/
After copying, rename the server binary to match what scripts/server/serve.cjs expects:
- Vulkan:
sd→sd-vulkan - ROCm:
sd→sd-rocm
Then restart the app with ./linux.sh (Linux) or ./mac.sh (macOS).
📝 License
This project is licensed under the MIT License - see the LICENSE file. Bundles stable-diffusion.cpp (MIT License). Model weights are subject to their respective creators' licenses.