xmonad-config
February 13, 2018 · View on GitHub
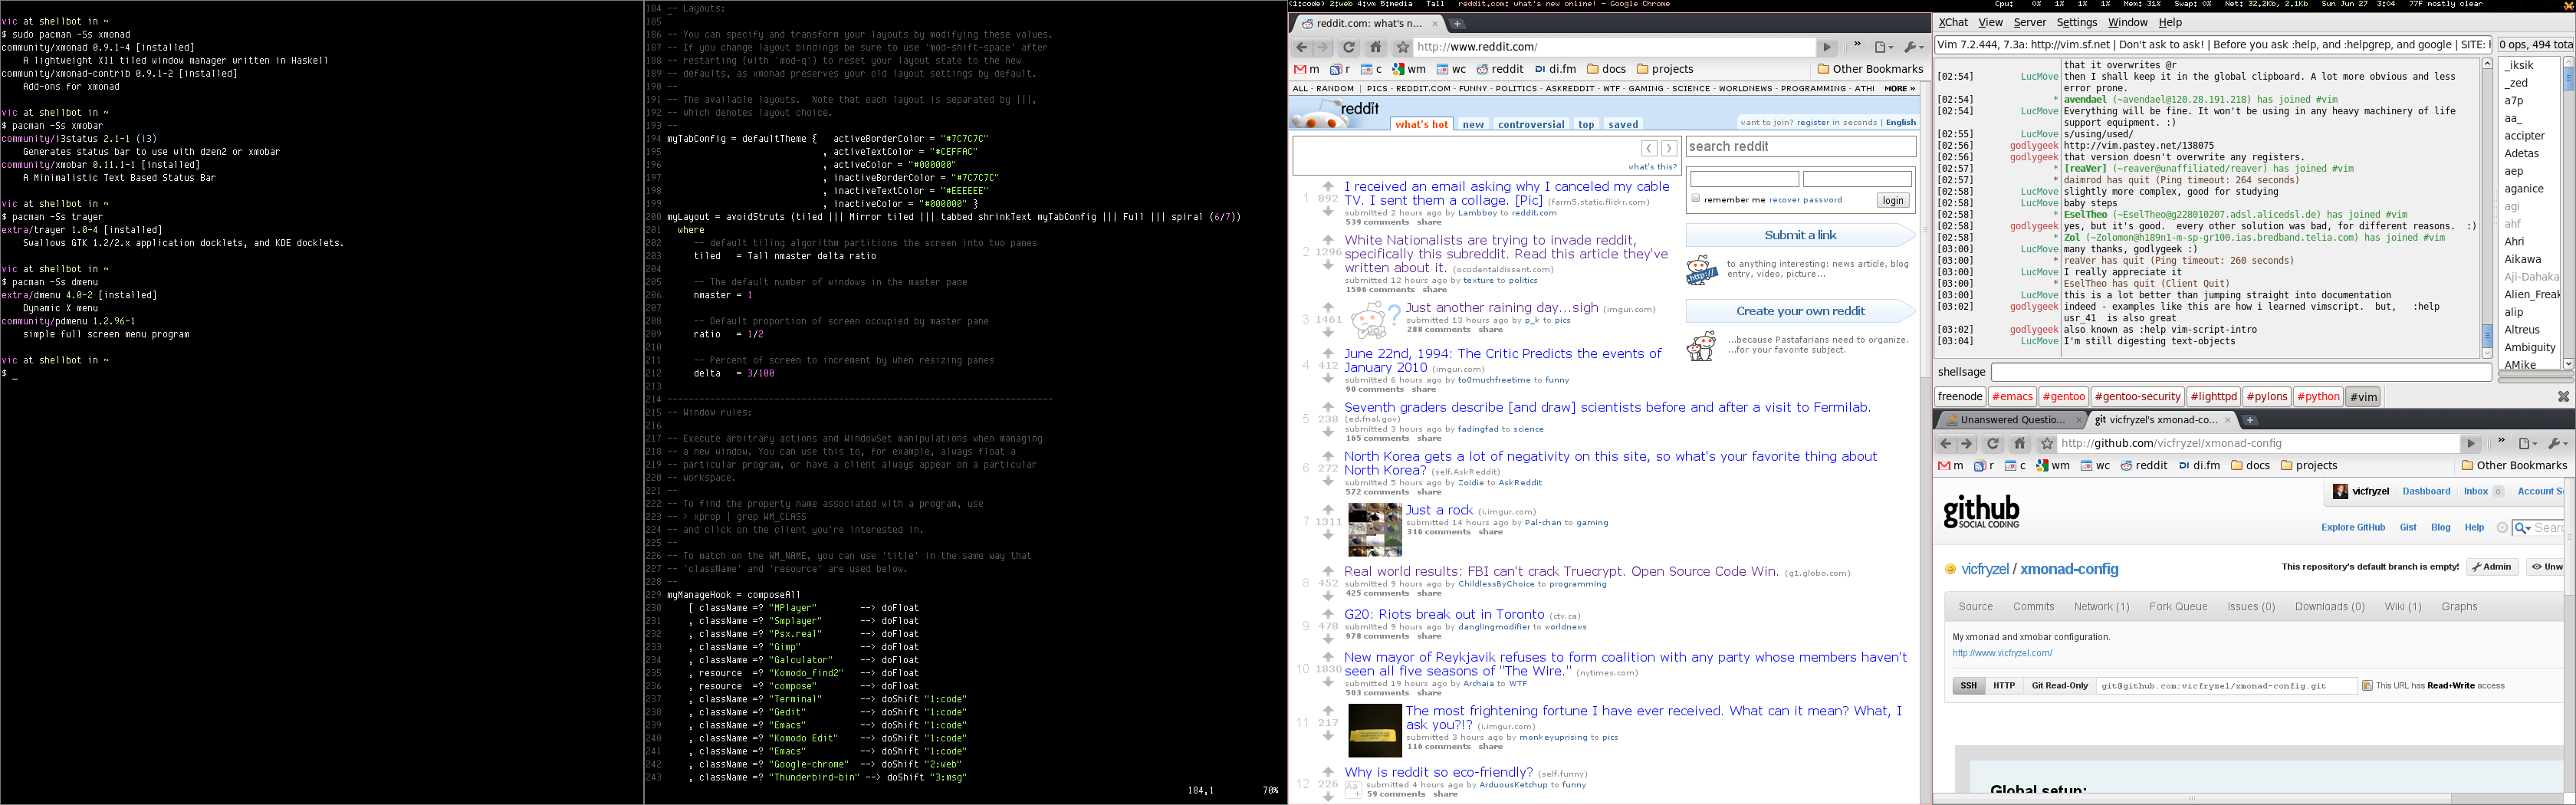
xmonad-config is the xmonad configuration used by Vic Fryzel.
Introduction
If you are unfamiliar with xmonad, it is a tiling window manager that is notoriously minimal, stable, beautiful, and featureful. If you find yourself spending a lot of time organizing or managing windows, you may consider trying xmonad.
However, xmonad can be somewhat difficult to configure if you're new to Haskell or even to xmonad itself.
This project contains a completely working and very usable xmonad configuration "out of the box". If you are just starting out with xmonad, this will give you a configuration that I personally use for around 12 hours every day. Thought has been put into the colors, key bindings, layouts, and supplementary scripts to make life easier.
This project is also recommended for advanced xmonad users, who may just not want to reinvent the wheel. All source provided with this project is well documented and simple to customize.
 For source code, or to contribute, see the
xmonad-config project page.
For source code, or to contribute, see the
xmonad-config project page.
Requirements
- xmonad 0.13
- xmonad-contrib 0.13
- xmobar 0.24.5
- consolekit 0.4.6
- stalonetray 0.8.1
- dmenu 4.7
- yeganesh 2.5
- scrot 0.8
Installing requirements on Arch Linux
sudo pacman -S xmonad xmonad-contrib xmobar stalonetray dmenu scrot \
    cabal-install xcompmgr
sudo cabal update
cabal install --global yeganesh
Also install the consolekit-git package from the AUR. The process for doing this is documented here.
Installing requirements on Ubuntu Linux or Debian Linux
sudo aptitude install xmonad libghc-xmonad-contrib-dev xmobar stalonetray \
    suckless-tools scrot cabal-install xcompmgr consolekit
sudo cabal update
sudo cabal install --global yeganesh
Installation
Installing xmonad-config is a matter of backing up any xmonad configuration you may already have, cloning the git repository, and updating your PATH.
cd
mv .xmonad .xmonad.orig
git clone https://github.com/vicfryzel/xmonad-config.git .xmonad
Once xmonad-config is installed, you also need to ensure you can actually start xmonad. The mechanism to do this varies based on each environment, but here are some instructions for some common login managers.
Starting xmonad from lightdm, xdm, kdm, or gdm
Note: You may need to choose "Custom xsession" or similar at the login screen.
ln -s ~/.xmonad/xmonad-session-rc ~/.xsession
# Logout, login from lightdm/xdm/kdm/gdm
Starting xmonad from slim
ln -s ~/.xmonad/xmonad-session-rc ~/.xinitrc
# Logout, login from slim
Keyboard shortcuts
After starting xmonad, use the following keyboard shortcuts to function in your new window manager. I recommend you print these out so that you don't get stranded once you logout and back in.
| Key Binding | Action |
|---|---|
| Alt+Shift+Return | Start a terminal |
| Alt+Ctrl+l | Lock screen |
| Alt+p | Start dmenu. Once it comes up, type the name of a program and enter |
| Alt+Shift+p | Take screenshot in select mode. Click or click and drag to select |
| Alt+Ctrl+Shift+p | Take fullscreen screenshot. Supports multiple monitors |
| Alt+Shift+c | Close focused window |
| Alt+Space | Change workspace layout |
| Alt+Shift+Space | Change back to default workspace layout |
| Alt+n | Resize viewed windows to the correct size |
| Alt+Tab | Focus next window |
| Alt+j | Focus next window |
| Alt+k | Focus previous window |
| Alt+m | Focus master window |
| Alt+Return | Swap focused window with master window |
| Alt+Shift+j | Swap focused window with next window |
| Alt+Shift+k | Swap focused window with previous window |
| Alt+h | Shrink master window area |
| Alt+l | Expand master window area |
| Alt+t | Push floating window back into tiling |
| Alt+, | Increment number of windows in master window area |
| Alt+. | Decrement number of windows in master window area |
| Alt+q | Restart xmonad. This reloads xmonad configuration, does not logout |
| Alt+Shift+q | Quit xmonad and logout |
| Alt+[1-9] | Switch to workspace 1-9, depending on which number was pressed |
| Alt+Shift+[1-9] | Send focused window to workspace 1-9 |
| Alt+w | Focus left-most monitor (Xinerama screen 1) |
| Alt+e | Focus center-most monitor (Xinerama screen 2) |
| Alt+r | Focus right-most monitor (Xinerama screen 3) |
| Alt+Shift+w | Send focused window to workspace on left-most monitor |
| Alt+Shift+e | Send focused window to workspace on center-most monitor |
| Alt+Shift+r | Send focused window to workspace on right-most monitor |
| Alt+Left Mouse Drag | Drag focused window out of tiling |
| Alt+Right Mouse Drag | Resize focused window, bring out of tiling if needed |
| Alt+Right Mouse Drag | Resize focused window, bring out of tiling if needed |
Personalizing or modifying xmonad-config
Once cloned, xmonad-config is laid out as follows.
All xmonad configuration is in ~/.xmonad/xmonad.hs. This includes things like key bindings, colors, layouts, etc. You may need to have some basic understanding of Haskell in order to modify this file, but most people have no problems.
All other configuration files are in ~/.xmonad.
All scripts are in ~/.xmonad/bin/. Scripts are provided to do things like take screenshots, start dmenu, or fix your multi-head layout after a fullscreen application may have turned off one of the screens.
Colors set in the xmobar config and dmenu script are meant to coincide with the IR_Black terminal and vim themes.
Configuring xmobar and stalonetray for your displays
xmonad-config is pre-configured to work on one of two display setups.
- Single 4K (3840x2160) resolution display.
- Dual 2560x1440 displays, with the right display as the primary.
If your display setup is different, you need to edit the xmobar and
stalonetray configurations provided, probably just to adjust the geometry of
the bars for your resolution. An example would be if you're using
xmonad-config on a laptop with a lower resolution screen. In this example,
you'd simply need to edit the geometries in xmobar-single.hs and
stalonetrayrc-single.
When you first clone xmonad-config, it is setup to use the single display configuration files.
To switch between the single and dual display setups, you must edit
xmonad-session-rc and xmonad.hs to point to the appropriate config files.
In xmonad-session-rc change the stalonetray line to read:
stalonetray -c ~/.xmonad/stalonetrayrc-dual
In xmonad.hs change the myXmobarrc line to read:
myXmobarrc = "~/.xmonad/xmobar-dual.hs"
To update geometries, edit xmobar-single.hs and stalonetrayrc-single, or
edit xmobar-dual.hs and stalonetrayrc-dual.