Durango POST-Code reader via RasPi Pico
July 11, 2026 · View on GitHub



Durango POST-Code reader via RasPi Pico
This software flashed to the Raspberry Pi Pico allows for monitoring of POST codes, which is useful for fault diagnosis on the hardware.
Supported consoles
Via FACET connector
- ✅ Xbox One PHAT
- ✅ Xbox One S
- ✅ Xbox One X
Via AARDVARK connector
- ✅ Xbox Series S
- ✅ Xbox Series X
Technical infos:
Usage
Note
Starting with firmware v0.3.0, some obsolete functionality was removed in favor of XboxPostcodeMonitor.
See https://github.com/xboxoneresearch/PicoDurangoPOST/pull/11 for details.
- Download latest release
- Flash the firmware onto the Pi Pico (Pi Pico:
durango_post_monitor.uf2, Pi Pico 2:*_pico2.uf2)- Disconnect Pi Pico from your PC
- Hold the BOOTSEL button
- Plug in Pi Pico to the PC again
- Release the BOOTSEL button
- A removable storage device should appear in your file explorer
- Drag the extracted *.uf2 file onto the Removable storage medium
- The removable storage should automatically disappear
- You are ready to go!
Note
ESP32 and Teensy 4 boards are also supported, see pin mapping below.
ESP32 / ESP32-S3 (no drag-and-drop UF2 flow, flash over serial instead):
- From source:
pio run -e esp32 -t upload(or-e esp32s3for ESP32-S3) - From a release: flash
durango_post_monitor_esp32.bin/durango_post_monitor_esp32s3.binwithesptool.py write_flash 0x0 <file>.bin
Teensy 4.0 / 4.1:
- From source:
pio run -e teensy40 -t upload(or-e teensy41) - From a release: flash
durango_post_monitor_teensy40.hex/durango_post_monitor_teensy41.hexwith Teensy Loader orteensy_loader_cli - Experimental: Teensyduino's built-in
Wireslave mode has known reliability quirks on Teensy 4 in community reports. Test on real hardware before relying on it; the teensy4_i2c library is the documented fallback if POST codes get dropped or garbled.
- Listen on the exposed USB Serial interface, Baudrate: 115200 via Serial monitor software
- XboxPostcodeMonitor is recommended
- Has errorcode auto-updating from https://errors.xboxresearch.com
- Multi-console compatibility
- PuTTY or any other generic serial monitor software
- PuTTy: Check this Link
- Tip: Make use of Saving a session configuration, no need to re-type Serial-port and baudrate each time!
- Downside: No multi-console functionality, no errorcode updating
- XboxPostcodeMonitor is recommended
How to interact ?
Note
When you have no console connected or incorrectly wired, the Serial terminal won't show any output.
To verify that your Pico is working, hit CTRL+C to enter the menu, then type help, press [ENTER] To resume POST monitoring, type post and hit [ENTER].
Important
The console needs to be at least receiving standby power to start the Southbridge. If, due to a hardware fault this is not possible, the underlying issues have to be eliminated first, to be able to use this tool.
Check Screenshots to see how the sofware output looks.
Generally:
- On Startup, it directly goes into POST monitoring mode.
- If you hit "CTRL+C" you will be brought into the REPL-menu.
- Here you can set various options
- Check out the "help" command.
Jump to the Connection diagram
Videos / Tutorials
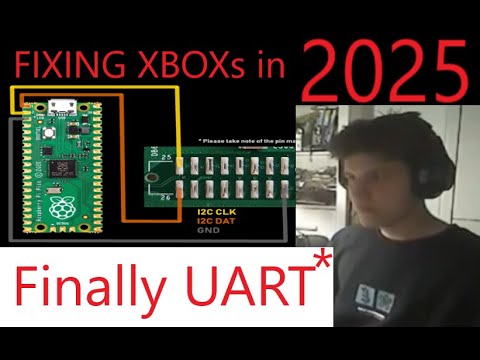
Check out the videos from @craftbenmine

Connection diagram
Caution
LOOK AT THE PIN MARKINGS ON THE FACET HEADER before soldering!
Pin 1 is marked with a white dot, pins 2, 25, 26 by numbers!
FACET connector orientation DOES CHANGE between console revisions!
Important
For Xbox Series S / X use the AARDVARK port (shown in the diagram).
The FACET port on these consoles require additional components to be populated for it to work.
Pi Pico -> FACET / AARDVARK
- SDA: Pi Pico Pin 1 (GP0) -> FACET Pin 26 (AARDVARK Pin 3 on Series S/X)
- SCL: Pi Pico Pin 2 (GP1) -> FACET Pin 25 (AARDVARK Pin 1 on Series S/X)
- GND -> GND

Thx to @ACE-AU for the new diagram
ESP32 (env esp32) -> FACET / AARDVARK
- SDA: ESP32 GPIO21 -> FACET Pin 26 (AARDVARK Pin 3 on Series S/X)
- SCL: ESP32 GPIO22 -> FACET Pin 25 (AARDVARK Pin 1 on Series S/X)
- GND -> GND
ESP32-S3 (env esp32s3) -> FACET / AARDVARK
- SDA: ESP32-S3 GPIO8 -> FACET Pin 26 (AARDVARK Pin 3 on Series S/X)
- SCL: ESP32-S3 GPIO9 -> FACET Pin 25 (AARDVARK Pin 1 on Series S/X)
- GND -> GND
Teensy 4.0 / 4.1 (envs teensy40 / teensy41) -> FACET / AARDVARK
- SDA: Teensy Pin 18 (Wire, fixed in hardware) -> FACET Pin 26 (AARDVARK Pin 3 on Series S/X)
- SCL: Teensy Pin 19 (Wire, fixed in hardware) -> FACET Pin 25 (AARDVARK Pin 1 on Series S/X)
- GND -> GND
Optional: 0.91" OLED Display (SSD1306)
Model: SSD1306 0.91" 128x32 pixels, monochrome

Pi Pico:
- Pi Pico 3V3 -> Display VCC
- SDA: Pi Pico Pin 9 (GP6) -> Display Pin SDA
- SCL: Pi Pico Pin 10 (GP7) -> Display Pin SCL
- GND -> GND
ESP32:
- ESP32 3V3 -> Display VCC
- SDA: ESP32 GPIO18 -> Display Pin SDA
- SCL: ESP32 GPIO19 -> Display Pin SCL
- GND -> GND
ESP32-S3:
- ESP32-S3 3V3 -> Display VCC
- SDA: ESP32-S3 GPIO4 -> Display Pin SDA
- SCL: ESP32-S3 GPIO5 -> Display Pin SCL
- GND -> GND
Teensy 4.0 / 4.1:
- Teensy 3V3 -> Display VCC
- SDA: Teensy Pin 17 (Wire1, fixed in hardware) -> Display Pin SDA
- SCL: Teensy Pin 16 (Wire1, fixed in hardware) -> Display Pin SCL
- GND -> GND

NOTE: This image is showing firmware v0.2.3 - starting with v0.3.0 POST code names are not shown on display anymore, see note in Usage.
Screenshots
This is showing the output of firmware v0.2.0.

NOTE: This screenshot is showing firmware v0.2.3 - starting with v0.3.0 POST code names are not shown via serial anymore, see note in Usage.
Develop
VS Code
- Use VS Code as your IDE / Code Editor
- Install the extension PlatformIO
- Edit the code
- Change to the PlatformIO-tab in VS Code and choose Upload and Monitor to compile and upload the code
Zed Editor
- Use Zed as your IDE / Code Editor
- Install PlatformIO Core (CLI)
- Generate a compilation database so
clangdcan resolve includes:pio run -e pico -t compiledb - Add a
.zed/settings.jsonpointingclangdat the ARM toolchain so it picks up the cross-compiler's built-in headers:{ "lsp": { "clangd": { "binary": { "arguments": [ "--query-driver=<path-to-.platformio>/packages/toolchain-rp2040-earlephilhower/bin/*" ] } } } } - Edit the code
- Compile and upload with
pio run -e pico -t upload, monitor withpio device monitor -b 115200 - Re-run the
compiledbcommand wheneverplatformio.inideps/envs change, since the database goes stale otherwise