BlacksmithAI
June 6, 2026 · View on GitHub


BlacksmithAI





[OPEN-SOURCE] AI-Powered Penetration Testing Framework
An intelligent multi-agent system for automated security assessment and penetration testing.
A hosted version is available for quick testing without local setup. Blacksmith-AI
Table of Contents
- Overview
- Architecture
- Prerequisites
- Installation
- Quick Start with Makefile
- Configuration
- Usage
- Tools & Capabilities
- Agent Workflow
- Troubleshooting
- Documentation
Overview
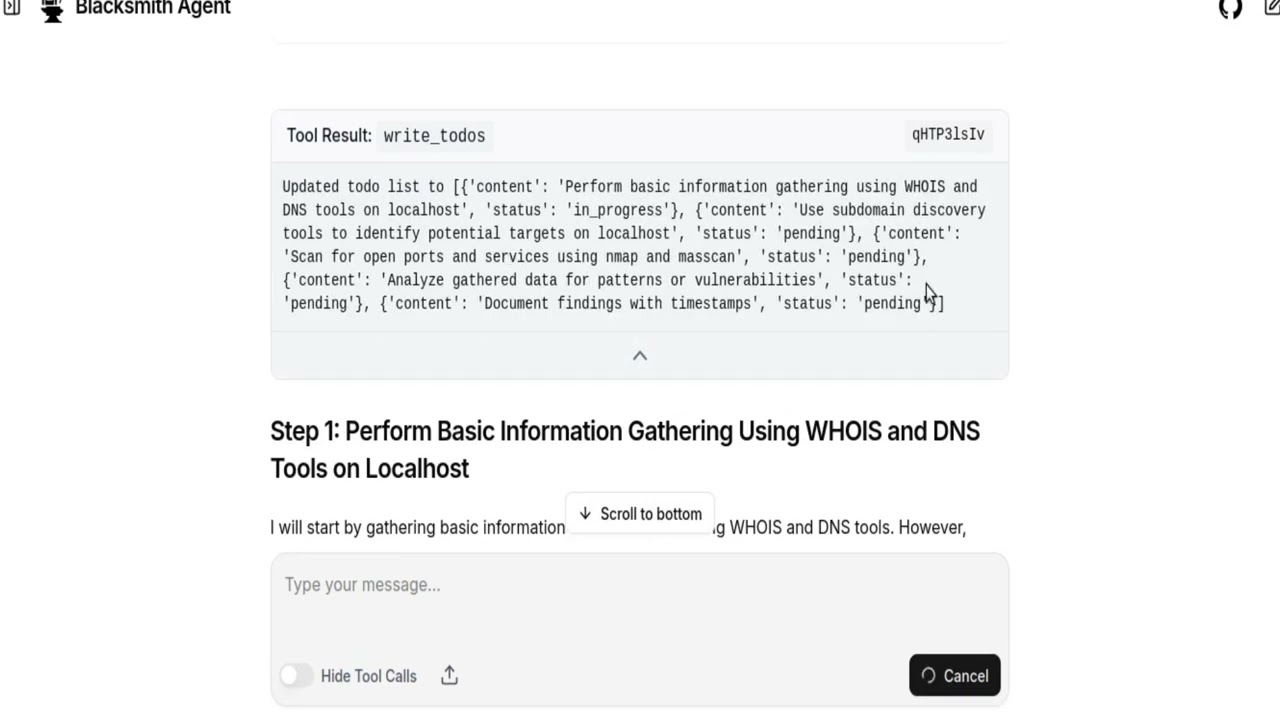
BlacksmithAI is an opensource advanced penetration testing framework that leverages multiple AI agents to automate security assessments. The system orchestrates specialized agents through a complete penetration testing lifecycle from reconnaissance to post-exploitation using professional security tools in a controlled environment.
Key Features
- Multi-Agent Architecture: Specialized agents for each phase of penetration testing
- Professional Tooling: Pre-configured Docker image with industry-standard security tools
- Flexible LLM Providers: Supports almost every model and provider e.g. openai, gemini, openrouter, and local models
- Web & Terminal Interfaces: Choose between a modern UI or CLI interaction
- Automated Reporting: Generates comprehensive security reports with evidence
- Safe & Controlled: runs on a controlled docker environment
Use Cases
- Professional penetration testing
- Automated security assessments
- Continuous security monitoring
- Vulnerability discovery and validation
- Security research and development
Architecture
BlacksmithAI uses a hierarchical multi-agent system.
Agent Hierarchy
-
Orchestrator
- Command and control center
- Manages mission planning and task delegation
- Coordinates subagents and generates final reports
-
Specialized Subagents
- Recon Agent: Attack surface mapping and information gathering
- Scan/Enum Agent: Deep scanning and service enumeration
- Vulnerability Analysis Agent: Vulnerability mapping and risk assessment
- Exploit Agent: Proof-of-concept exploitation
- Post-Exploit Agent: Impact assessment and pivot analysis
Each sub-agent maintains its own mission planning creating local autonomy, while the Orchestrator retains top-level process control through evaluation
Each sub-agent has access to specific tools tailored to its role, ensuring efficient and focused operations.
Prerequisites
System Requirements
- Operating System: Linux (recommended), macOS, or Windows with WSL2
- RAM: Minimum 2GB (4GB recommended)
- Disk Space: 2GB+ including Docker images
- Docker: 20.10+ with Docker Compose
- Python: 3.12 (via uv - recommended)
Software Dependencies
BlacksmithAI relies on the following tools:
# Python package & environment manager
uv

# Containerization
Docker & Docker Compose

# Frontend runtime & tooling
Node.js 18+ (LTS recommended)
pnpm (fast JavaScript package manager)
1. Python: uv
uv is a fast, modern Python package manager + environment tool — kind of like a turbocharged combo of pip, pipx, and virtualenv. ([GitHub][1])
Install uv
macOS & Ubuntu / Linux
# Install via official install script
curl -LsSf https://astral.sh/uv/install.sh | sh
If you prefer a Python-packaged version:
pip install uv
# or
pipx install uv
Verify:
uv --version
Notes:
- Standalone script is recommended for full functionality and auto-updates.
- On Windows use PowerShell:
powershell -ExecutionPolicy ByPass -c "irm https://astral.sh/uv/install.ps1 | iex"
Read uv docs for detailed setup - https://docs.astral.sh/uv/
2. Docker & Docker Compose
Docker lets us containerize and run backend services, databases, etc.
Install on Ubuntu / Debian
sudo apt update
sudo apt install -y docker.io docker-compose
macOS
brew install --cask docker
After installing, start Docker Desktop and confirm:
docker --version
docker compose version
If you see version outputs, you’re good to go.
Tip: On Linux you may want to add your user to the docker group:
sudo usermod -aG docker $USER
# Then restart your terminal
3. Node.js 18+ (OPTIONAL)
We use Node.js for frontend tooling. Node 18+ is required for modern pnpm and ecosystem compatibility.
Ubuntu / Debian
# Using NodeSource setup (recommended for precise versions)
curl -fsSL https://deb.nodesource.com/setup_18.x | sudo -E bash -
sudo apt install -y nodejs
macOS
Install with Homebrew:
brew install node@18
Verify:
node --version
npm --version
4. pnpm (Fast JavaScript Package Manager)
pnpm is preferred for consistent, fast installs and predictable lockfiles. ([pnpm.cn][4])
Install pnpm
You can install via one of these:
From npm
npm install -g pnpm
Using standalone script (npm not required)
curl -fsSL https://get.pnpm.io/install.sh | sh -
With Corepack (Node.js bundled tool manager)
corepack enable
corepack prepare pnpm@latest --activate
Verify:
pnpm --version
Verify Your Dev Environment
Try these checks:
uv --version
node --version
pnpm --version
docker --version
docker compose version
vLLM setup
if you want to use vLLM local models
setup vLLM
cd blacksmithAI/blacksmithAI
uv add vllm
uv add huggingface_hub

uv run hf auth login #if not logged in
Serve
e.g.
vllm serve mistralai/Devstral-2-123B-Instruct-2512 \
  --host 0.0.0.0 \
  --port 8000 \
  --max-model-len 8192 \
  --gpu-memory-utilization 0.75
Installation
Step 1: Clone the Repository
git clone https://github.com/yohannesgk/blacksmith.git
Step 2: Install Python Dependencies
# Install dependencies using uv
cd blacksmithAI/blacksmithAI
uv sync
Step 3: Build the mini-kali Docker Image
The mini-kali container provides all penetration testing tools in a secure, isolated environment.
# start it with
cd blacksmithAI/blacksmithAI
docker compose up -d
Step 4: Install Frontend Dependencies (Optional)
Skip this if using the terminal-only interface.
cd blacksmithAI/frontend
pnpm install
cd ../..
Quick Start with Makefile
For a simpler setup experience, use the provided Makefile commands. Run make help to see all available commands.
Complete Setup (One-Command)
make setup
This command performs:
- Python dependency installation (
make install) - Docker image building (
make docker-build) - Frontend dependency installation (
make frontend-install)
Initial Configuration
After setup or installation, configure your environment:
# 1. Copy example environment file
cp blacksmithAI/.env.example blacksmithAI/.env

# 2. Edit .env with your API keys
nano blacksmithAI/.env

# 3. Edit config.json for your LLM provider
nano blacksmithAI/config.json
Running BlacksmithAI
CLI Mode
make start-cli
Starts the mini-kali Docker container and Launches the CLI interface
OR
uv run main.py
Just launches the CLI interface
Web UI Mode
Run these commands in separate terminals:
# Terminal 1: Start Docker container
make docker-up

# Terminal 2: Start frontend
cd frontend && pnpm build && pnpm start

# Terminal 3: Start LangGraph server
cd blacksmithAI && uv run langgraph up # production server
>or
cd blacksmithAI && uv run langgraph dev # dev server
Then access: http://localhost:3000
Using VLLM (Local LLM)
# Install VLLM
make vllm-install

# Start VLLM server
make vllm-serve
# Or for smaller systems:
make vllm-serve-small
Available Makefile Commands
| Command | Description |
|---|---|
make help | Show all available commands |
make install | Install Python dependencies |
make setup | Complete initial setup |
make frontend-install | Install frontend dependencies |
make docker-build | Build mini-kali Docker image |
make docker-up | Start Docker container |
make docker-down | Stop Docker container |
make docker-logs | View Docker logs |
make vllm-install | Install VLLM for local LLM |
make vllm-serve | Start VLLM server (123B model) |
make vllm-serve-small | Start VLLM server (7B model) |
make start-cli | Start CLI mode |
make start-ui | Show Web UI setup instructions |
make start-all | Quick start CLI mode |
make stop | Stop all services |
make clean | Clean up Docker containers |
make status | Show Docker container status |
make check-deps | Check if dependencies are installed |
make check-config | Check configuration files |
make quickstart | Display quick start guide |
Quick Reference
# First time setup
make setup
cp blacksmithAI/.env.example blacksmithAI/.env
# Edit .env with your API keys

# Start CLI
make start-cli

# Start Web UI (3 terminals)
make docker-up
cd frontend && pnpm build && pnpm start
cd blacksmithAI && uv run langgraph dev

# Stop everything
make stop
Configuration
Environment Variables
Create a .env file from the example:
cp blacksmithAI/.env.example blacksmithAI/.env
Using OpenRouter (Cloud LLM Provider)
Edit .env and add your API key:
OPENROUTER_API_KEY=your-openrouter-api-key-here
Using VLLM (Local LLM Provider)
No environment variables needed. Ensure your VLLM server is running:
# Example VLLM server startup
vllm serve <model-name> --port 8000
Application Configuration
Edit blacksmithAI/config.json to configure LLM providers and models.
{
  "defaults": {
    "provider": "openrouter",  // or "vllm", or custom(openai)
  },
  "providers": {
    "openrouter": {
      "base_url": "https://openrouter.ai/api/v1/chat/completions", # inference url
      "default_model": "mistralai/devstral-2512:free", # model name
      "default_embedding_model": "openai/text-embedding-3-small",
      "default_model_config": {
        "context_size": 200000,
        "max_retries": 3,
        "stream_usage": true,
        "max_tokens": null
      },
      "default_embedding_model_config": {
        "max_retries": 3,
        "embedding_ctx_length": 8191
      }
    },
    "vllm": {
      "base_url": "http://localhost:8000/v1/chat/completions",
      "default_model": "mistralai/devstral-2512",
      "default_embedding_model": "text-embedding-3-small",
      "default_model_config": {
        "context_size": 200000,
        "max_retries": 3,
        "stream_usage": true,
        "max_tokens": null
      },
      "default_embedding_model_config": {
        "max_retries": 3,
        "embedding_ctx_length": 8191
      }
    }
  }
}
you can add support for more providers like openai, claude,...and many more. by simply editing config.json and adding api key to .env
for example if you want to add support for openai you can add this to providers in config.json:

   "openai": {
      "base_url": "https://api.openai.com/v1/chat/completions",
      "default_model": "gpt-5-mini",
      "default_embedding_model": "text-embedding-3-small",
      "default_model_config": {
        "context_size": 200000,
        "max_retries": 3,
        "stream_usage": true,
        "max_tokens": null
      },
      "default_embedding_model_config": {
        "max_retries": 3,
        "embedding_ctx_length": 8191
      }
    }

since the name of the provider here is set to `openai` you need to add OPENAI_API_KEY=**** to env file. so uppercase(provider_name)+API_KEY to env.
set the new provider to default by modifying:

	  "defaults": {
	    "provider": "openai"
	  },

Now everything is configured for openai.
you can easily scaleup with the above method and add more support.
Configuration Options
defaults.provider: Default LLM provider to usebase_url: API endpoint for the providerdefault_model: LLM model identifierdefault_embedding_model: Model for embeddingscontext_size: Context window size of the selected model(required for summerization, to prevent context window overflow)max_retries: Number of retry attempts for failed requestsmax_tokens: Maximum tokens in responses (null = model default) - helps manage token costs
Usage
Option 1: Terminal Interface (CLI)
Interact directly through the terminal with full agent control.
# Start mini-kali Docker container
docker run -i --rm -p 9756:9756 mini-kali-slim -d

or

cd blacksmithAI/blacksmithAI
docker compose up -d
# Run BlacksmithAI
cd blacksmithAI/blacksmithAI && uv run main.py

or

cd blacksmithAI && make start-cli
Follow the prompts to initiate penetration testing tasks.
Option 2: Web UI

Access a modern, user-friendly interface for managing penetration tests.
# Terminal 1: Start mini-kali container
docker run -i --rm -p 9756:9756 mini-kali-slim -d

or

cd blacksmithAI/blacksmithAI
docker compose up -d


# Terminal 2: Start the frontend
cd blacksmithAI/frontend
pnpm build
pnpm start

# Terminal 3: Start LangGraph development server
cd blacksmithAI/blacksmithAI
uv run langgraph dev
Access the UI at: http://localhost:3000
Option 3: Cloud Version
A hosted version is available for quick testing without local setup.
Tools & Capabilities
BlacksmithAI provides access to professional penetration testing tools through the mini-kali Docker container. All tools are designed for non-interactive, stdin/stdout execution ideal for AI agents.
Tools Documentation: Complete list of available tools and their capabilities
Agent Workflow
BlacksmithAI follows a structured penetration testing methodology through coordinated agent execution.
1. Orchestrator Agent
Role: General Commander
The orchestrator is the central coordination point that:
- Maintains the high-level mission plan
- Manages a todo list of tasks
- Delegates work to specialized subagents
- Generates structured final reports with findings, severity, evidence, and remediation guidance
Available Tools: planning tools, filesystem tools
2. Reconnaissance Agent
Role: Attack Surface Mapping
Builds a comprehensive map of the target environment:
- Passive OSINT: DNS records, SSL certificates, WHOIS data
- Active Network Scanning: Port and service discovery
- Tech Stack Fingerprinting: Identify technologies and versions
Available Tools: Reconnaissance tools, general utilities
3. Scanning & Enumeration Agent
Role: Deep Inspection
After attack surface mapping, this agent:
- Performs user enumeration
- Probes APIs and endpoints
- Discovers versions and misconfigurations
- Identifies potential entry points
Available Tools: Scanning & enumeration tools, general utilities
4. Vulnerability Analysis Agent
Role: Risk Assessment
Analyzes outputs from scanning to:
- Map services to known vulnerabilities (CVEs, logic flaws)
- Prioritize by impact, exploitability, and business risk
- Generate concise evidence summaries
- Create attack hypotheses
Available Tools: Vulnerability mapping tools, general utilities
5. Exploitation Agent
Role: Proof-of-Concept Execution
Validates vulnerabilities through controlled exploitation:
- Execute exploits in a controlled manner
- Validate impact without collateral damage
- Provide clean proof of compromise
- Return evidence (e.g., shell access, data extraction)
Available Tools: Exploitation tools, general utilities
6. Post-Exploitation Agent
Role: Impact Assessment
After successful exploitation:
- Assess the blast radius of the compromise
- Identify pivot paths for lateral movement
- Discover credentials and authentication mechanisms
- Document business impact
Available Tools: Post-exploitation tools, general utilities
Workflow Visualization
Orchestrator
    ↓
Recon Agent → Attack Surface Map
    ↓
Scan/Enum Agent → Detailed Service Information
    ↓
Vuln Analysis Agent → Vulnerability Prioritization
    ↓
Exploit Agent → Proof of Concept
    ↓
Post-Exploit Agent → Impact Assessment
    ↓
Orchestrator → Final Report
Troubleshooting
Docker Issues
Container won't start
# Check Docker is running
docker ps

# View container logs
docker logs [container-name]
Port conflicts
# Check what's using port 9756
lsof -i :9756

# Use a different port
docker run -i --rm -p 9757:9756 mini-kali-slim -d
Frontend Issues
Build errors
# Clean and rebuild
cd blacksmithAI/frontend
rm -rf node_modules .next
pnpm install
pnpm build
UI not connecting
- Ensure LangGraph server is running
- Check browser console for errors
- Verify port 3000 is not in use
Agent Performance
Slow responses
- Switch to faster LLM model
- Check system resources (RAM/CPU)
Common Errors
"Module not found"
# Reinstall dependencies
cd blacksmithAI/blacksmithAI
uv sync
"Permission denied"
# Fix file permissions
chmod +x blacksmithAI/blacksmithAI/main.py
Documentation
For more detailed information, refer to:
- Tools Documentation: Complete list of available tools and their capabilities
- Agent Tool Documentation: Tool-specific documentation for each agent
Contributing
Contributions are welcome! Please read our contributing guidelines before submitting pull requests.
Upcoming Features
- Web Browser: allow agents to browse the web
- Code Interpreter: dedicated container for script execution
- Exploits Database: Integration with exploit databases
- Interactive Tools: Support for Metasploit and other interactive frameworks
License
This project is open-source:
The source code is available under the GPL‑3.0‑only open‑source license for community use, modification, and redistribution (see [LICENSE-GPL](LICENSE-GPL.txt)).
For commercial use under different terms (for example, closed‑source distribution or integration without copyleft obligations), please contact us to obtain a commercial license.
You may choose which license to comply with when you use the code.
[Contact me]📧(mailto:yohannesgk@kahanlabs.com)
Support
- Issues: Report bugs and feature requests on GitHub
- Discussions: Join our community discussions discord
- Documentation: Check our Wiki for additional resources