README.md
August 6, 2026 · View on GitHub

An IDE for AI CLI Agents
Docs, plans, terminals, autonomous agents, and git — one workspace instead of five scattered tools.






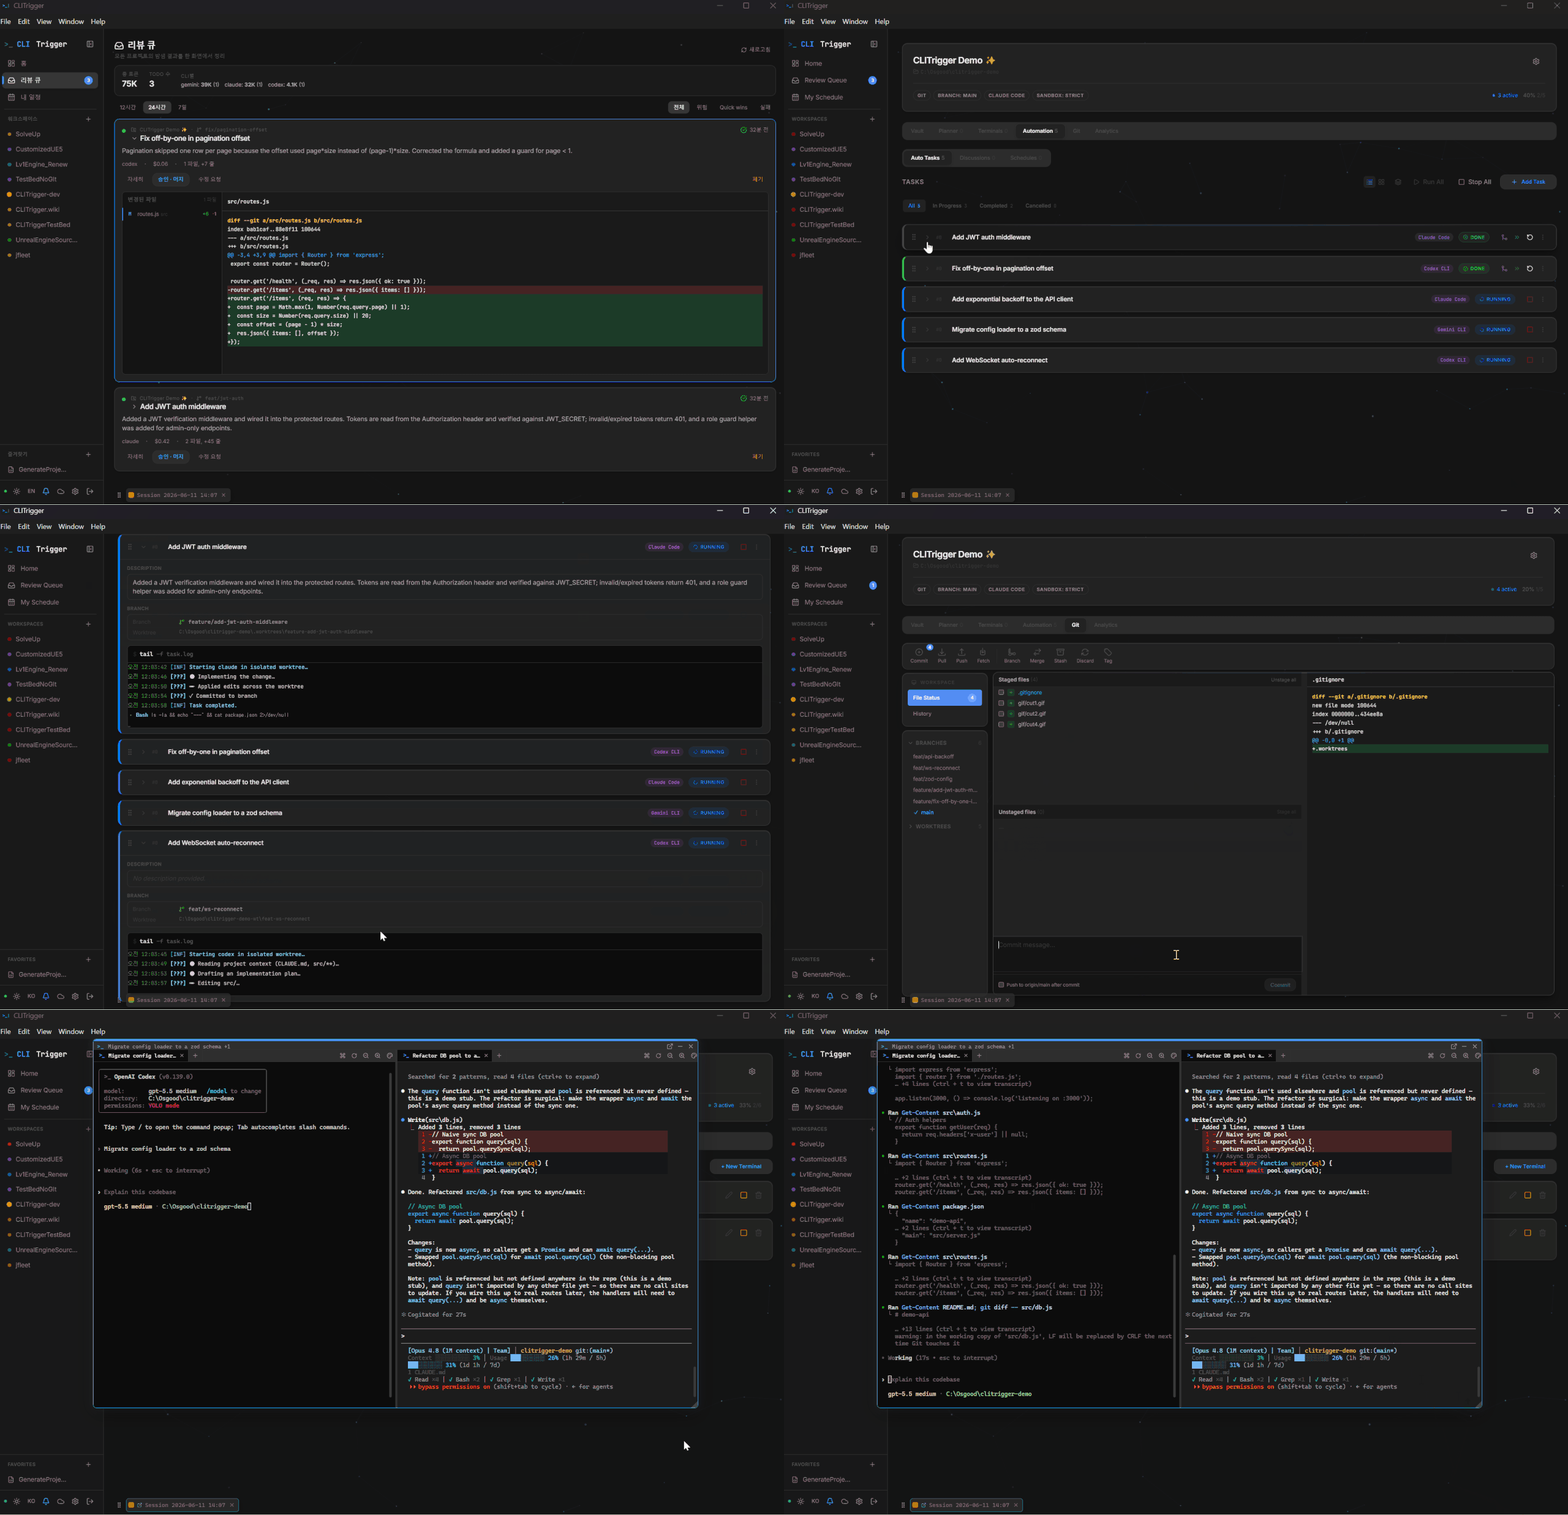
npm i -g clitrigger && clitrigger
Or download the desktop app — no Node.js needed: Windows .exe · macOS .dmg · Linux .AppImage
Up and running in 60 seconds — open http://localhost:3000, set a password, add a project, write TODOs, hit Start.
Docs → Plan → Terminal → Autonomous Tasks → Version Control. One pipeline.
Developing with AI CLI agents (Claude Code, Codex, …) scatters the workflow across disconnected tools: requirements in a note app, plans in another tool, agents across a pile of terminal windows, results in a git client. Editor-centric development has the IDE; CLI-agent-centric development doesn't — so the one ferrying context between tools ends up being you.
CLITrigger is that missing IDE. It connects the whole workflow into a single five-stage pipeline — build project knowledge in Docs, shape it into a plan with the planner & calendar, refine it live in terminal sessions, hand it to multiple AI CLIs (Claude Code · Antigravity · Codex) for parallel autonomous execution in isolated git worktrees, and land the results through the review queue and built-in Git client.
Each stage inherits the context of the one before it — the intent you captured in docs flows all the way to the merge.
flowchart LR
    docs["📚 Docs<br>Project knowledge"] --> plan["🗓 Plan<br>Planner · Calendar"]
    plan --> term["⌨️ Terminal<br>Interactive Sessions"]
    term --> auto["🤖 Autonomous Tasks<br>Parallel Worktrees"]
    auto --> vcs["🔀 Version Control<br>Review Queue · Git"]
    vcs -. lessons feed back into docs .-> docs
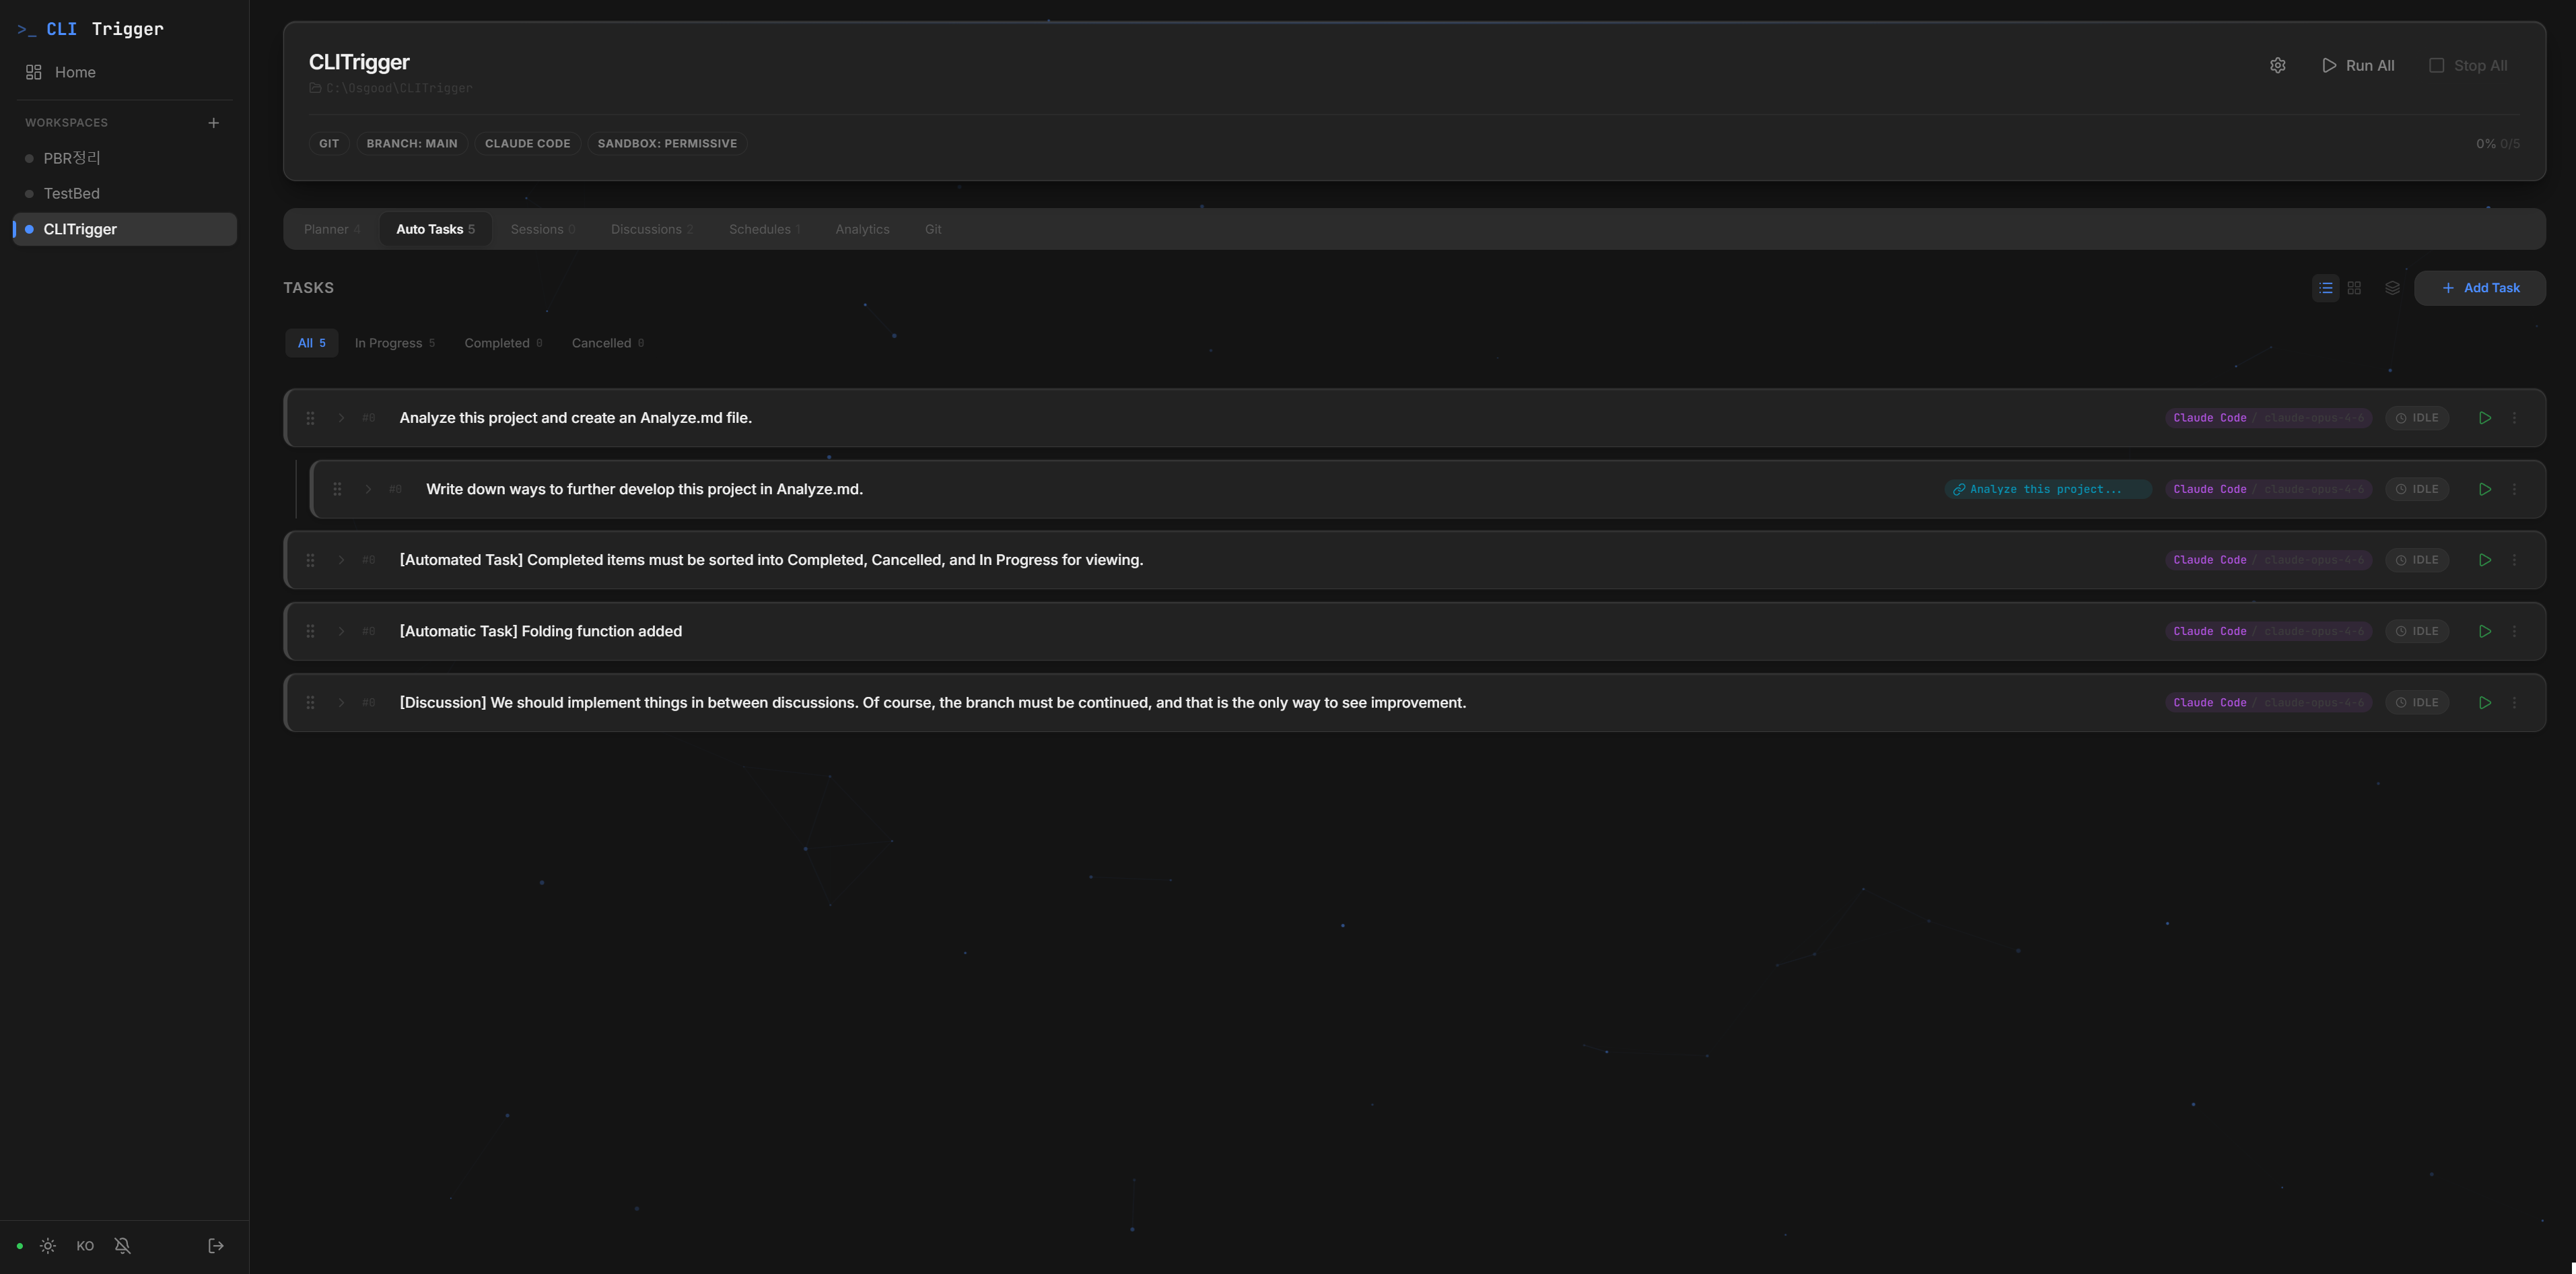
AI CLIs working simultaneously across isolated git worktrees
Why CLITrigger?
The tools don't talk to each other. As AI writes more of the code, the developer's real job becomes capturing intent and reviewing output — yet that intent lives in a note app, the plan in another tool, the agents in a stack of terminal windows, and the results in a git client. Editor-centric development solved this decades ago with the IDE. CLI-agent-centric development never got one.
CLITrigger is built as that IDE. Its backbone is a single pipeline — Docs → Plan → Terminal → Autonomous Tasks → Version Control — where each stage is not a separate tool but a consumer of the previous stage's context: docs become plans, plans become the agent's prompt, execution results arrive in a review queue. Intent is never lost between stages.
Inside the pipeline sits the execution machinery:
- Parallel execution — every task runs in its own isolated git worktree, with Claude / Antigravity / Codex working simultaneously
- Scheduling around rate limits — cron-based runs and auto-retry at quota reset make full use of your tokens, even while you're away
- Multi-agent quality — architect / developer / reviewer agents debate before implementation, beating a single agent working alone
- One place to land it — triage every diff in the review queue, then commit, push, and merge in the built-in Git client
Features
The features follow the five pipeline stages — 📚 Docs → 🗓 Plan → ⌨️ Terminal → 🤖 Autonomous Tasks → 🔀 Version Control — plus the supporting features underneath. Each feature below has a full guide in the Wiki (↗).
📚 1. Docs — build the knowledge
Docs (File-based Knowledge)
A per-project Obsidian-style knowledge base with a [[wikilink]] graph — inject any file into a prompt, CLI-agnostically. What accumulates here is the input to the whole pipeline. ↗
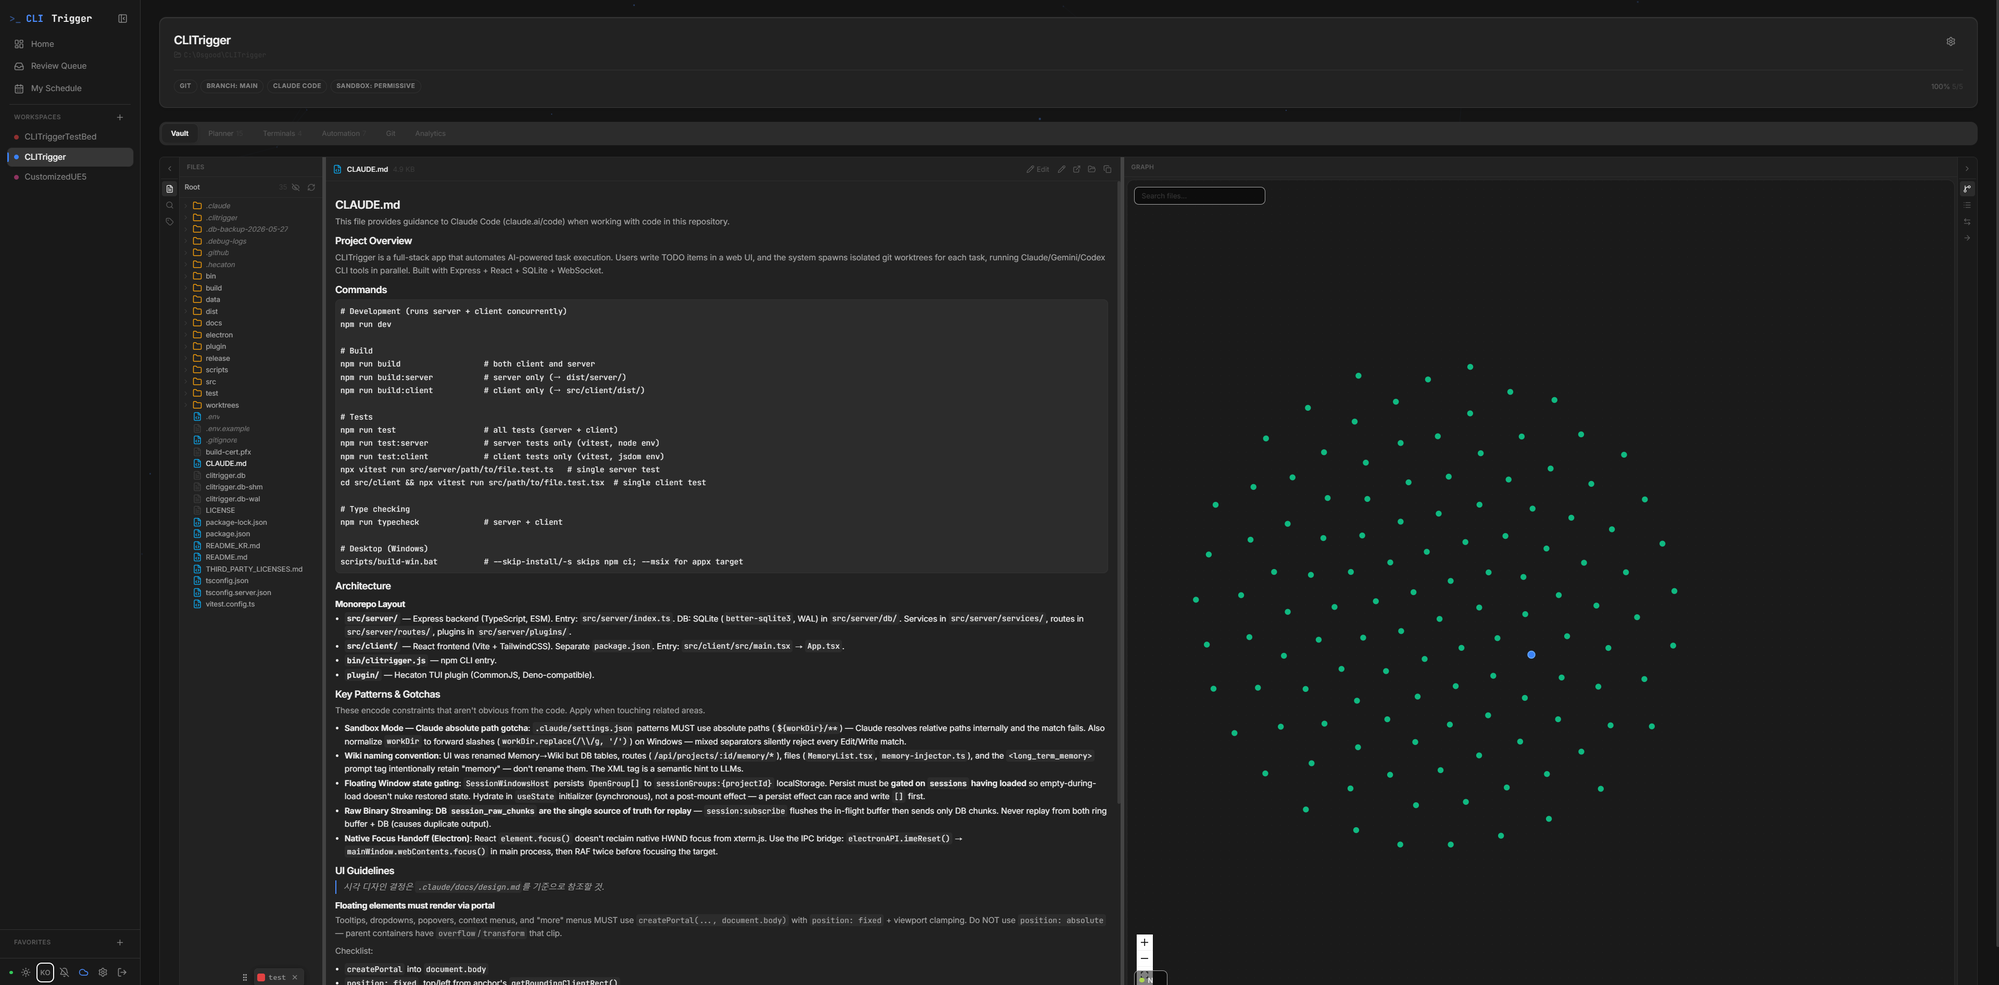
The Docs tab — browse project markdown with inline preview and a force-directed wikilink graph, then selectively inject files into prompts
🗓 2. Plan — capture the intent
My Schedule
One personal calendar overlaying your memos, every project's schedules, planner due dates, and assigned Jira issues. ↗
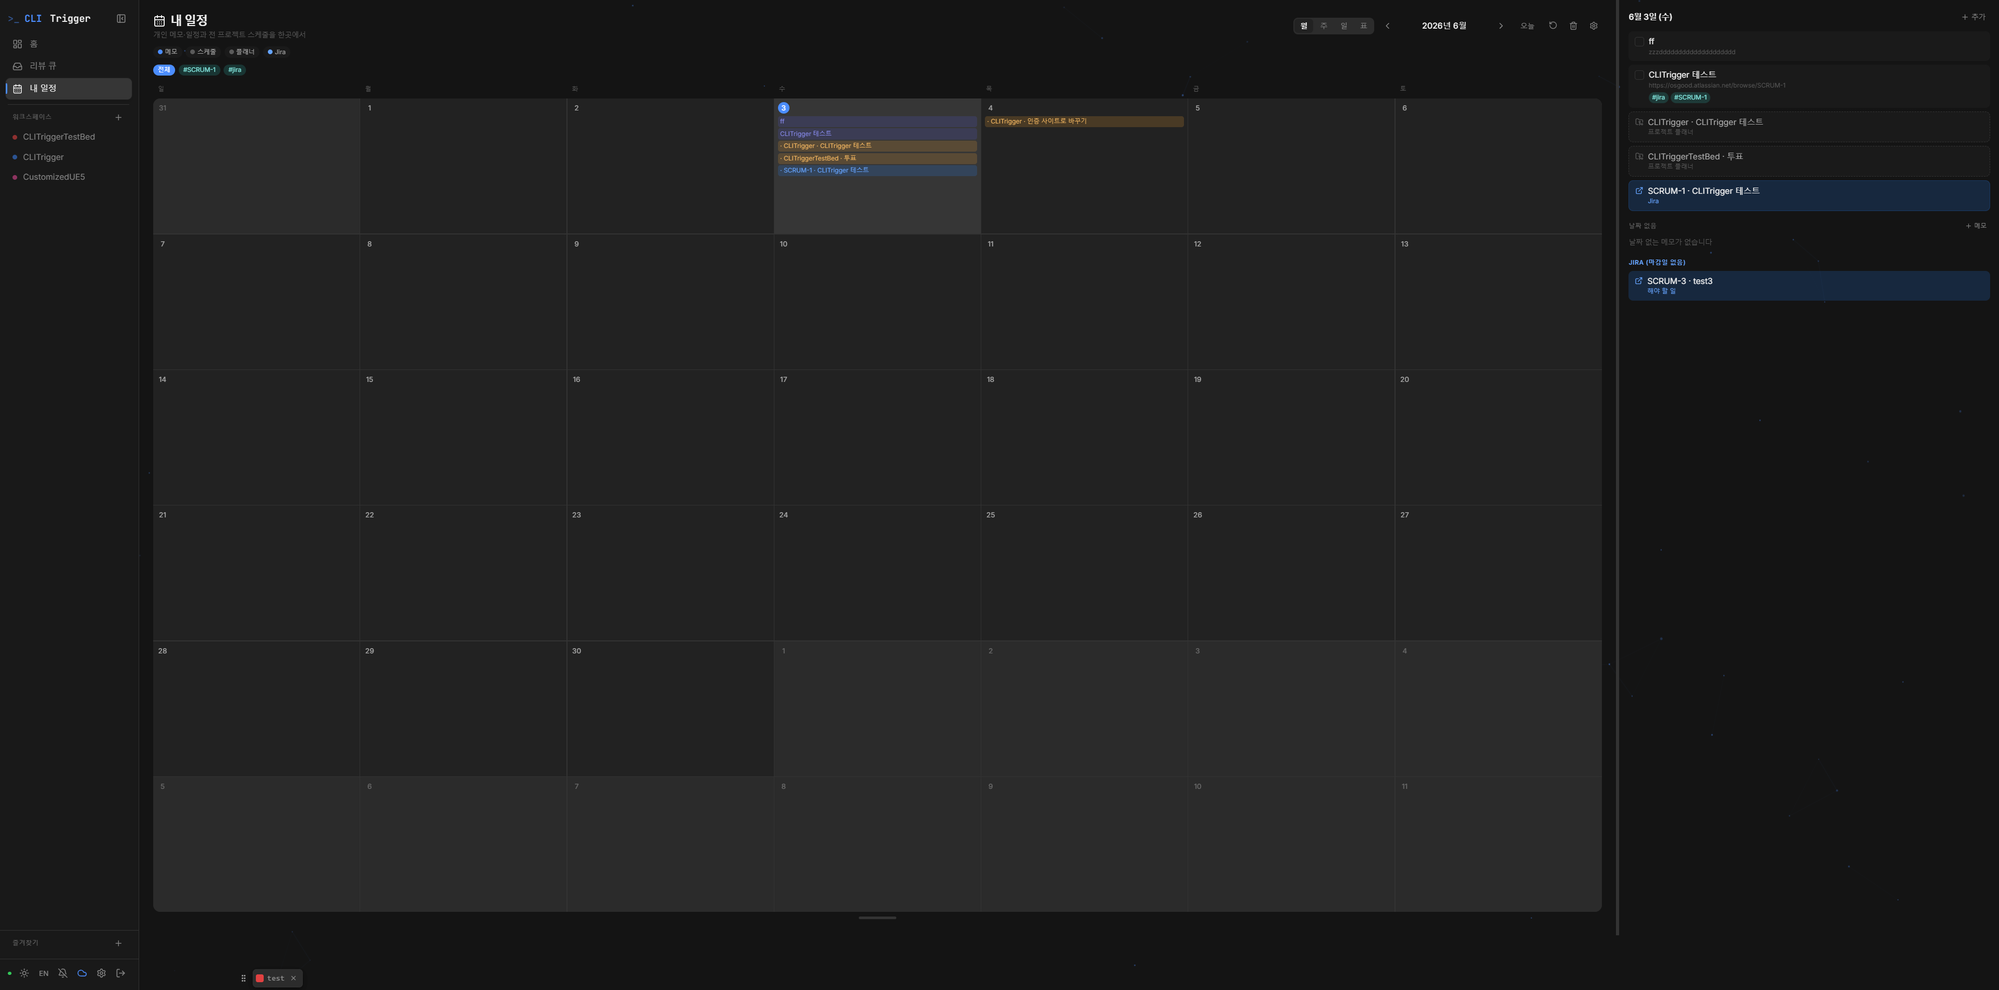
One calendar overlaying personal memos, cross-project schedules, planner due dates, and assigned Jira issues
Planner
A lightweight task planner — capture ideas, then convert any item into a TODO, schedule, or session; Markdown import/export. What you plan here becomes the execution unit of the next stage. ↗
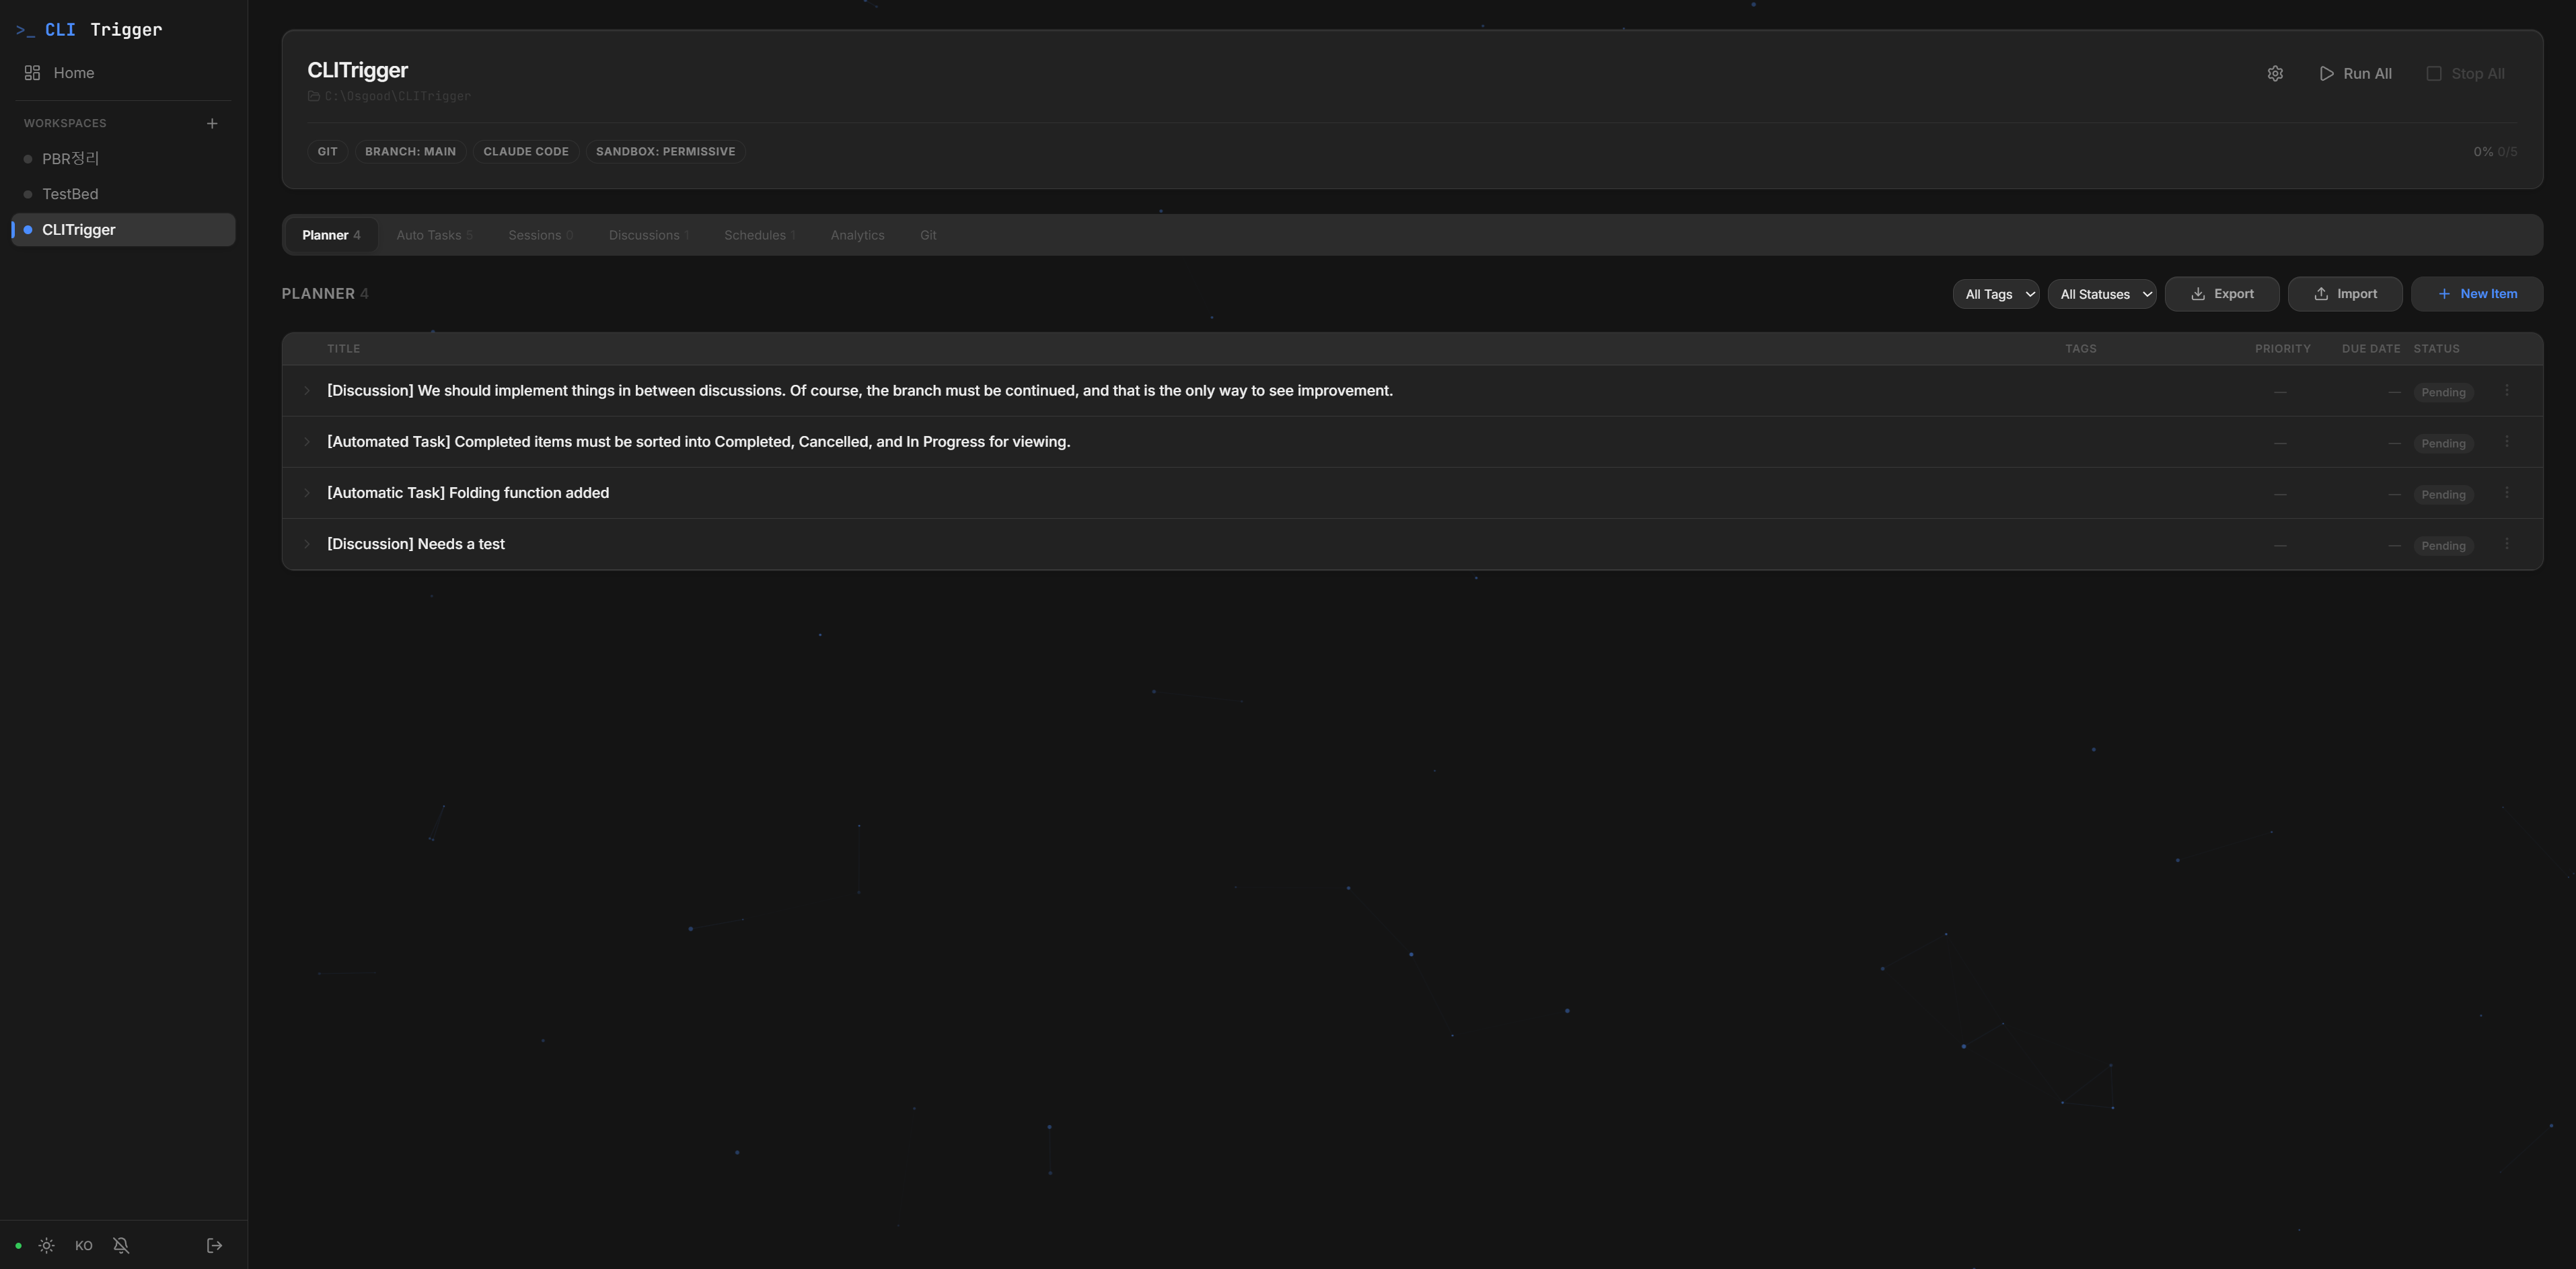
Inline editing, color-coded tags, image attachments, and one-click conversion to TODOs or schedules
⌨️ 3. Terminal — refine it with AI
Interactive Sessions
Long-lived CLI sessions in floating windows with VS Code-style docking, pop-out, and real xterm.js terminals — the human-in-the-loop stage before handing work off to automation. ↗
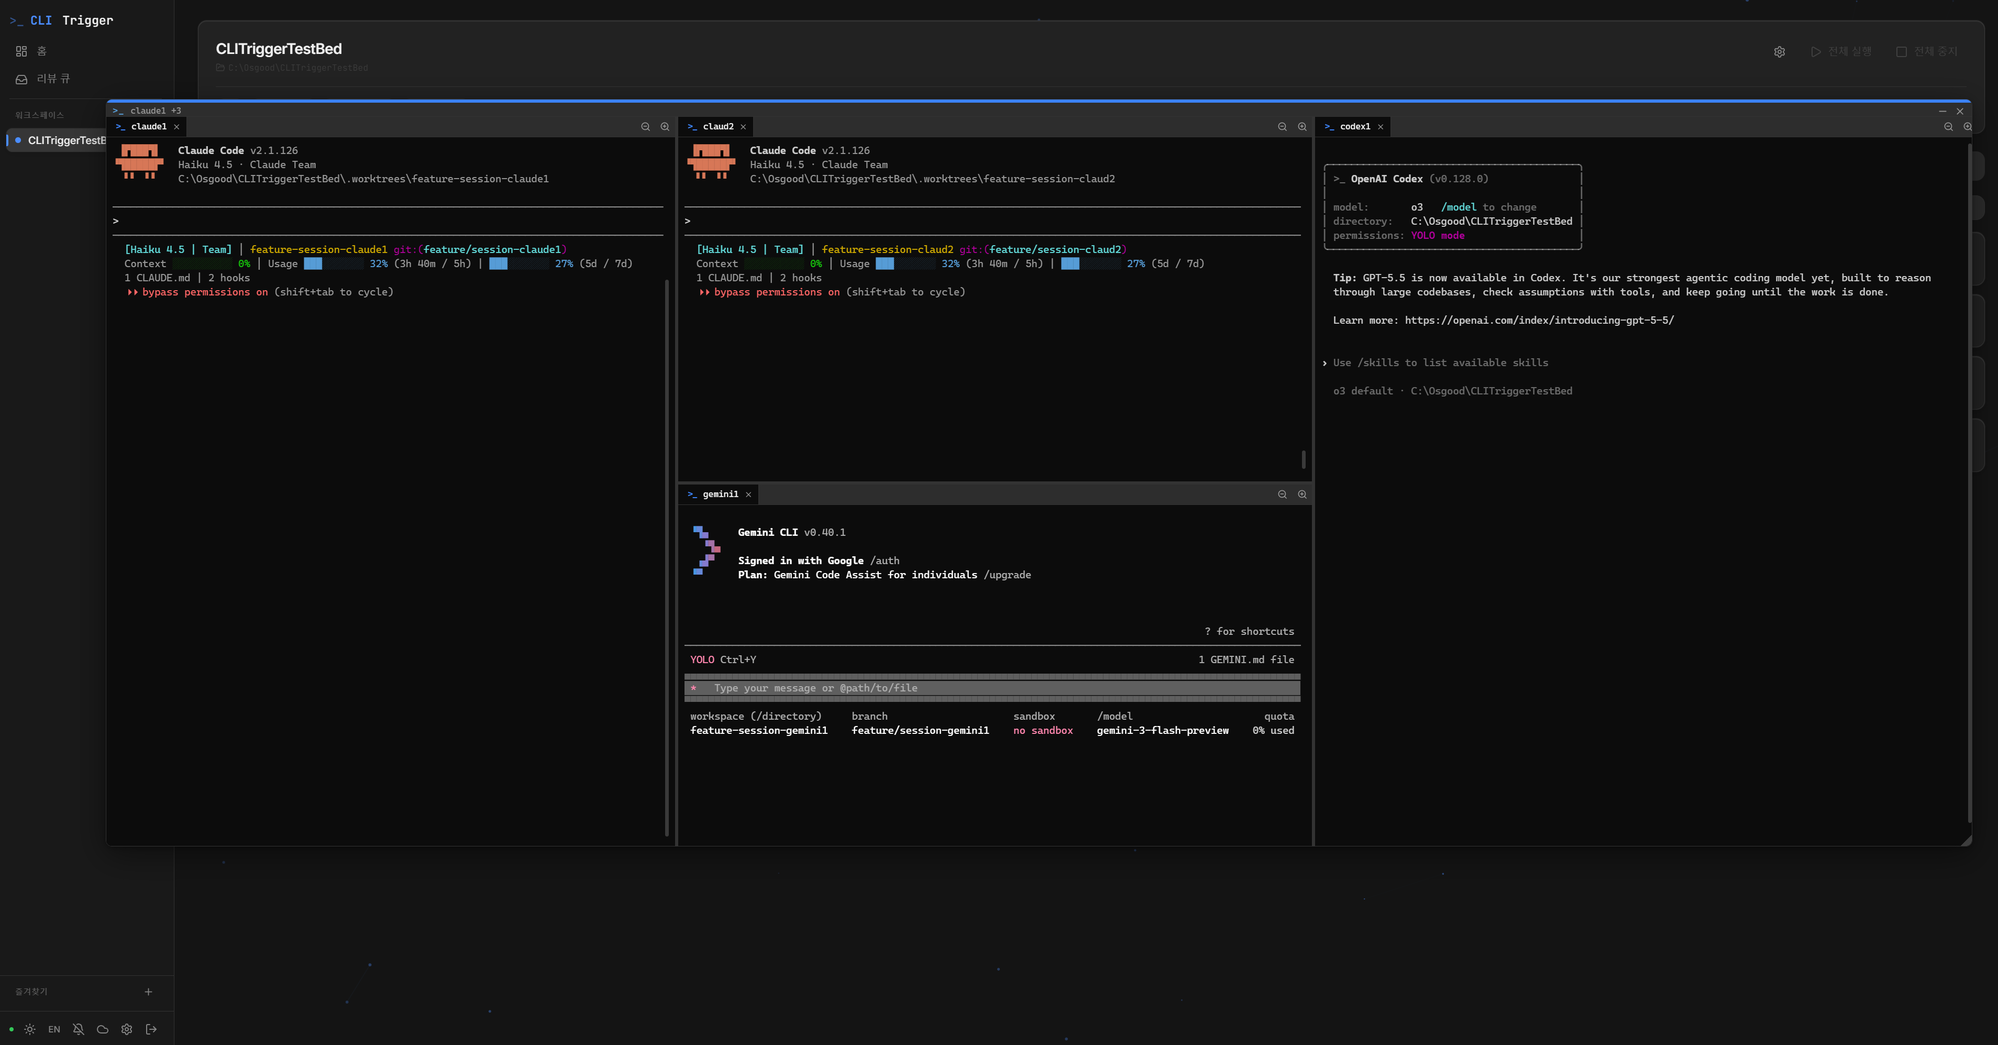
Claude, Antigravity, and Codex sessions docked side-by-side via VS Code-style window grouping — each running in its own worktree branch
🤖 4. Autonomous Tasks — AI executes in parallel
Parallel Worktree Execution (Tasks)
Every TODO runs in its own git worktree with Claude / Antigravity / Codex in parallel, plus dependency chains and merge control. ↗
Multi-Agent Discussion
Architect / developer / reviewer agents debate before implementing, then commit code or send action items to the planner. ↗
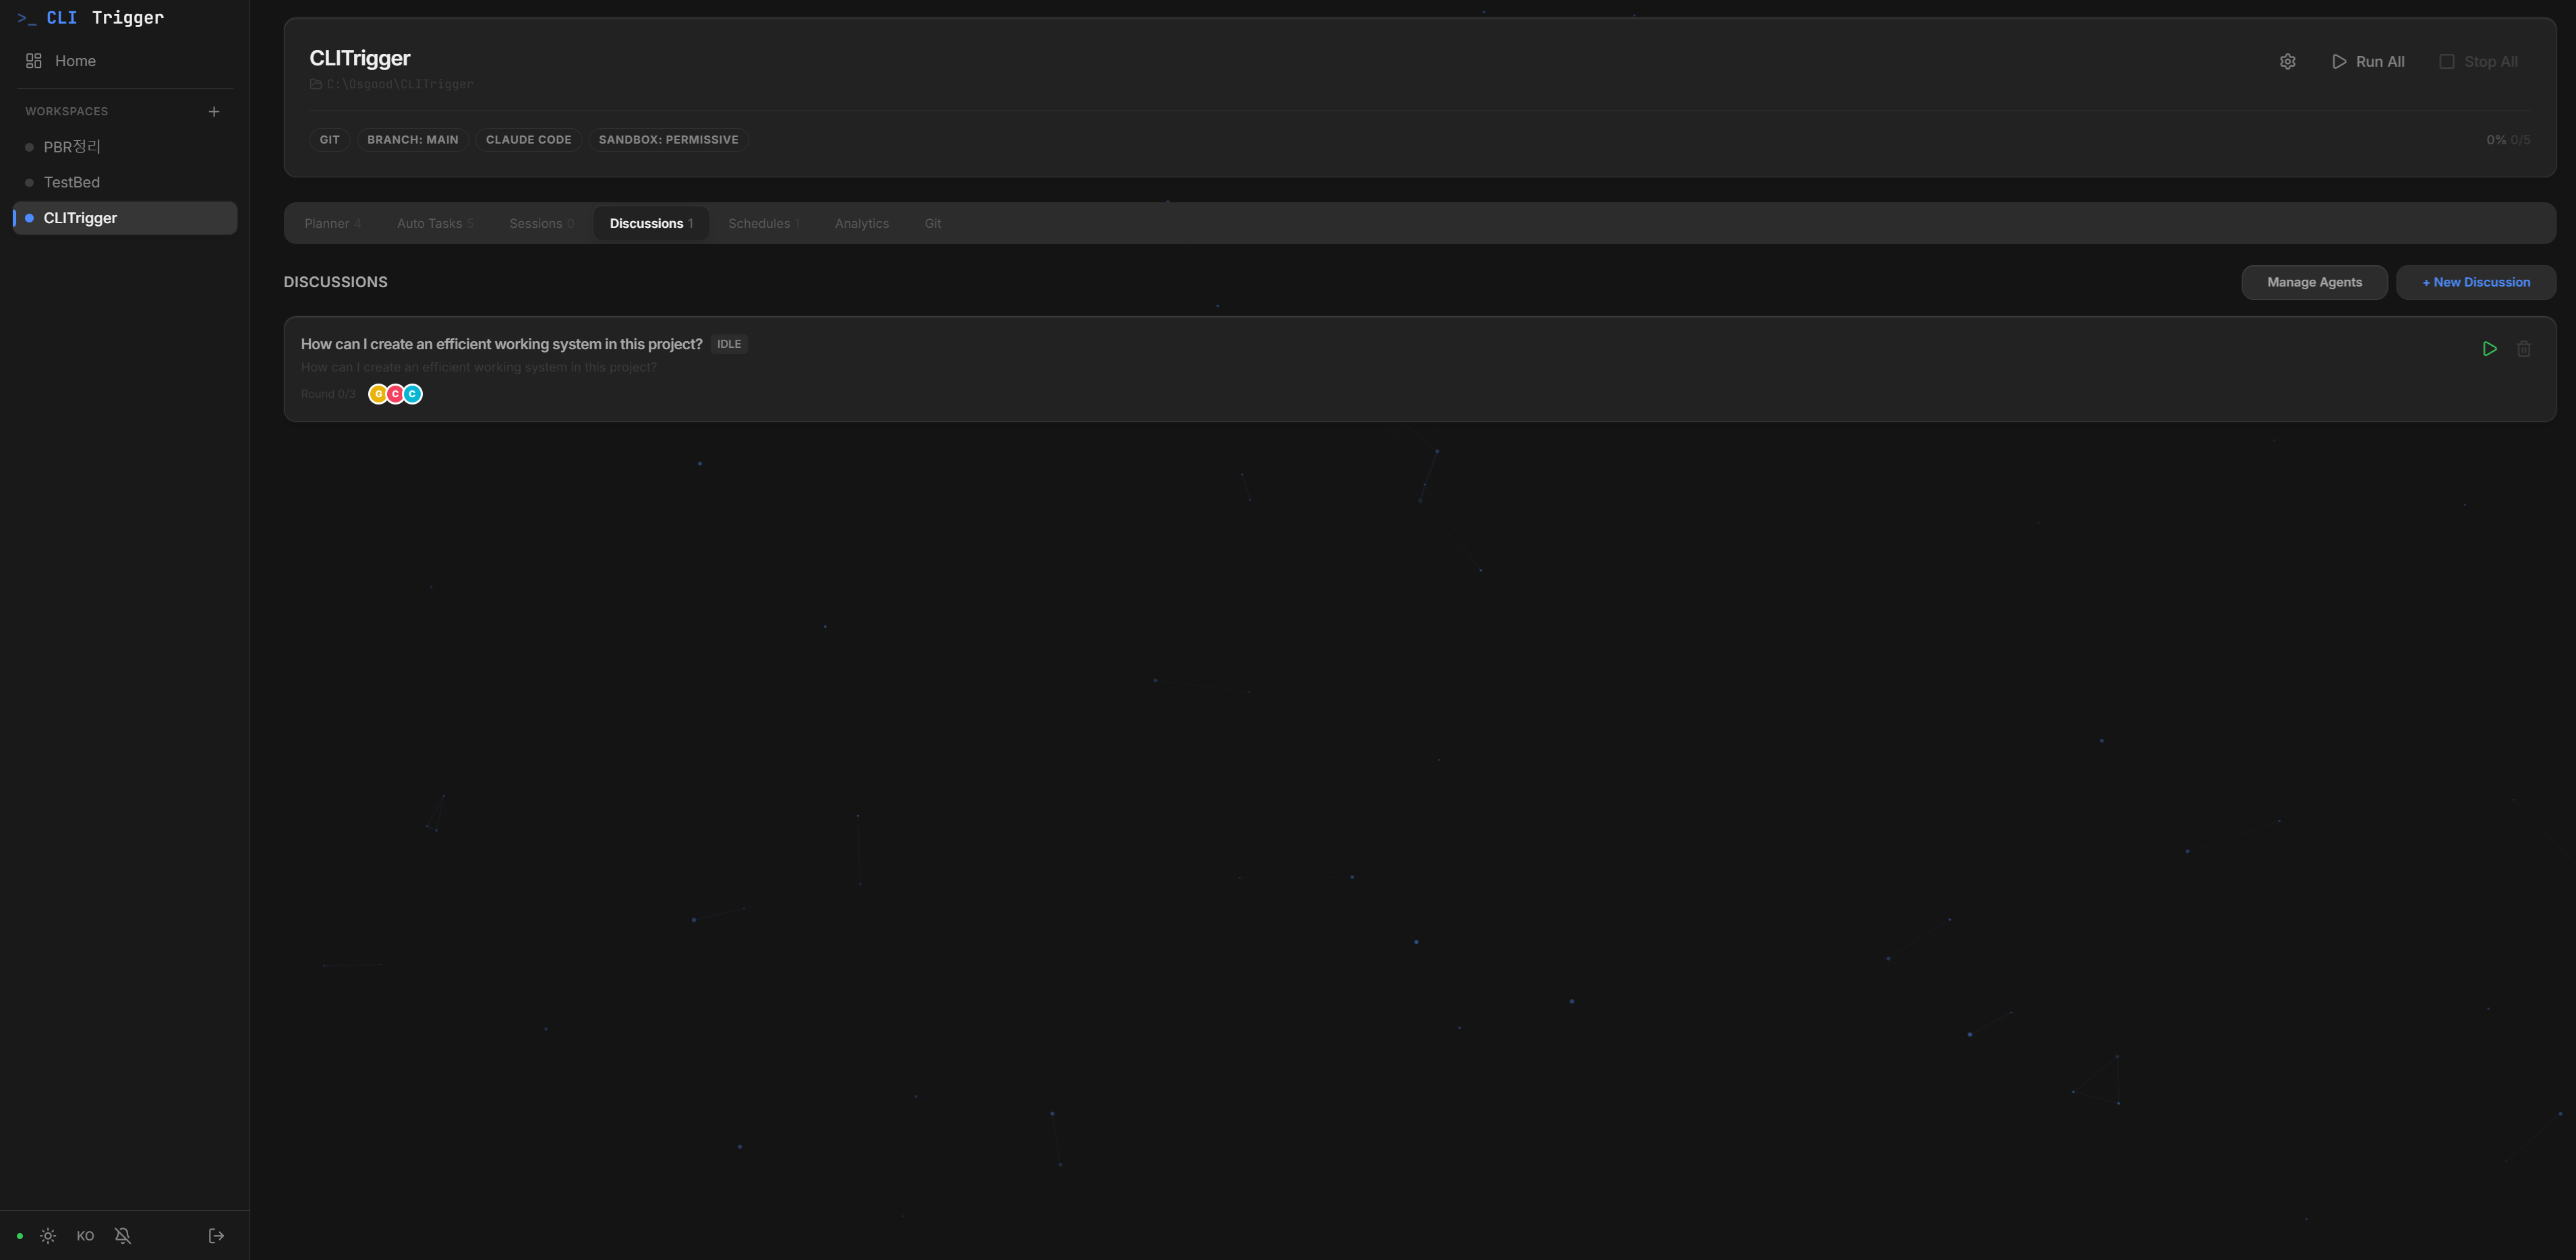
Multiple AI agents with different roles debating in the Discussion view
Scheduled Execution
Run tasks on cron or one-off schedules, with auto-retry at the exact rate-limit reset time. ↗
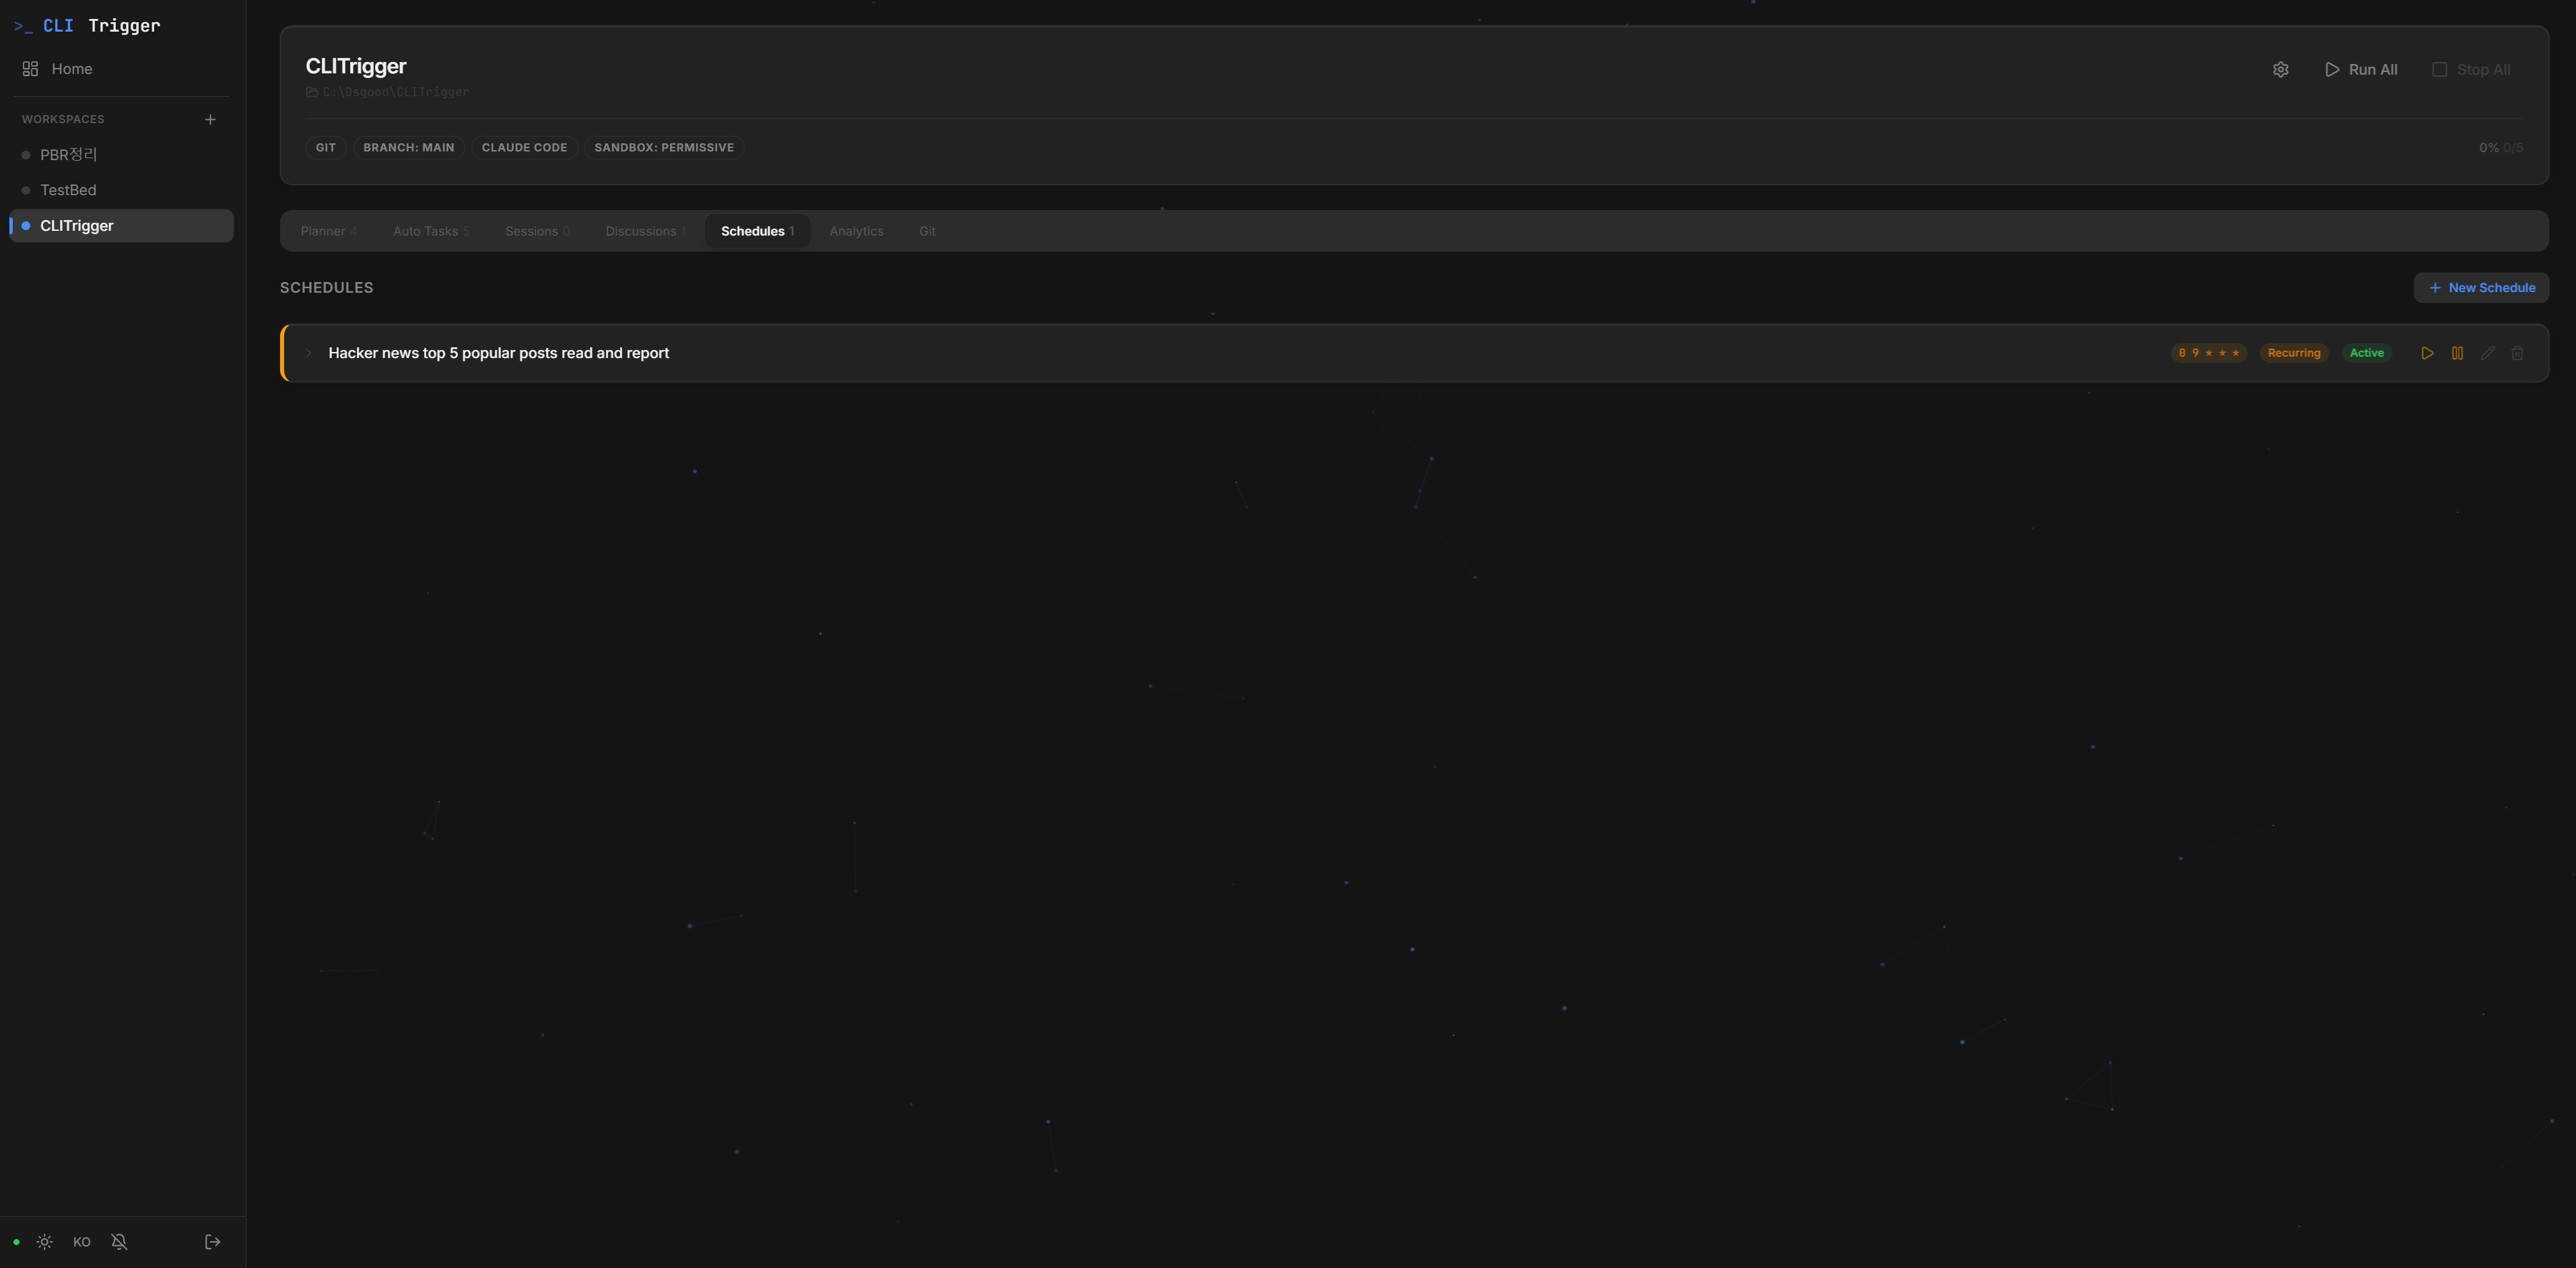
Cron-based recurring and one-time scheduled task execution
Multi-CLI & Sandbox Mode
Pick Claude / Antigravity / Codex per project, TODO, or agent; strict sandbox confines file access to the worktree. ↗
🔀 5. Version Control — review and land it
Morning Review Queue
Triage every overnight TODO across projects in one keyboard-driven card stack — navigate, merge, or discard in a keypress. ↗
Built-in Git Client
A Fork / SourceTree-style Git client in the browser — stage, commit, push, and manage branches and diffs. This is where AI output lands in your history, closing the pipeline. ↗
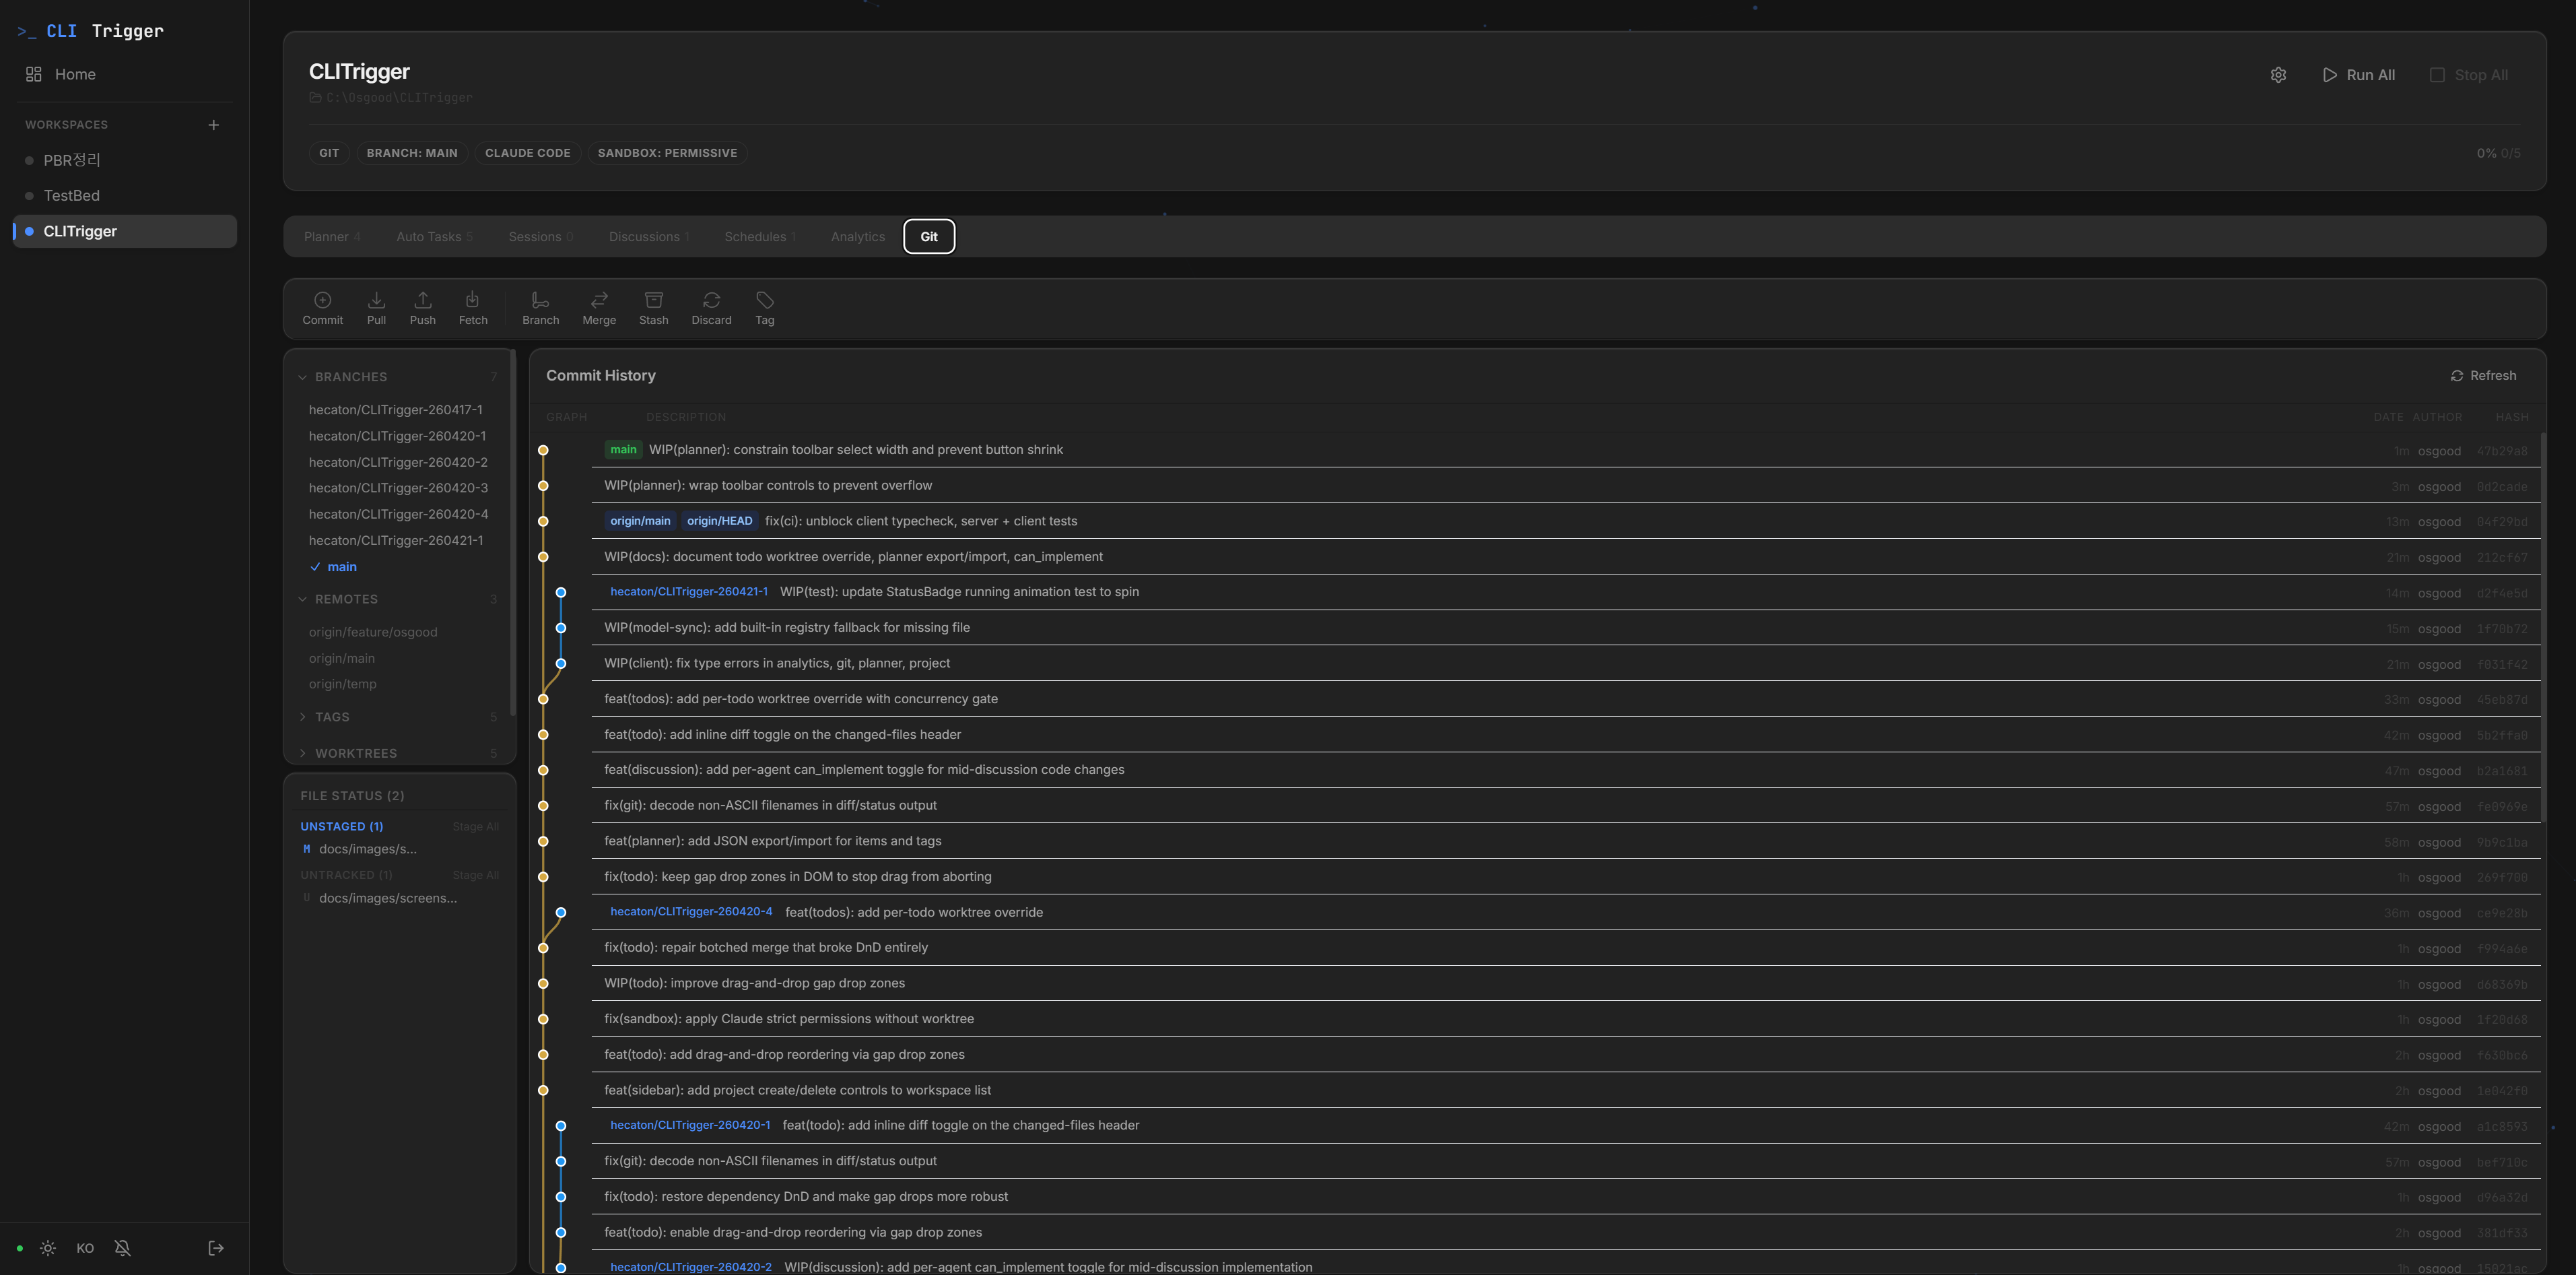
Commit graph, branch actions, file diffs — all in the browser
🧰 Supporting the pipeline
Analytics
Per-project cost and execution stats — by CLI, by status, and over time. ↗
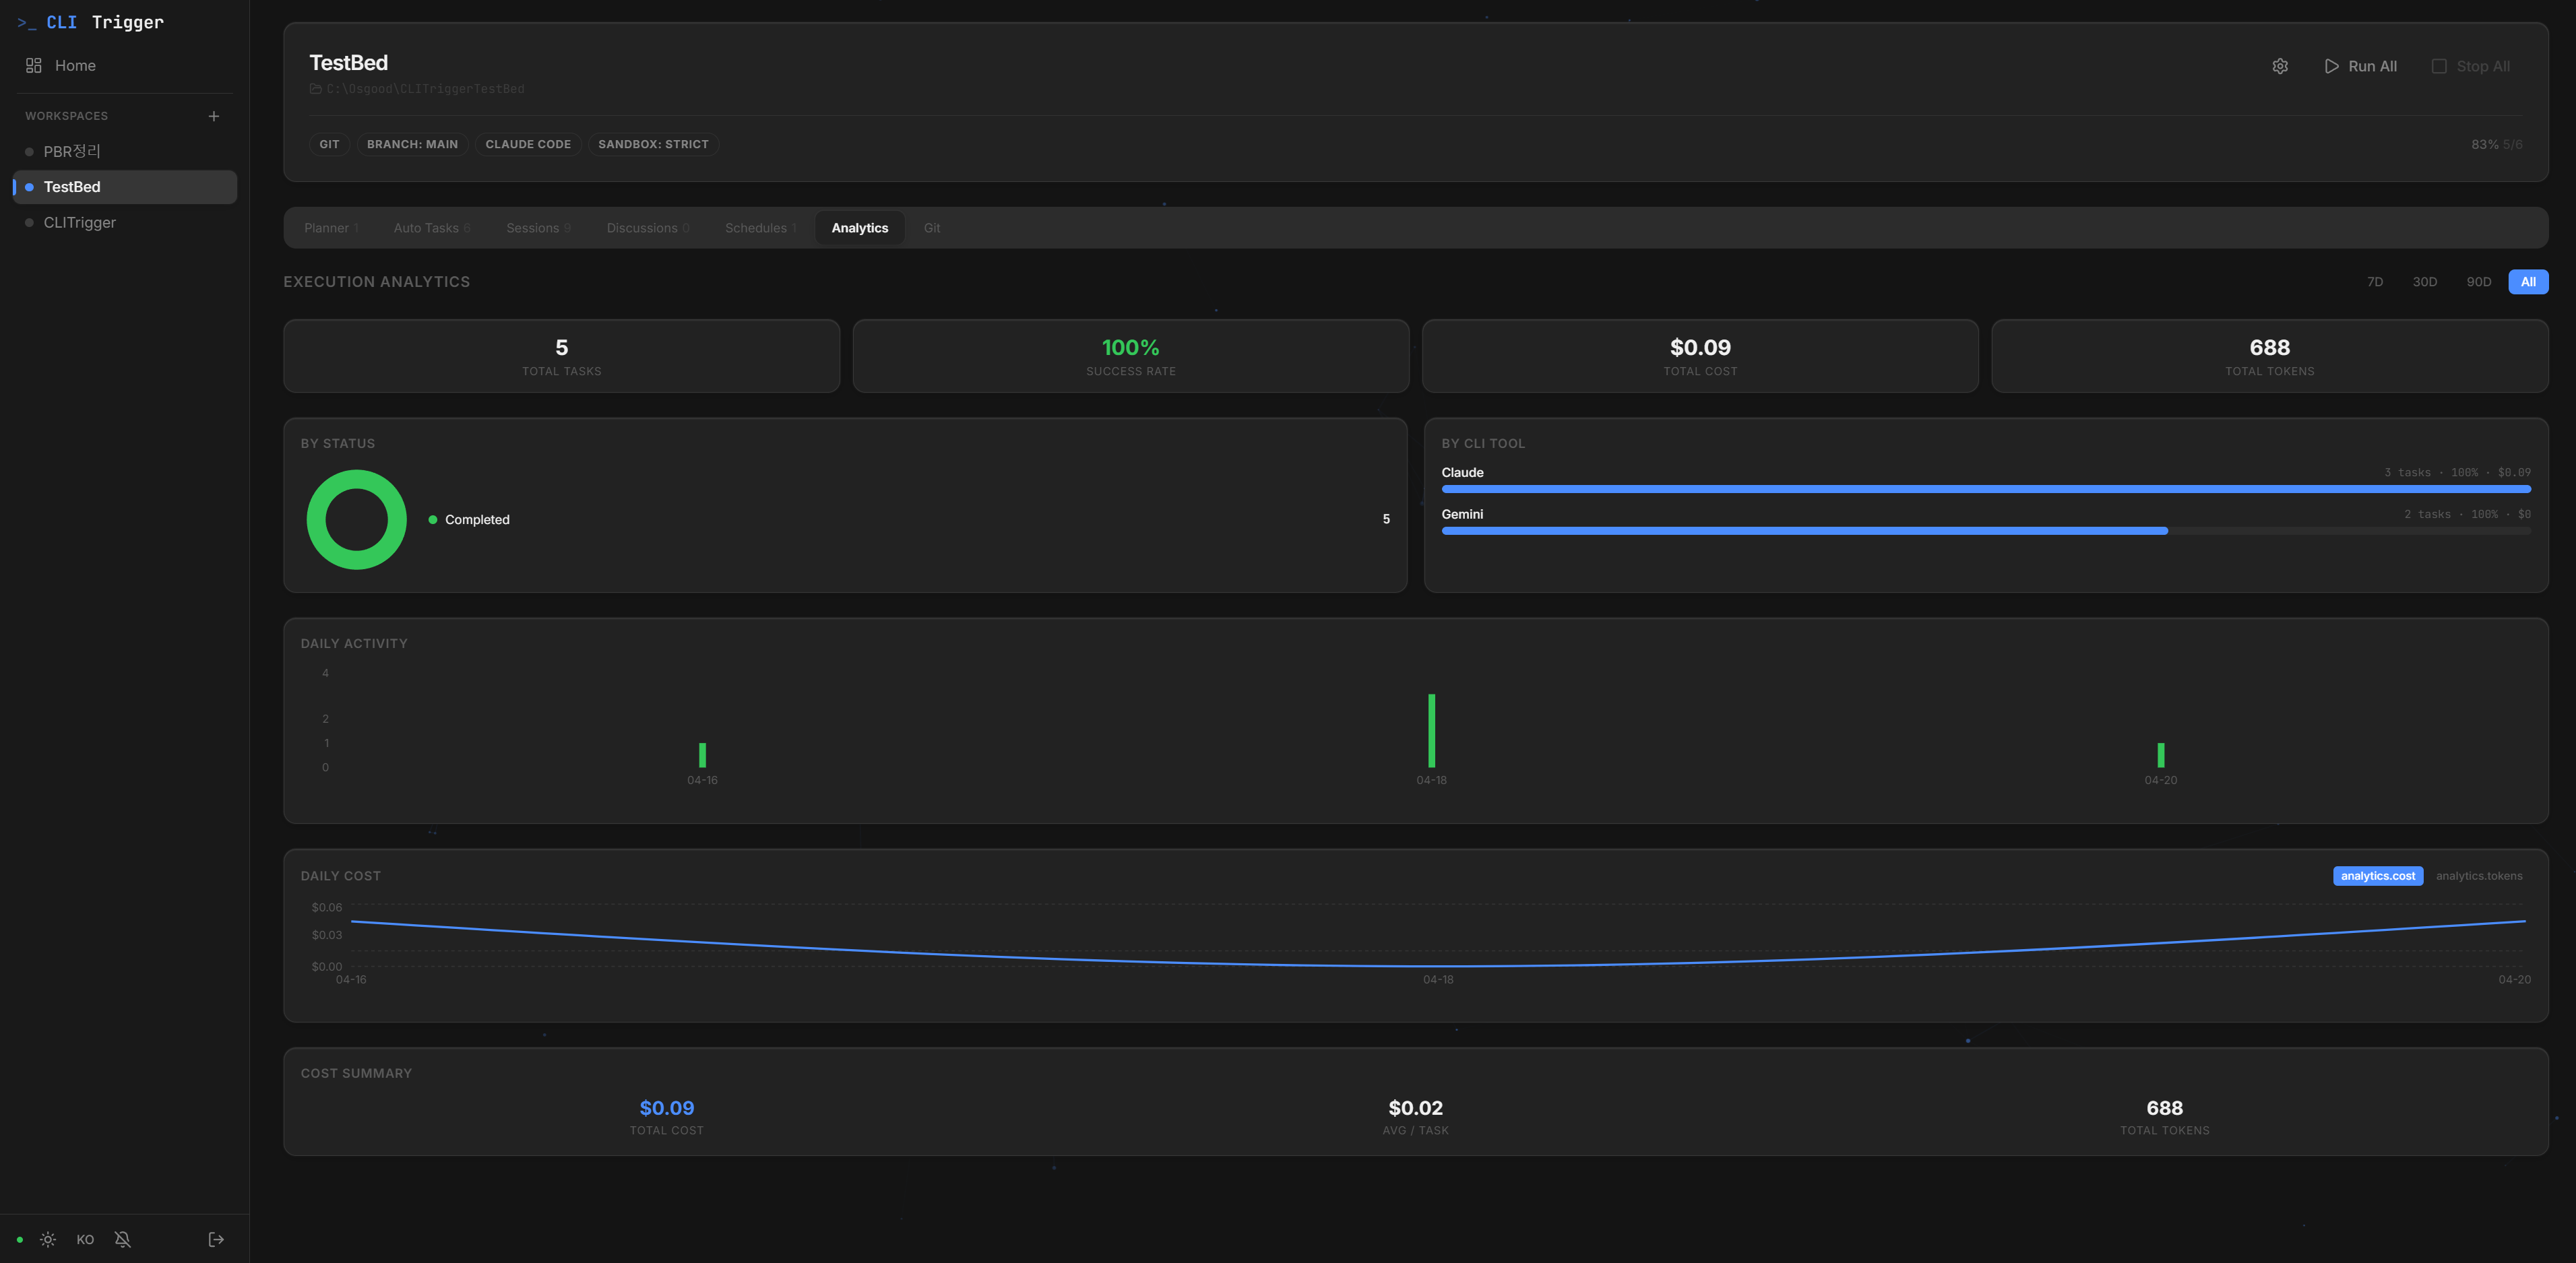
Cost and token usage broken down by CLI, status, and over time
Live Logs (Chat & Raw)
Real-time WebSocket log streaming in Chat (markdown) or Raw (terminal) mode. ↗
Favorites Launcher
One-click launcher for your frequent external tools (executables, commands, URLs) from the sidebar. ↗
Remote Access
Reach CLITrigger from anywhere via Cloudflare Tunnel, with completion notifications and custom-domain routing. ↗
MCP Server
Expose CLITrigger to any MCP client (Claude Desktop, Claude Code) over an HTTP endpoint — list projects, create and run tasks, and check status just by chatting with your AI. Copy the ready-made config (URL + token) from Settings → MCP; works for npm, desktop, and tunnel users alike. ↗
Tech Stack
| Layer | Tech |
|---|---|
| Backend | Node.js · Express · TypeScript · SQLite · WebSocket |
| Frontend | React 18 · Vite · Tailwind CSS · Recharts |
| AI CLIs | Claude · Antigravity · Codex (Adapter Pattern) |
| Git | simple-git (worktree management) |
| Scheduling | node-cron |
| Terminal | node-pty (TTY support) · xterm.js (pixel-perfect rendering) |
| Remote Access | Cloudflare Tunnel (optional) |
Quick Start
Option A — Desktop App (recommended for end users)
Download the installer for your platform from the latest GitHub release:
- Windows —
CLITrigger-Setup-<version>.exe(NSIS installer) or the portable.exe - macOS —
CLITrigger-<version>.dmg(Apple Silicon & Intel) - Linux —
CLITrigger-<version>.AppImage
The desktop app bundles Node.js and the native modules (better-sqlite3, node-pty, cloudflared), so no separate runtime install is needed. On first launch a setup screen appears in the embedded browser — pick a password there and you're in. External sharing (Cloudflare tunnel) stays paused until setup completes, so the first user is guaranteed to be you.
Option B — npm (recommended for developers)
# Install
npm i -g clitrigger
clitrigger

# Upgrade to the latest version
npm i -g clitrigger@latest
# Check current version: clitrigger --version
On first run the server starts immediately. Open http://localhost:3000 → set a password on the welcome screen → register a project → write TODOs → click Start. Change the password later via Settings → Account in the web UI.
CLITrigger also prints a one-line Update available: <new> -> npm i -g clitrigger@latest hint at startup whenever a newer version is on npm — no auto-update, you decide when to upgrade.
# Change settings
clitrigger config port 8080    # Change port
clitrigger config tunnel on    # Enable Cloudflare tunnel for external sharing
Prerequisites: Node.js 22+ (use an LTS release), Git, at least one AI CLI (Claude / Antigravity / Codex)
Supported Platforms: Windows · macOS · Linux — all core code is cross-platform compatible. Prefer an LTS (even-numbered) Node.js. A brand-new major (e.g. an odd/just-released version) may not have prebuilt native binaries yet, which forces a source build requiring a C++ toolchain (Visual Studio Build Tools on Windows,
xcode-select --installon macOS).
Run from Source (for development)
Click to expand
# 1. Clone & install
git clone https://github.com/HyperAITeam/CLITrigger.git
cd CLITrigger
npm install
cd src/client && npm install && cd ../..

# 2. Configure environment
cp .env.example .env
# AUTH_PASSWORD is optional — leave it blank and the dev server will show the
# setup screen on first browser load. Set it only if you want to skip setup.

# 3. Run
npm run dev
Open http://localhost:5173.
Windows One-Click Scripts
Double-click any bat file in scripts/ — no terminal needed.
| File | Action |
|---|---|
install.bat | Install dependencies (first time) |
dev.bat | Start development mode |
build.bat | Build project |
start.bat | Start production server |
start-tunnel.bat | Start with Cloudflare Tunnel |
test.bat | Run all tests |
macOS / Linux
npm run commands work identically on all platforms. Use the terminal instead of .bat scripts.
npm run dev        # Development mode
npm run build      # Build
npm run start      # Production server
npm test           # Run tests
Remote Access (Cloudflare Tunnel)
# Install cloudflared
winget install cloudflare.cloudflared    # Windows
brew install cloudflared                  # macOS

# Set TUNNEL_ENABLED=true in .env, then:
npm run start:tunnel
# → Outputs https://xxxx.trycloudflare.com in the console
Route a named tunnel through your own domain (optional)
To avoid the "dangerous site" browser warnings on *.trycloudflare.com / *.cfargotunnel.com, point a named tunnel at your own domain. Either use the sidebar ⚙ → Tunnel settings modal (Tunnel Name + Custom Hostname), or the CLI:
clitrigger config tunnel hostname app.your-domain.com
cloudflared tunnel route dns <tunnel-name> app.your-domain.com   # one-time
The displayed URL becomes https://app.your-domain.com and reputation tracks your domain.
Documentation
📖 The full manual lives in the Wiki — installation, every feature guide, and remote access.
| Doc | Content |
|---|---|
| Wiki | Detailed feature guides and usage |
| SETUP.md | Detailed installation and usage guide (한국어) |
| changelog/ | Version history (per-date entries by month) |
| CICD.md | GitHub Actions CI/CD setup |
| TESTING.md | Testing guide |
Star & Join Us
If CLITrigger saves you time, please give us a star — it genuinely helps the project reach more developers.
Want to help shape what comes next? We're actively looking for contributors:
- File an issue — bug reports, feature requests, and rough ideas all welcome at Issues
- Open a PR — start with
good first issuelabels, or pick anything that itches you - Share what you built — drop your worktree workflows, custom plugins, or productivity tips in Discussions
Every star, issue, and PR moves this faster. Thank you 🙏
Contributors
Thanks to everyone who has contributed to CLITrigger!
Star History
☕ Buy Me a Coffee
If CLITrigger saves you time, consider buying me a coffee!

License
MIT — Free to use, modify, and distribute.