lds2d
June 4, 2026 · View on GitHub
Python driver for 2D LiDARs. 23 models supported across LDROBOT, YDLIDAR, RPLIDAR, 3irobotix, Neato / Xiaomi, Camsense and Hitachi-LG — see the model table below.
Try it in 60 seconds - without any hardware
pip install 'lds2d[viz]'
lds2d viz --demo
and open http://localhost:8080.
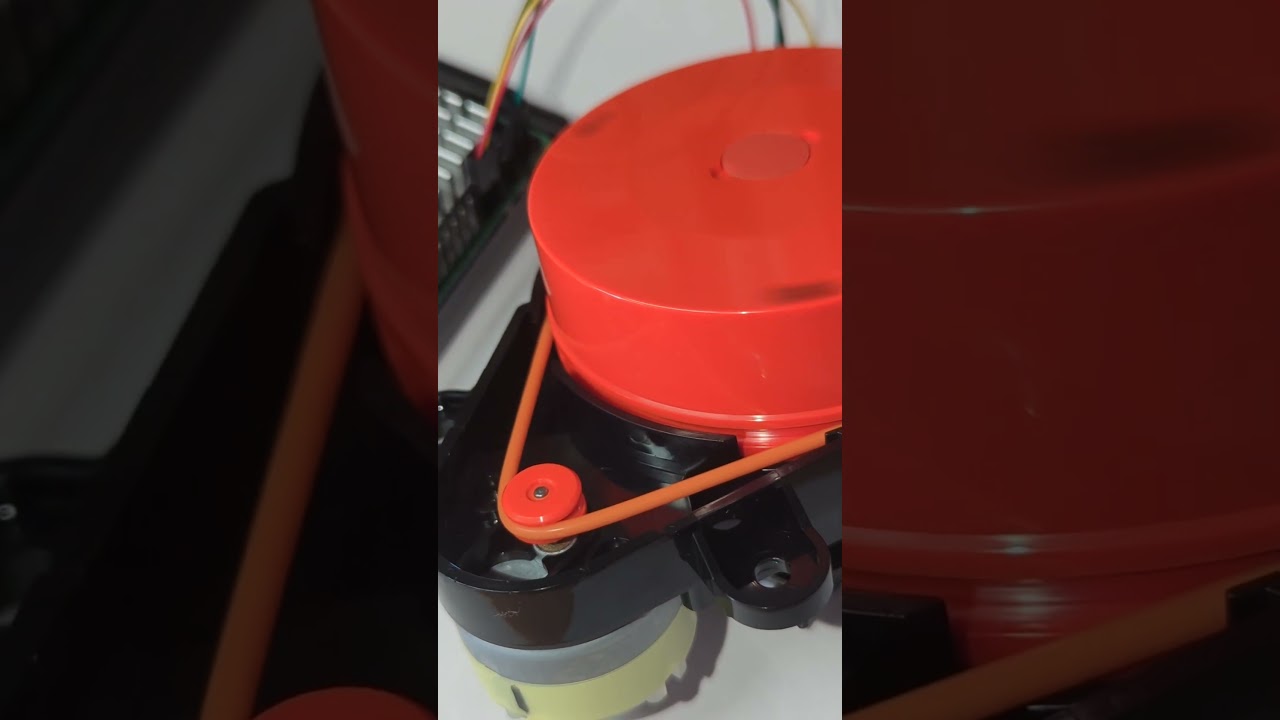
Video: Xiaomi LDS02RR LiDAR Sensor Connected to Raspberry Pi 5
Read the intro: lds2d: one Python library for 2D LiDARs.
Install
pip install lds2d

# for host-driven-motor LiDARs (the Pi spins them) — see "Software setup" below:
pip install 'lds2d[pwm]'

# for the live browser visualizer:
pip install 'lds2d[viz]'
Quick start
from lds2d import Lidar

with Lidar.open("LDROBOT-LD14P", "/dev/serial0") as lidar:
    for scan in lidar.scans():            # one full rotation at a time
        pts = scan.valid_points
        print(f"{scan.scan_freq_hz:.1f} Hz  {len(pts)} points")
        for p in pts:
            print(p.angle_deg, p.dist_mm, p.quality)
Model names are MANUFACTURER-MODEL (e.g. YDLIDAR-X4, RPLIDAR-A1) — see the
model table.
Use lidar.points() to get a flat stream instead of grouped scans.
Motor control (LDROBOT-LD14P)
with Lidar.open("LDROBOT-LD14P", "/dev/serial0") as lidar:
    lidar.set_scan_freq(6)     # 2–8 Hz
    lidar.stop()               # stop the motor (data stream halts)
    lidar.start()              # spin back up
    print(lidar.get_scan_freq())
Xiaomi LDS02RR (host-driven motor)
The LDS02RR has no onboard motor controller — it only streams data while the host
spins it at ~5 Hz. lds2d runs that PID + PWM loop for you: just iterating drives
the motor, and leaving the with block stops it.
# needs the [pwm] extra and the Maker's Pet LDS02RR adapter
with Lidar.open("XIAOMI-LDS02RR", "/dev/serial0", pwm="software", pwm_pin=18) as lidar:
    for scan in lidar.scans():            # the motor is held at 5 Hz for you
        print(f"{scan.scan_freq_hz:.1f} Hz  {len(scan.valid_points)} points")
pwm="software" drives any GPIO via gpiozero (tested). pwm="hardware" uses Pi
hardware PWM (pwm_channel/pwm_chip) and is supported but not yet hardware-verified.
Tune with target_hz=, kp=, ki=, kd=.
The 3irobotix Delta-2A works the same way (it also needs host motor control — e.g. via the Maker's Pet driver board), just a different model name and a 6 Hz default:
with Lidar.open("3IROBOTIX-DELTA-2A", "/dev/serial0", pwm="software", pwm_pin=18) as lidar:
    for scan in lidar.scans():
        ...
# the 230400-baud Delta-2A variant: add baud=230400
Supported models
Open any of these with its name, e.g. Lidar.open("YDLIDAR-X4", "/dev/serial0").
Motor is how the LiDAR spins: onboard (self-spinning or started by a serial
command — nothing extra needed), or host PWM (the Pi must drive the motor —
needs the [pwm] extra and a driver board; lds2d runs the PID for you). HW
marks whether the port has been confirmed on real hardware yet.
| Model | open(...) name | Baud | Motor | HW |
|---|---|---|---|---|
| LDROBOT LD14P | LDROBOT-LD14P | 230400 | onboard (serial cmd) | ✅ |
| LDROBOT LD19 | LDROBOT-LD19 | 230400 | onboard | spec¹ |
| LDROBOT LD06 | LDROBOT-LD06 | 230400 | onboard | spec¹ |
| LDROBOT STL19P | LDROBOT-STL19P | 230400 | onboard | spec¹ |
| 3irobotix Delta-2A | 3IROBOTIX-DELTA-2A | 115200 | host PWM | ✅ |
| 3irobotix Delta-2B | 3IROBOTIX-DELTA-2B | 230400 | host PWM | spec¹ |
| 3irobotix Delta-2D | 3IROBOTIX-DELTA-2D | 115200 | host PWM | spec¹ |
| 3irobotix Delta-2G | 3IROBOTIX-DELTA-2G | 115200 | host PWM | spec¹ |
| 3irobotix LDS08RR | 3IROBOTIX-LDS08RR | 115200 | host PWM | spec¹ |
| Xiaomi LDS02RR | XIAOMI-LDS02RR | 115200 | host PWM | ✅ |
| Xiaomi LDS01RR | XIAOMI-LDS01RR | 115200 | host PWM | spec¹ |
| Neato XV11 | NEATO-XV11 | 115200 | host PWM | spec¹ |
| YDLIDAR X4 | YDLIDAR-X4 | 128000 | onboard | spec¹ |
| YDLIDAR X2 / X2L | YDLIDAR-X2 | 115200 | onboard | spec¹ |
| YDLIDAR X3 | YDLIDAR-X3 | 115200 | onboard | spec¹ |
| YDLIDAR X3-PRO | YDLIDAR-X3-PRO | 115200 | onboard | spec¹ |
| YDLIDAR X4-PRO | YDLIDAR-X4-PRO | 128000 | onboard | spec¹ |
| YDLIDAR SCL | YDLIDAR-SCL | 115200 | onboard | spec¹ |
| YDLIDAR T-mini | YDLIDAR-TMINI | 230400 | onboard | spec¹ |
| RPLIDAR A1 | RPLIDAR-A1 | 115200 | onboard (serial cmd) | spec¹ |
| RPLIDAR C1 | RPLIDAR-C1 | 460800 | onboard (serial cmd) | spec¹ |
| Camsense X1 | CAMSENSE-X1 | 115200 | onboard | spec¹ |
| Hitachi-LG HLS-LFCD2 (TurtleBot3 LDS-01) | HLS-LFCD2 | 230400 | onboard (serial cmd) | spec¹ |
lds2d.available_models() lists every accepted name.
¹ spec = faithfully ported from the kaiaai/LDS C++ and unit-tested against synthetic packets, but not yet confirmed on physical hardware. If you run one of these, a report (success or bug) is very welcome.
Command line
lds2d read                 # summarized: one line per full scan
lds2d read --raw           # one line per measurement
lds2d --port /dev/ttyUSB0 read
lds2d viz                  # live polar plot in your browser (needs [viz])

lds2d motor status
lds2d motor stop
lds2d motor start
lds2d motor speed 6        # set 6 Hz

# host-PWM models: read drives the motor (software PWM on GPIO18)
lds2d --model XIAOMI-LDS02RR --pwm software --pwm-pin 18 read
The read/motor commands default to LDROBOT-LD14P; pass --model for others.
Live visualizer
lds2d viz shows a live polar plot you can open in any browser on your network — no GUI on the Pi required.
With a real sensor attached:
lds2d viz                                   # LDROBOT-LD14P on /dev/serial0, port 8080
lds2d --model XIAOMI-LDS02RR --pwm software viz    # host-driven-motor models work too
lds2d viz --port 9000
(lds2d read --demo prints the same synthetic scans as text, no browser needed.)
Then open http://<your-pi>:8080. Points are coloured by signal strength and the
range ring auto-scales to the room; the HUD shows the live scan rate and point
count. Under the hood it's a background reader thread feeding a thread-safe
latest-scan buffer that a tiny Flask app exposes as JSON — and like every other
moving part in lds2d, the buffer and scan-to-JSON conversion are
unit-tested without any hardware.
from lds2d import Lidar
from lds2d.viz import serve

with Lidar.open("LDROBOT-LD14P", "/dev/serial0") as lidar:
    serve(lidar, port=8080)
Wiring & Setup (Linux PC)
Self-spinning LiDARs (LDROBOT, YDLIDAR, RPLIDAR, Camsense, Hitachi-LG) need only a serial or USB-to-serial port. Connect as follows:
- LiDAR TX to serial RX
- LiDAR RX (if available) to serial TX
- GND to GND
- 5V to 5V power
The LiDAR 5V current supply ranges from 0.3 to 1A peak depending on LiDAR model.
Wiring & setup (Raspberry Pi)
The wiring is as follows:
- LiDAR 5V → Raspberry Pi header Pin2
- LiDAR GND → Pin6
- LiDAR TX → GPIO15/Pin10 (reading)
- LiDAR RX → GPIO14/Pin8 (motor stop, start, speed)
LiDAR logic is typically 3.3V except old Neato - no level shifter.
Alternatively, instead of the serial port available on the Raspberry Pi's header, you can use a USB-to-Serial adapter - see the Linux PC wiring instructions above.
See these step-by-step tutorials for wiring illustrations:
Host-driven-motor low-cost LiDARs (3irobotix Delta-*, Xiaomi LDS02RR / LDS01RR, Neato XV11) require GPIO to operate in addition to a serial or USB-to-serial port. Therefore, host-driven-motor LiDARs require a Linux device with GPIO - like Raspberry Pi.
Host-driven-motor LiDARs require one GPIO connection:
- LiDAR MOT+, MOT- → PWM-to-motor-driver adapter → GPIO18/Pin12
The PWM-to-motor-driver adapter for host-driven-motor LiDARs is a simple circuit - see these step-by-step tutorials:
- Tutorial: Connect 3irobotix Delta-2A LiDAR to Raspberry Pi (Python)
- Tutorial: Connect Xiaomi LDS02RR LiDAR to Raspberry Pi (Python)
Software setup
Enable the serial port (once): sudo raspi-config → Interface Options →
Serial Port → login shell over serial? No, serial hardware enabled?
Yes, then reboot. The LiDAR then appears at /dev/serial0. Your user needs
the dialout group to open the port (and gpio to drive the motor) — both are
default for the standard Pi user; otherwise sudo usermod -aG dialout,gpio $USER
and log back in.
Self-spinning LiDARs — LDROBOT, YDLIDAR, RPLIDAR, Camsense, Hitachi-LG — need nothing else:
python3 -m venv ~/lidar && source ~/lidar/bin/activate
pip install lds2d
lds2d --model YDLIDAR-X4 read
Host-driven-motor low-cost LiDARs — 3irobotix Delta-*, Xiaomi LDS02RR / LDS01RR, Neato
XV11 — let the Pi spin the motor over a GPIO with
gpiozero, which on the Pi 5 talks through
the lgpio backend. Both ship with Raspberry Pi OS as python3-gpiozero /
python3-lgpio. Two snags to avoid: recent Raspberry Pi OS blocks pip
from installing into the system Python (PEP 668), and the lgpio wheel won't
build from PyPI without swig. The painless way is a venv that can see the
system GPIO packages:
sudo apt install -y python3-gpiozero python3-lgpio   # usually already present
python3 -m venv --system-site-packages ~/lidar
source ~/lidar/bin/activate
pip install lds2d
lds2d --model 3IROBOTIX-DELTA-2A --pwm software --pwm-pin 18 read
--system-site-packages lets the venv use the system gpiozero/lgpio while
lds2d and pyserial come from PyPI. If you're using a fully isolated venv instead,
install the build tools first — sudo apt install -y swig python3-dev — then
pip install 'lds2d[pwm]' lgpio builds the backend inside it.
The motor PWM pin is
--pwm-pinon the CLI /pwm_pin=in Python (default GPIO18).--pwm hardwareuses the Pi's hardware PWM instead — cleaner, but needs adtoverlay=pwm-2chanline in/boot/firmware/config.txt(on the Pi 5 also--pwm-chip 2).
Extending
A driver subclasses LidarDriver, implements _packets() (yielding
(scan_freq_hz, [ScanPoint, ...])), and registers itself:
from lds2d.core import LidarDriver, ScanPoint, register

@register("MY_MODEL")
class MyModel(LidarDriver):
    DEFAULT_BAUD = 115200
    def _packets(self):
        ...
points() and scans() come for free. The transport is any object with
read(n) / write(data) / close(), so drivers are unit-tested against
recorded byte streams — no hardware required (see tests/).
Development
pip install -e ".[dev]"
pytest
Revision History
- 0.6.0: added
lds2d viz --demomode - 0.5.0: initial release
Acknowledgements
lds2d is a Pythonic port of the kaiaai/LDS C++ library.
License
Apache License 2.0 — see LICENSE.